One of the major players in the business space is Hubspot, the CRM (Customer Relationship Management) platform to help run your marketing, sales and customer service efforts.
HubSpot easily allows us to manage customer information, nurture leads and improve pipeline efficiency.
That sounds nice and all, but the real question is ‘how’ do those contacts get into Hubspot?
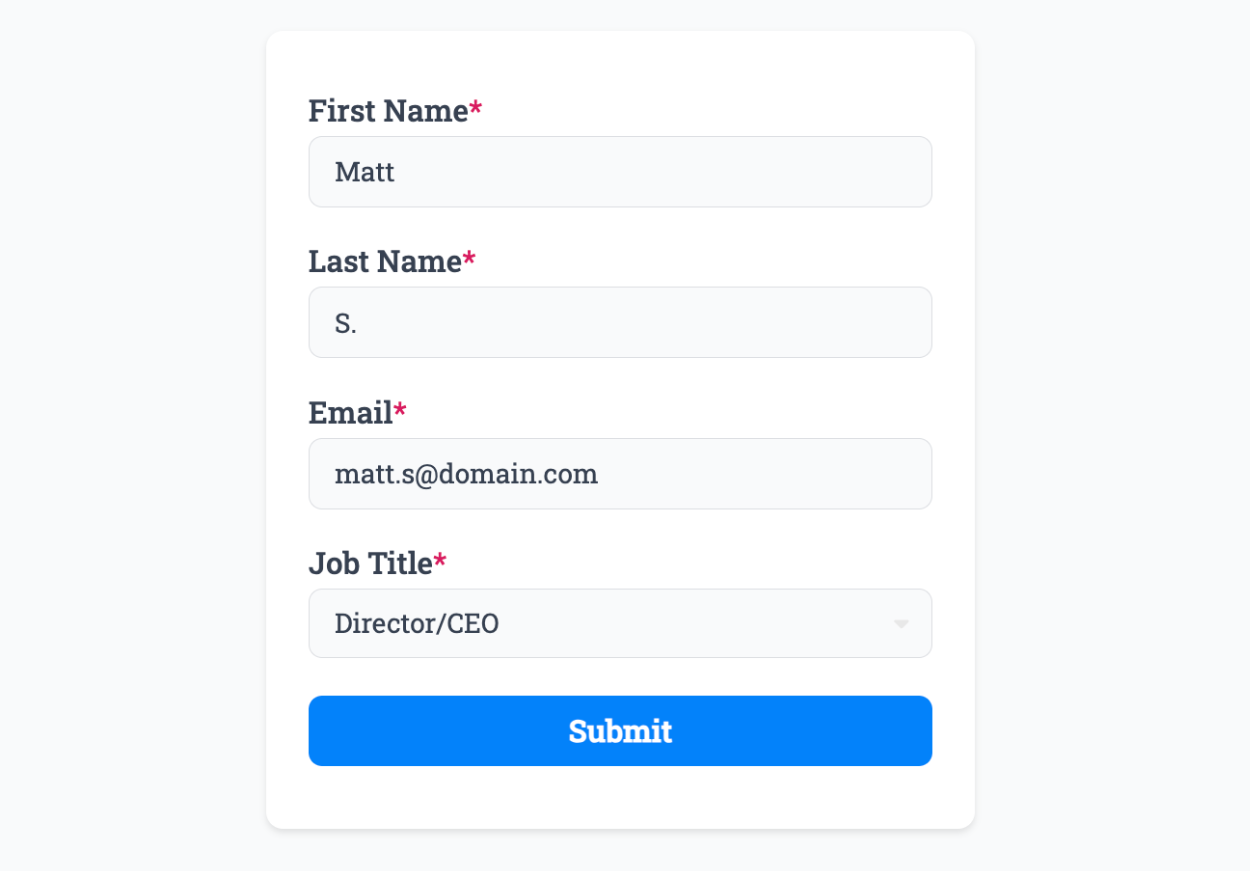
That’s where we come in to save the day. We turn this:
Into this:
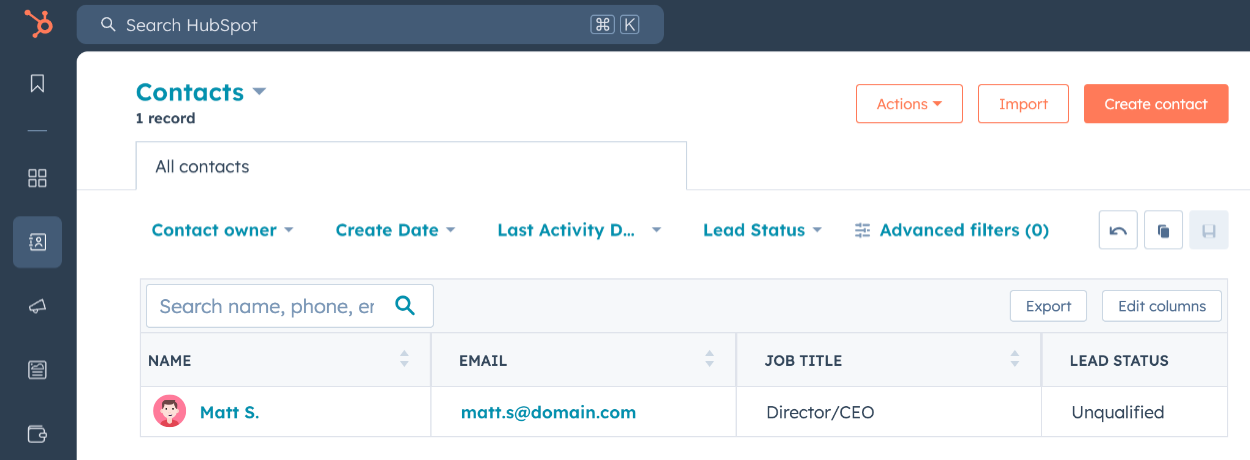
That’s right, no copy and pasting and entering data into the wrong cells. Just share your form or embed it, and we’ll handle the rest automatically.
Our Hubspot Plugin turns each form response into a new contact in your Hubspot account, and offers support for updating that contact if they fill out the form again (with different choices).
Hubspot offers two core concepts for each contact, a Lifecycle Stage and Lead Status:
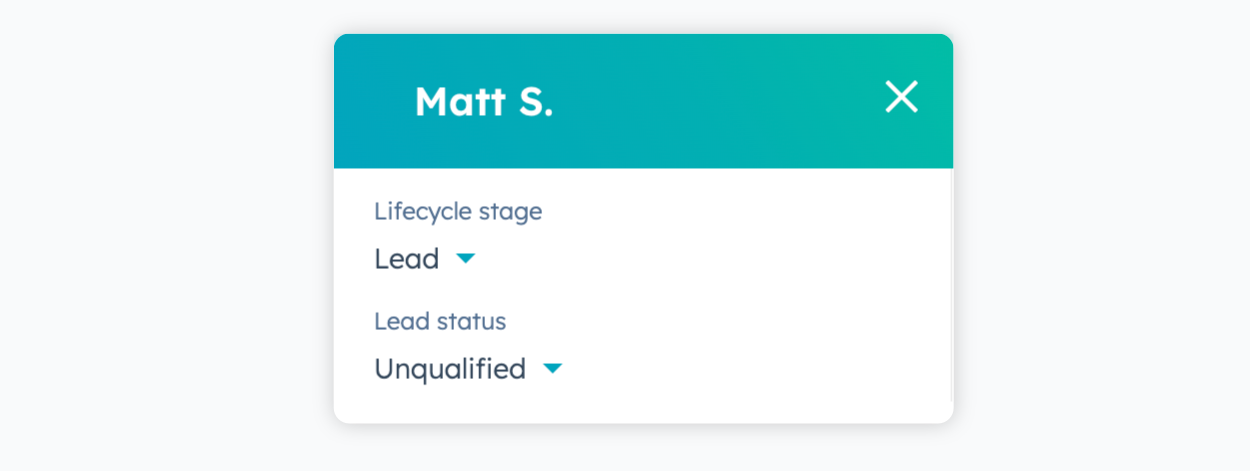
The Lifecycle Stage represents the current stage your contact is at. Are they a subscriber, a lead, or are they now a fully-fledged customer?
Lead Status is for tracking actions you’ve performed against the lead, for example they may begin as ‘New’, then moved to ‘Qualified’, and ultimately ‘In Progress’ and ‘Open Deal’.
Our Hubspot plugin has full support for setting default Lifecycle Stage and Lead Status at the time of contact creation.
With this in mind, let’s take a look at how to hook it up to a form!
Step one is easy, create a form and head across to the Plugins page on your form and select the Hubspot Plugin, and click Connect:

Once you’ve authorized the plugin, you’ll be given the choice of Lifecycle Stage and optional Lead Status that is assigned to each new contact:
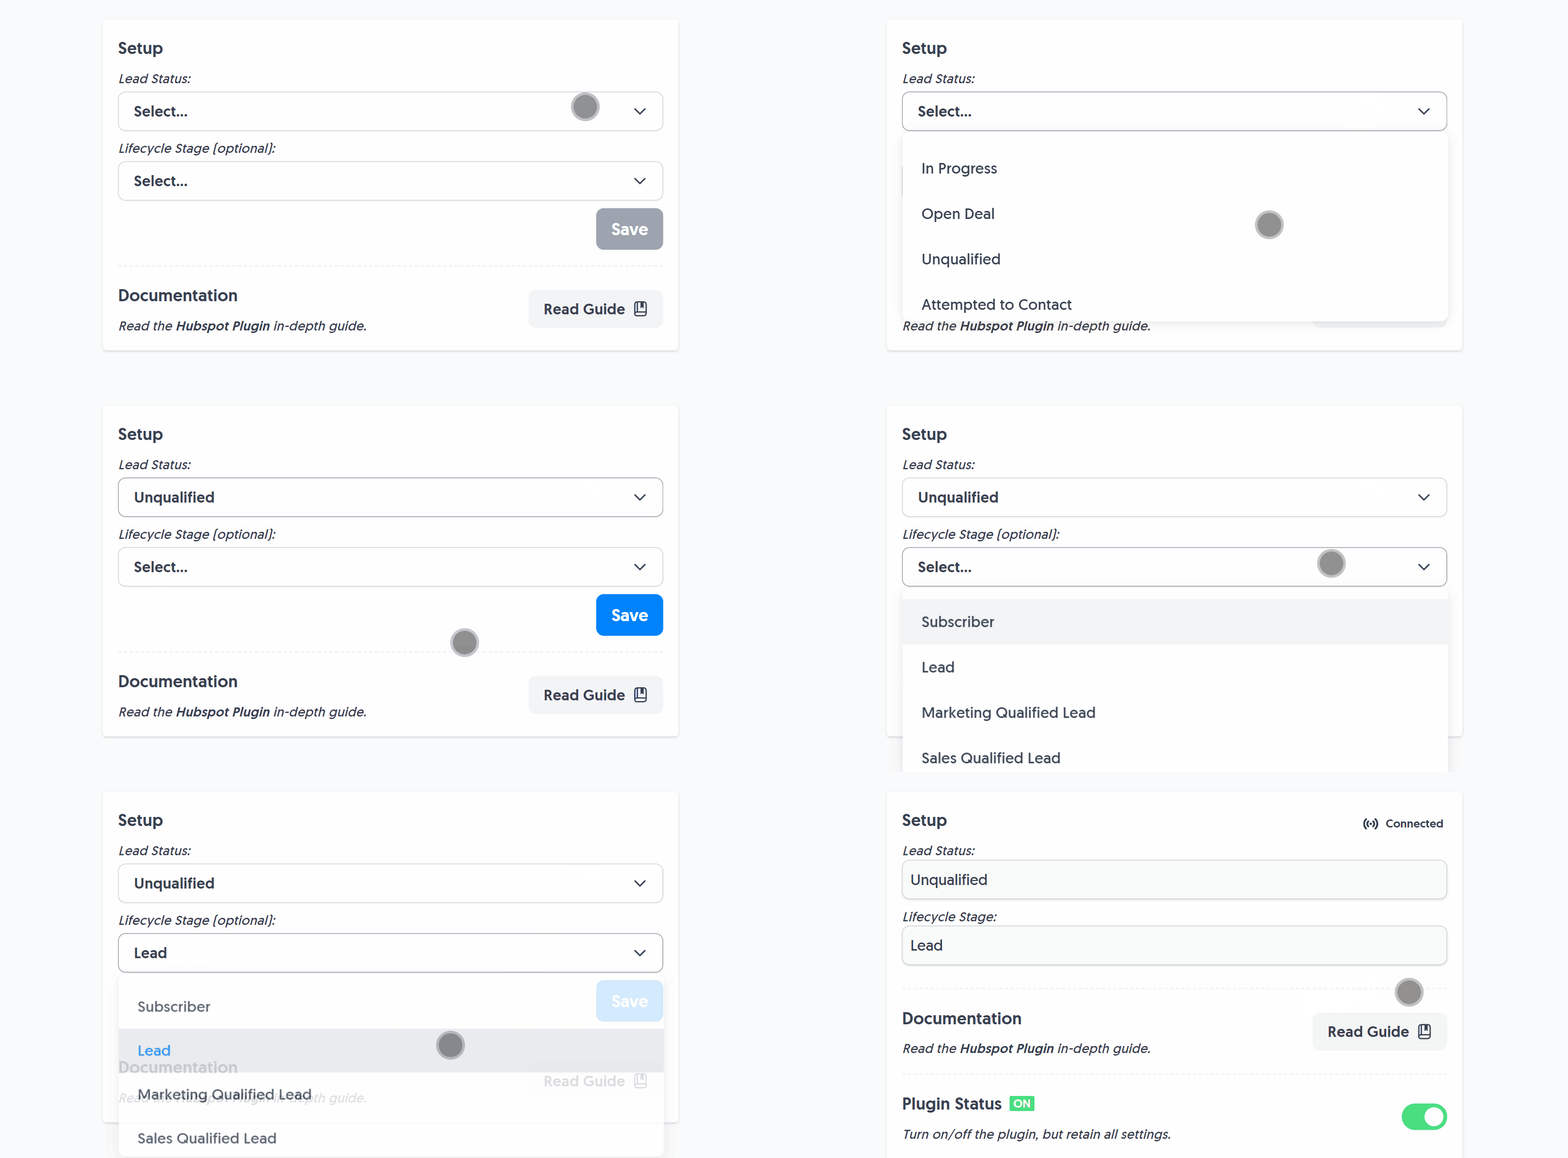
The final step is to tell your form which fields need to populate certain Hubspot contact values. We cover this in more detail in the official Hubspot Plugin guide, but here’s the gist…
Inside Hubspot you’ll find property names such as First Name, which have a secret key inside them such as firstname. This is just a reference to this field, and we need to find it and copy it:
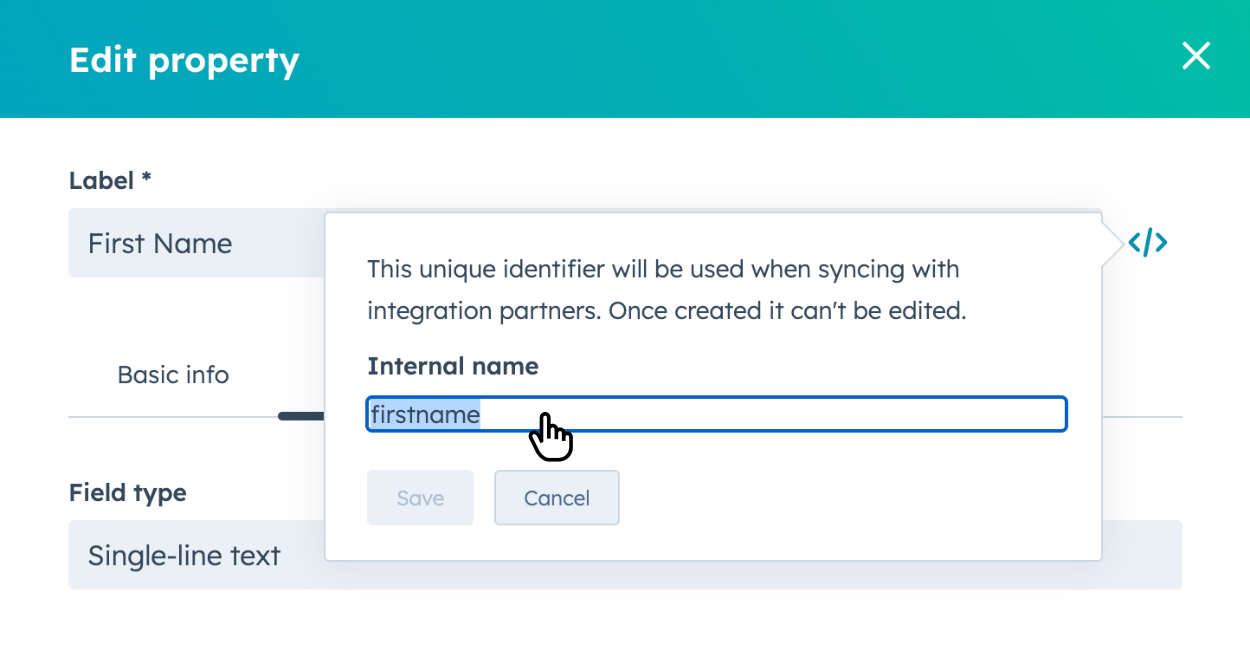
Some examples of common Hubspot property names to give you an idea of what fields you can populate from a form response:
email- required for a new contact’s emailfirstname- contact’s first namelastname- contact’s last namesalutation- contact’s salutationcompany- contact’s company nameindustry- contact’s industry sectorjobtitle- contact’s job titlephone- contact’s phone numbermobilephone- contact’s mobile phone numberaddress- contact’s street addresscity- contact’s citystate- contact’s state/regionzip- contact’s zip/postal codewebsite- contact’s website URL
Then, we simply head back to our form field (for example the ‘First Name’ field) to create the connection to Hubspot by entering a Custom Name value:

And that’s it. Now repeat the process for all your form fields, for example enter email as the Custom Name in your ‘Email’ form field. Then sit back and watch the contacts roll in.
If you’re ready to manage contacts, lifecycles and sales efforts in Hubspot, then a form is the best way to get those contacts there.
Simply create a free Form Falcon account and check out our full Hubspot Plugin guide.
Create Forms that create Hubspot contacts
One-click install our Hubspot Plugin and start powering new leads via forms.
Learn MoreCreate incredible forms to run your business.

