Ready to drop the paper work and jump into the digital era of professional and reliable forms to run your business?
In this guide, we’ll take a typical “Paper Form” and transform it into a beautiful digital form in a few minutes.
Either follow along in this guide, or watch the video from our YouTube Channel:
Paper Form
Before we begin, here’s a glimpse at our paper form we’ll transform during this guide:
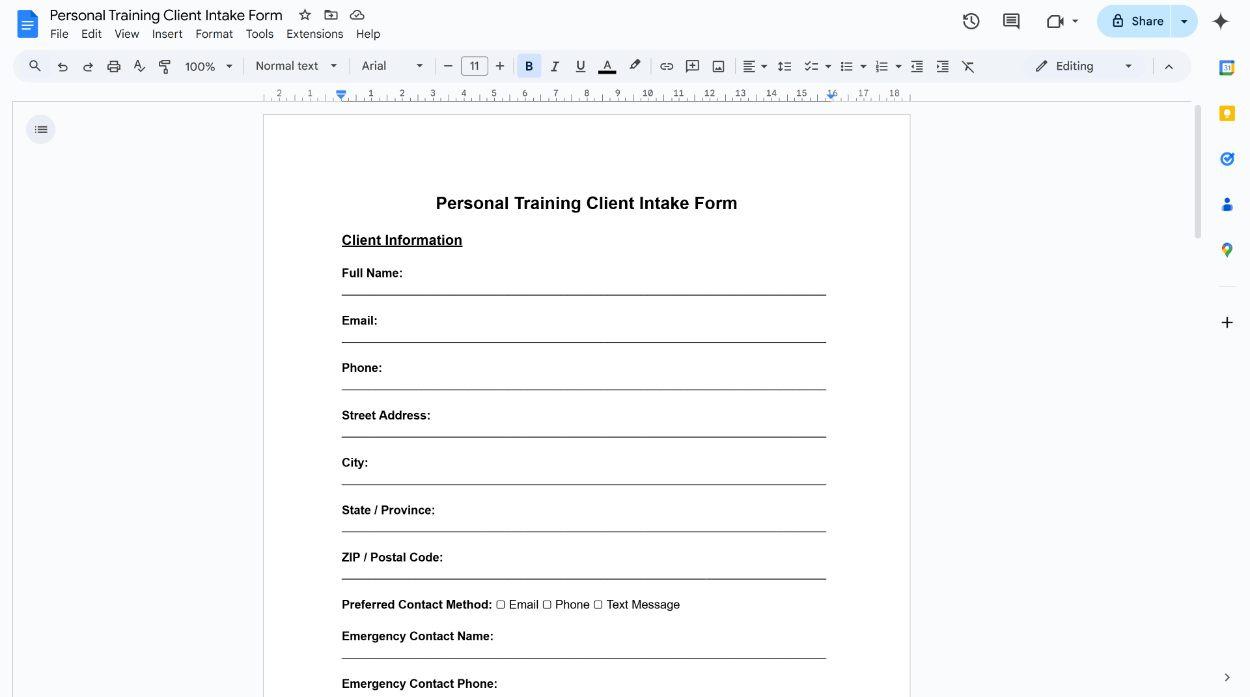
It’s not very elegant, and gives a customer a large burden of effort to print it off, fill it out, scan it, email it back. This deeply hurts conversion rates, and a huge reason why Digital Forms are required for modern businesses.
Why move from Paper to Digital Forms?
Instead of just migrating from paper forms to digital forms “just because”, we might ask ourselves “why”. So… why?
Here’s a short list of a few examples I can think of:
- Cost Savings: Eliminates printing, storage, and distribution costs.
- Environmental Impact: Reduces paper waste and promotes sustainability.
- Data Accuracy: Minimizes errors from manual data entry.
- Efficiency: Speeds up data collection, processing, and access.
- Real-Time Access: Allows instant sharing and retrieval of data across teams.
- Customizability: Easily adapts to changing business needs without reprinting.
- Enhanced Security: Offers encryption and secure storage compared to vulnerable paper files.
- Integration: Seamlessly integrates with CRMs, databases, and workflows.
- Automation: Triggers follow-up actions like emails or approvals automatically.
- Space Saving: Eliminates the need for physical storage of forms.
- Remote Accessibility: Enables filling out and submitting forms from anywhere.
- Scalability: Accommodates growing volumes of data effortlessly.
- Compliance: Helps meet industry standards for data tracking and retention.
- Analytics: Provides insights from data instantly with reporting tools.
- Modern Customer Experience: Delivers a professional, branded and user-friendly experience.
Creating the Digital Form
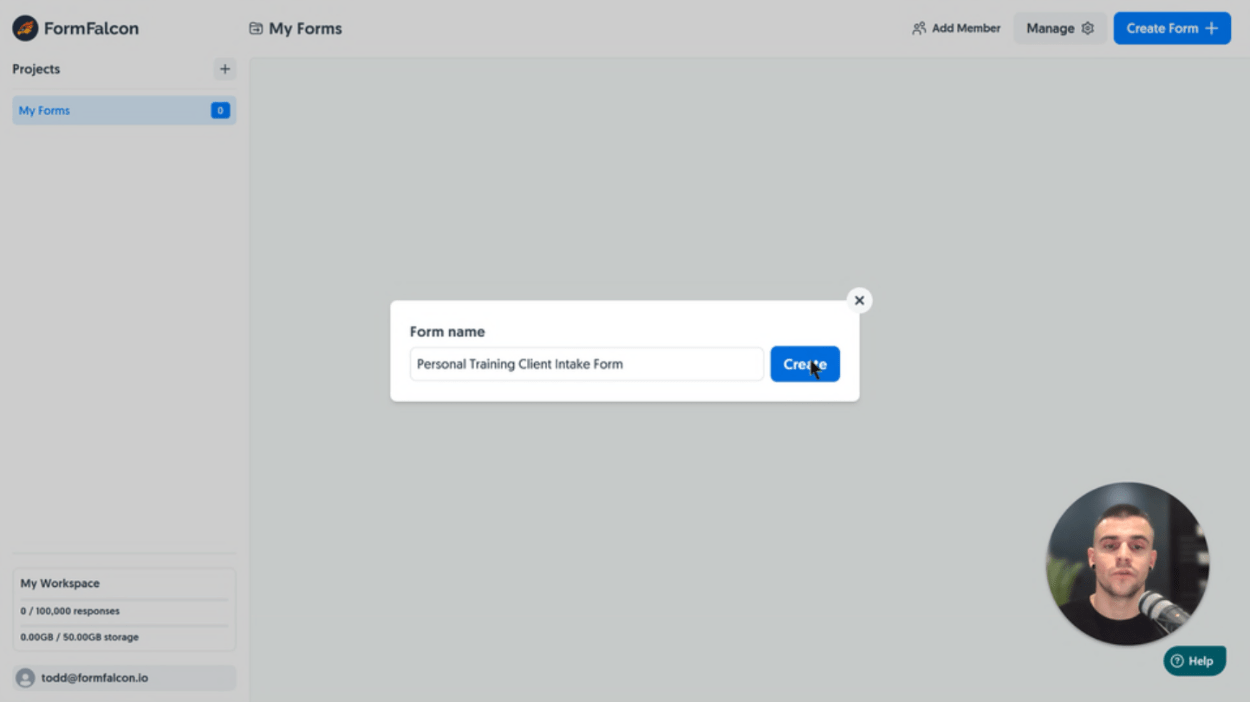
Our first step is to head into the Form Falcon app (create a free account if you haven’t already) and enter our form name Personal Training Client Intake Form and click Create:
Referencing our Paper Form, we need to add three new fields: a Text Field, Email Field and Telephone Field:
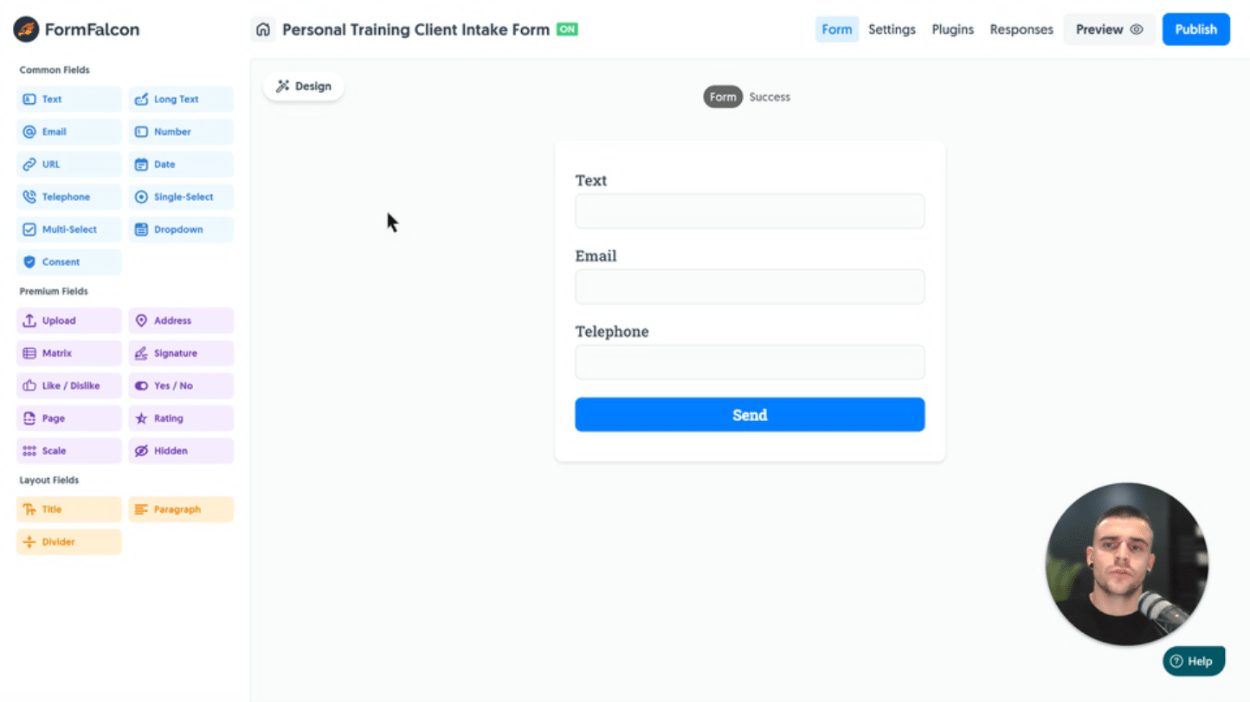
Then, a Title Field which will setup our first form block nicely:
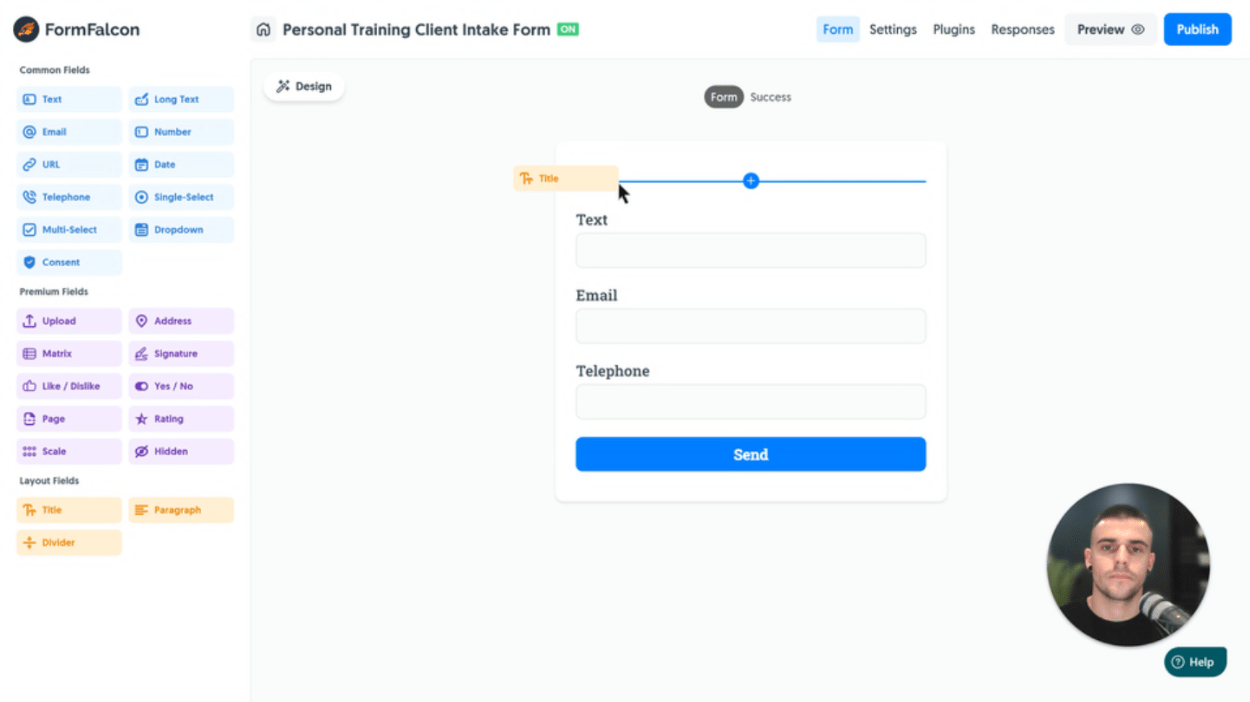
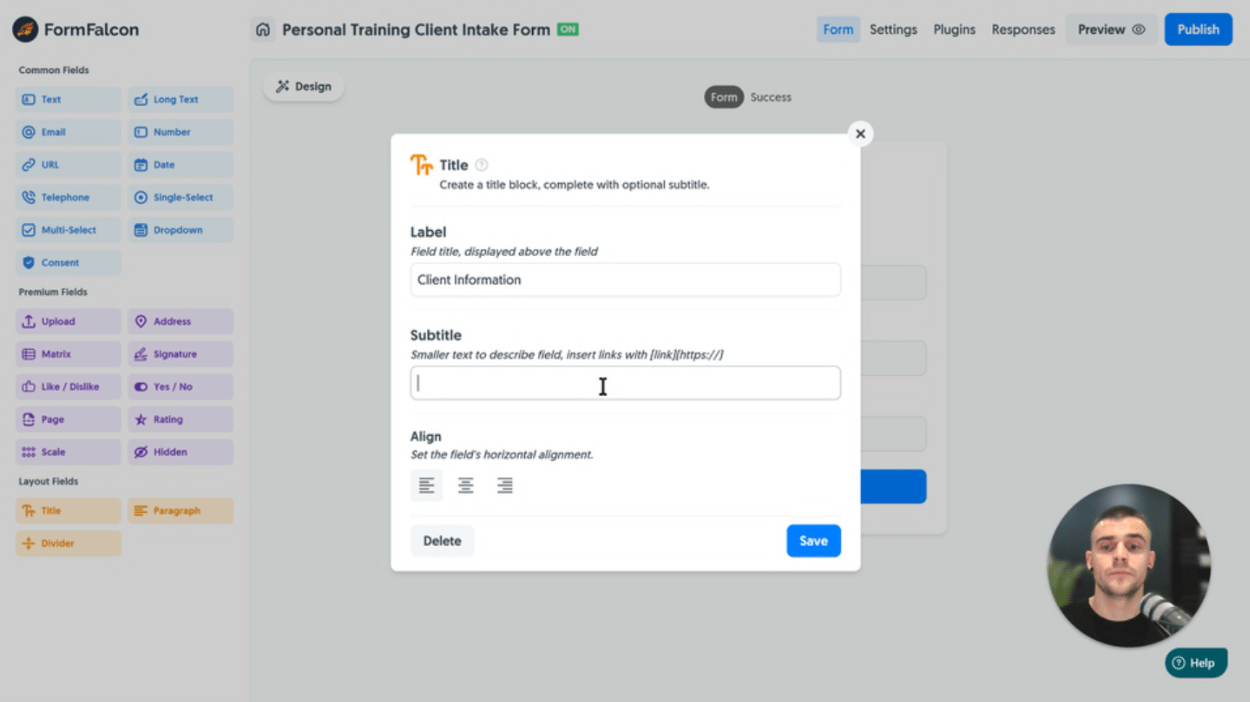
Hover over the new Title Field and click Edit, and enter Client Information into the Label input, leaving Subtitle empty:
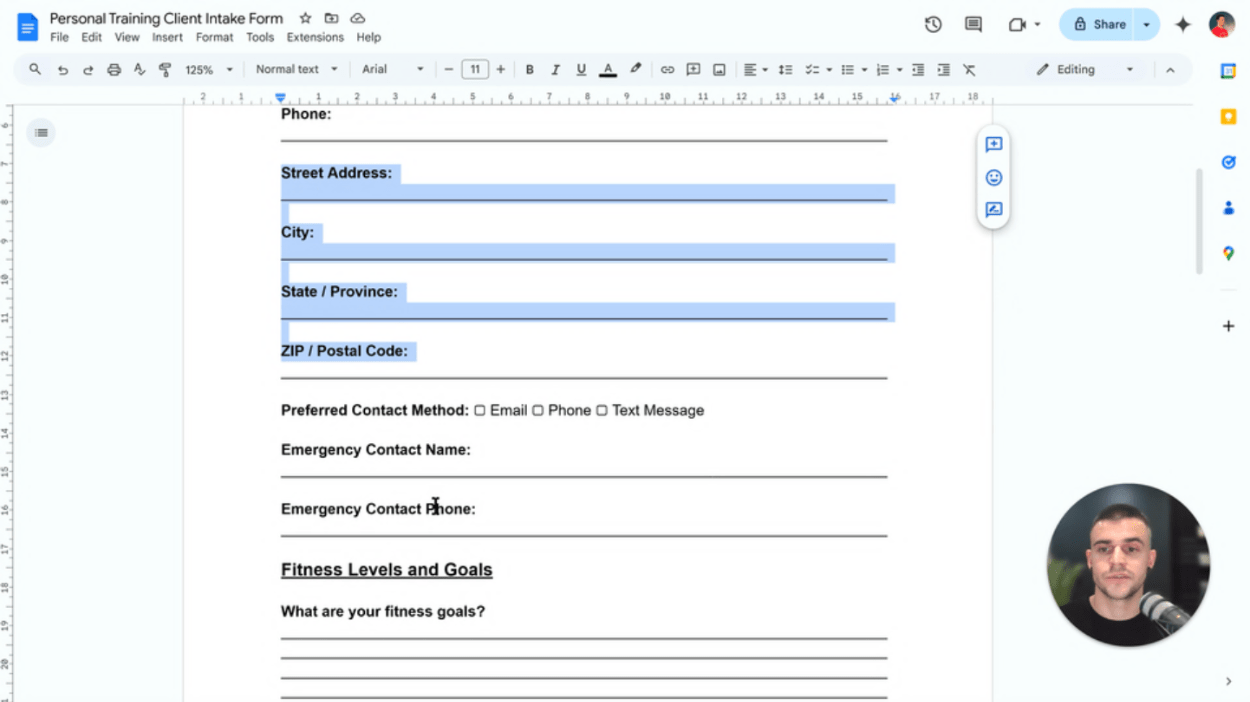
Referencing our Paper Form once more, we’ll need to add an Address set of fields, a Preferred Contact Method, Emergency Contact Name and Emergency Contact Phone:
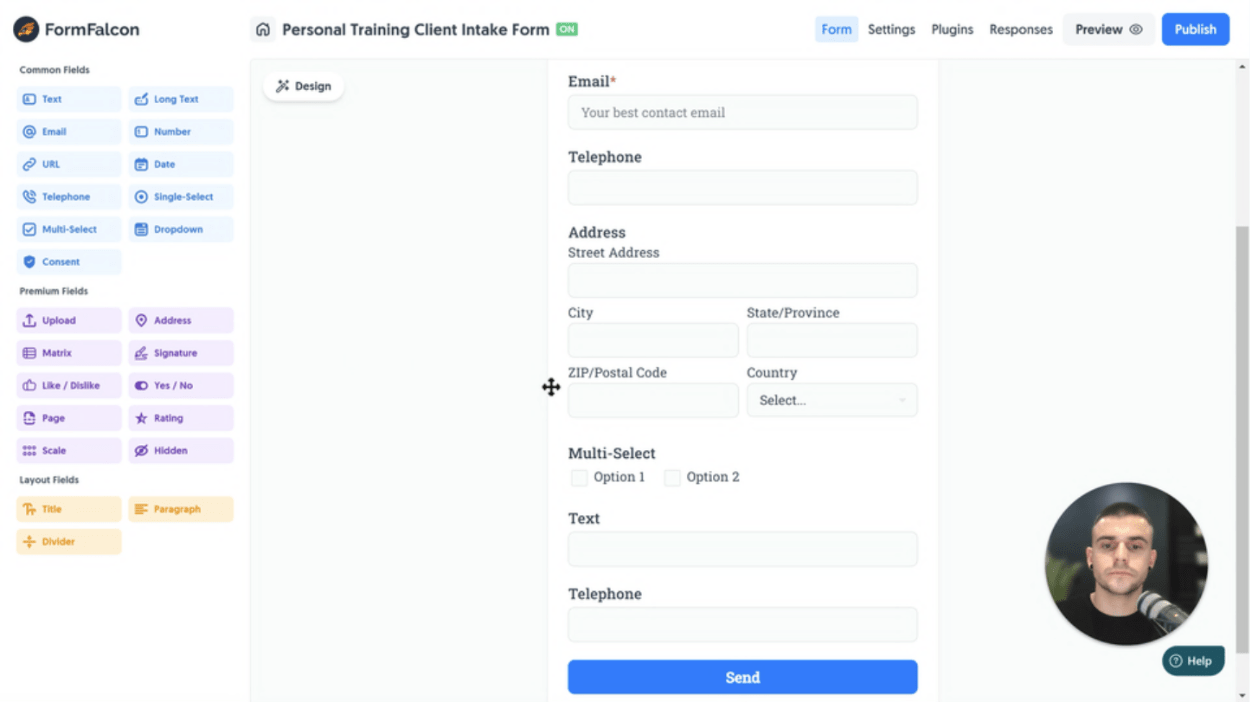
Adding an address is quick and simple, we’ll drag in the Address Field, followed by the Multi-Select Field and two Text Fields:
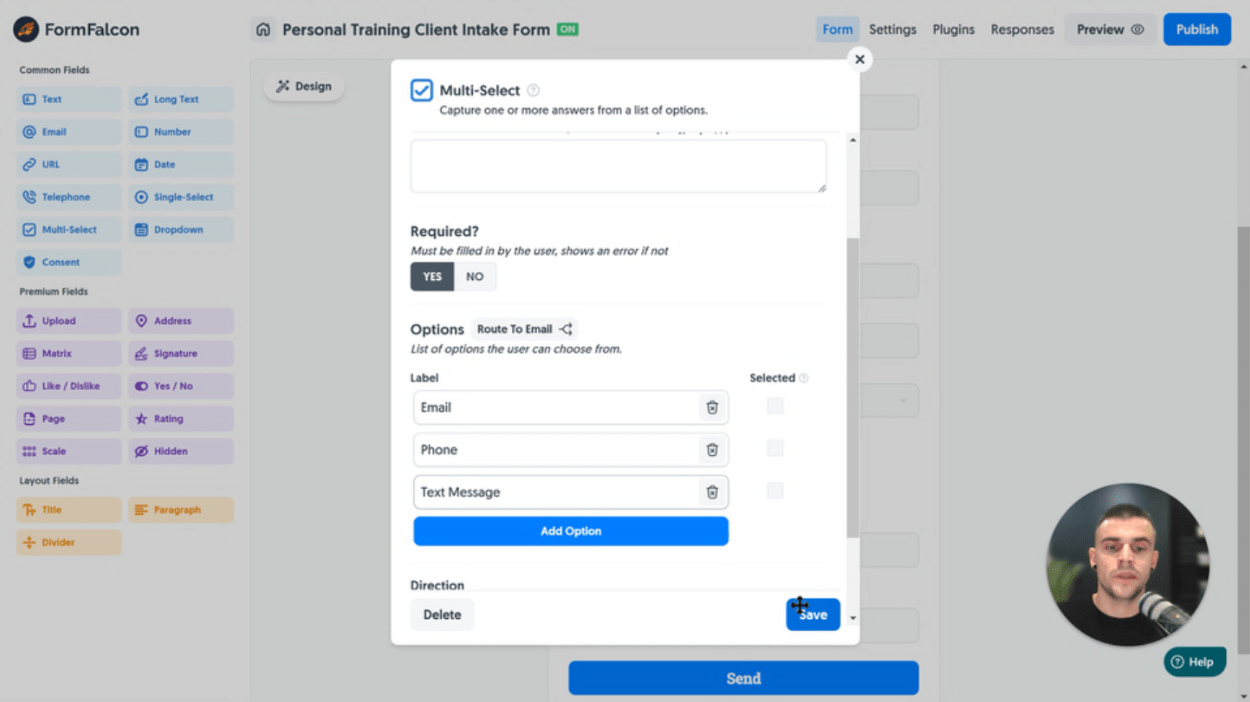
Now, let’s add Email, Phone and Text Message as potential options a user can select from for the Preferred Contact Method, and also update the field’s Label to contain “Preferred Contact Method” and mark it as Required via Smart Validation:
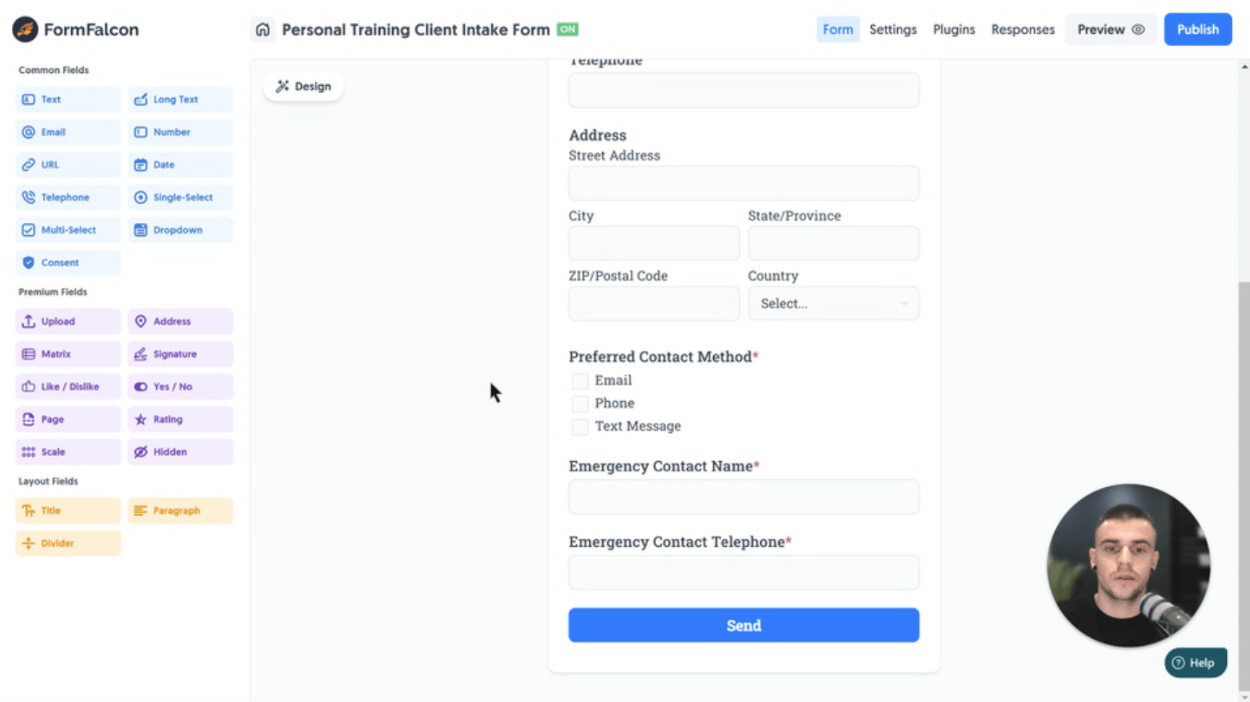
Our new Preferred Contact Method options list is now fully populated with choices and ready to go:
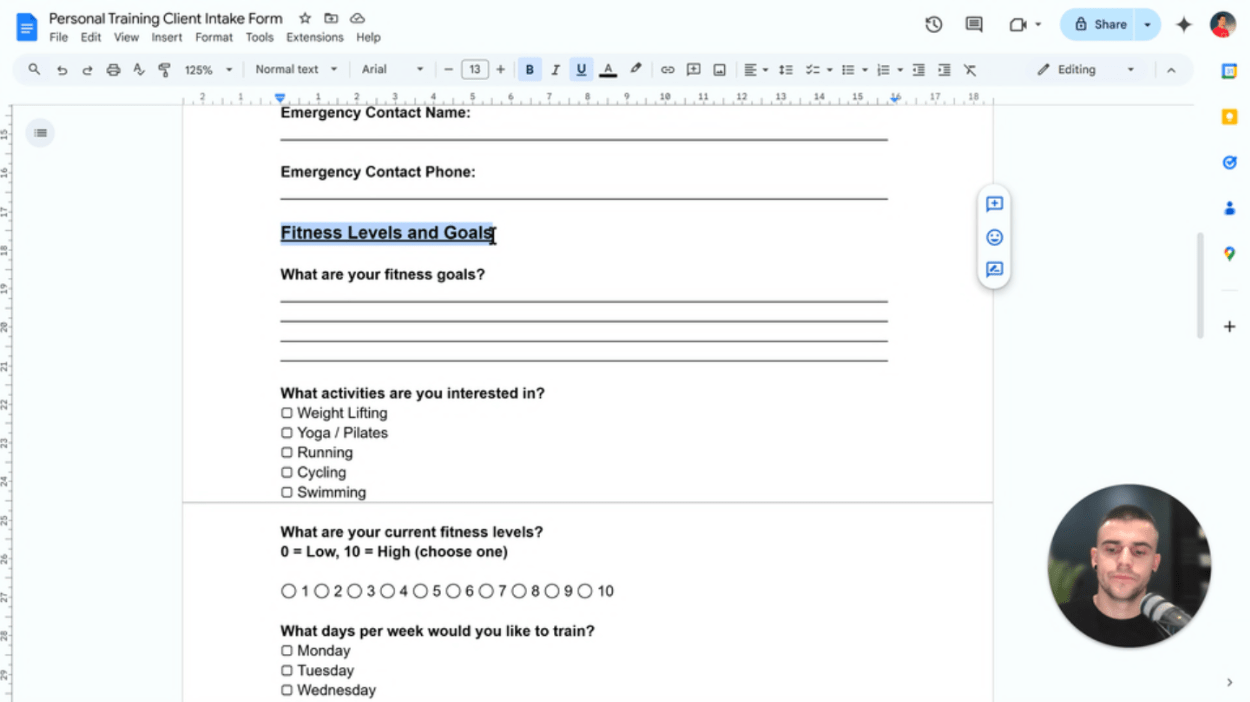
Let’s check back to our Paper Form, we have the Fitness Levels and Goals block up next:
But first, let’s introduce a Page Field to put this next section onto a new “page” within the form, so as to not overwhelm the user with a huge list of questions all at once (and give a nice tabbale “Next” button to proceed to this next block):
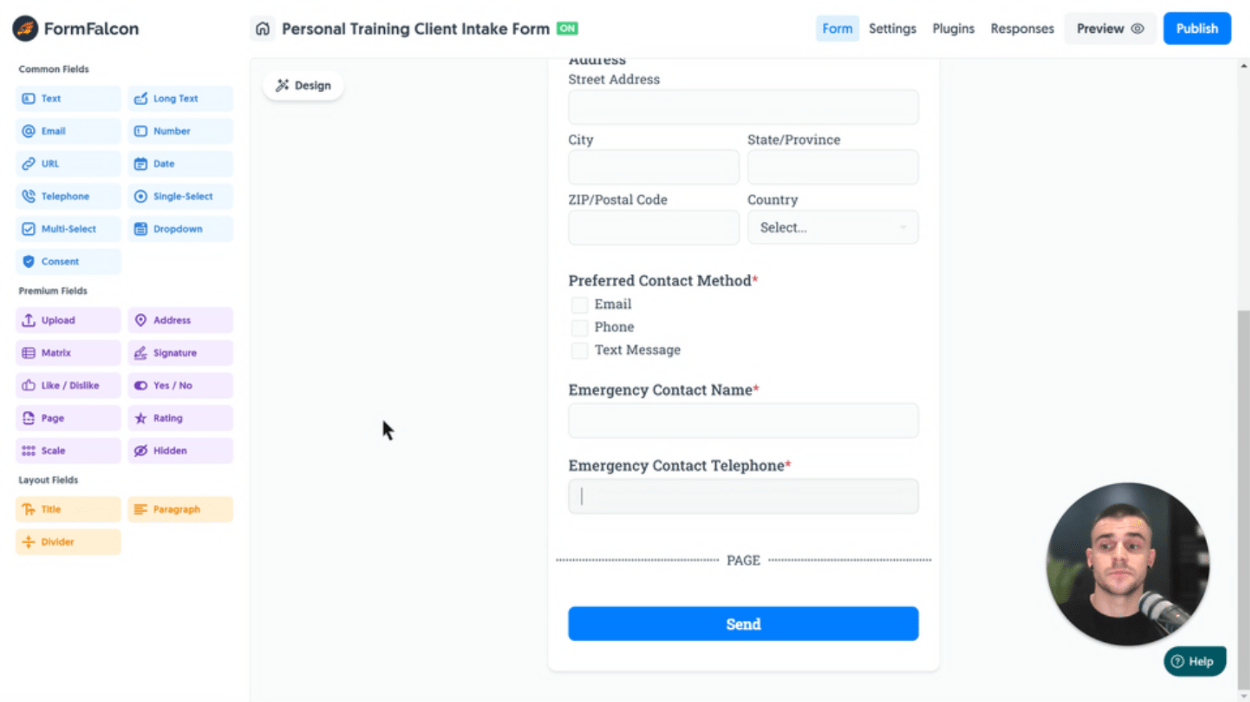
Next, we’ll add a new Title Field and change the Label to Fitness Levels and Goals:
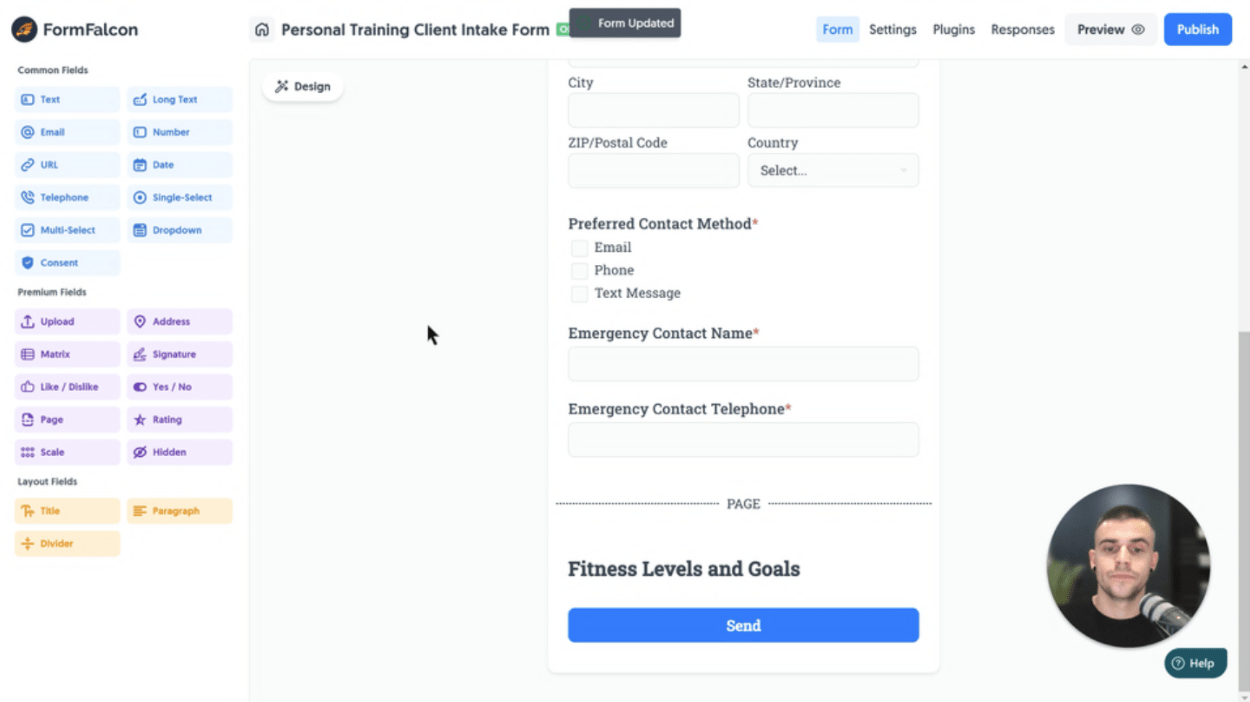
For the What are your fitness goals? question, we’re going to introduce the Long Text Field to allow the user to submit sentences to describe their goals. We’ll also add a Multi-Select Field:
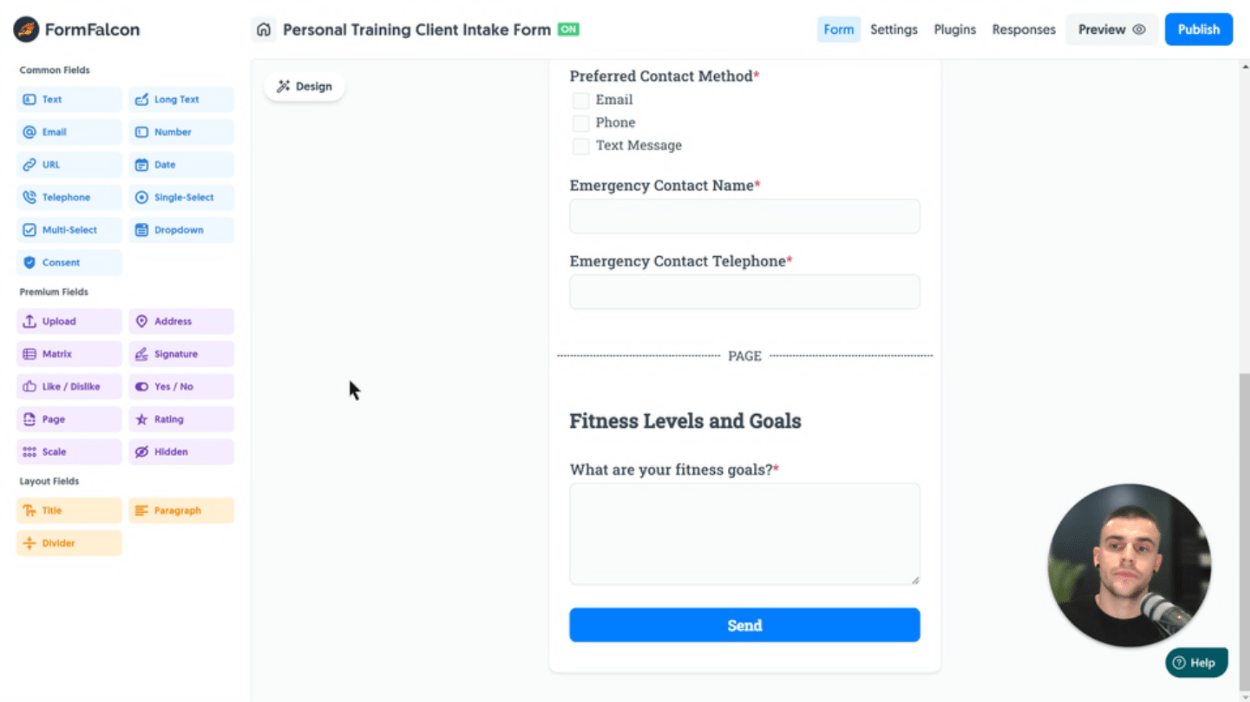
Within the Multi-Select Field, we’ll add Weight Lifting, Yoga / Pilates, Running, Cycling and Swimming as potential options for the user to select one or more:
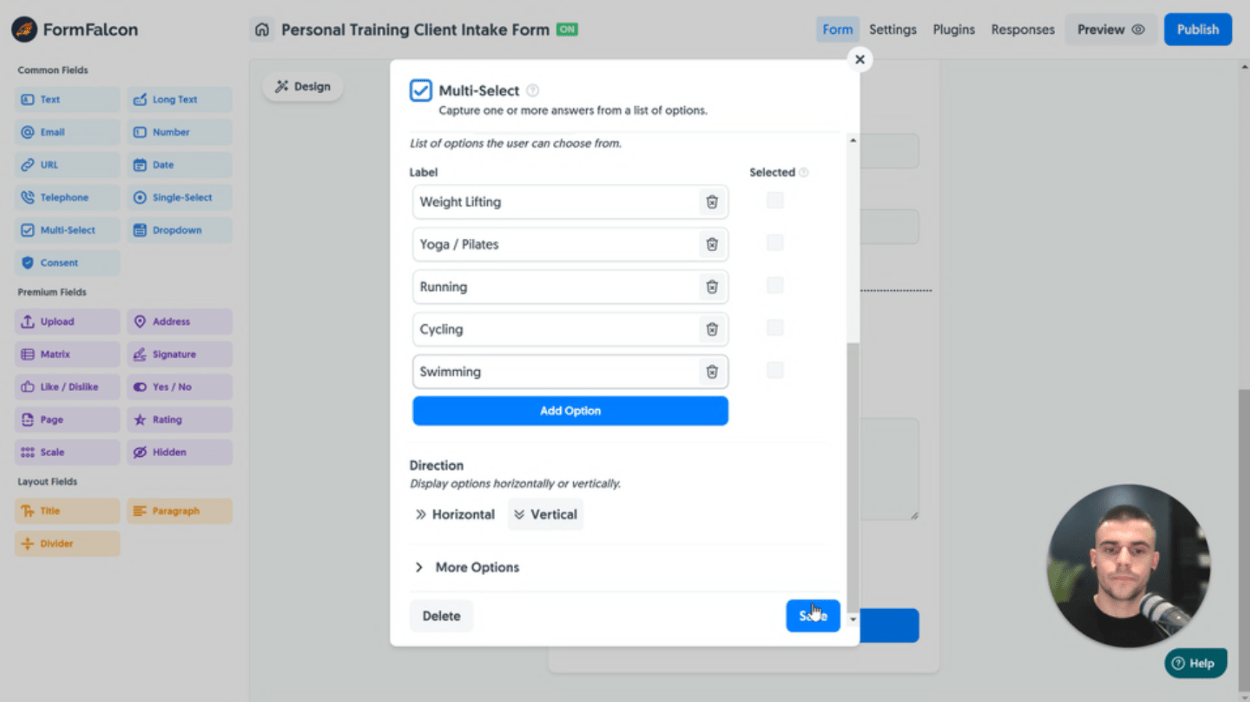
Which gives us a nice stacked answer for easy filling out:
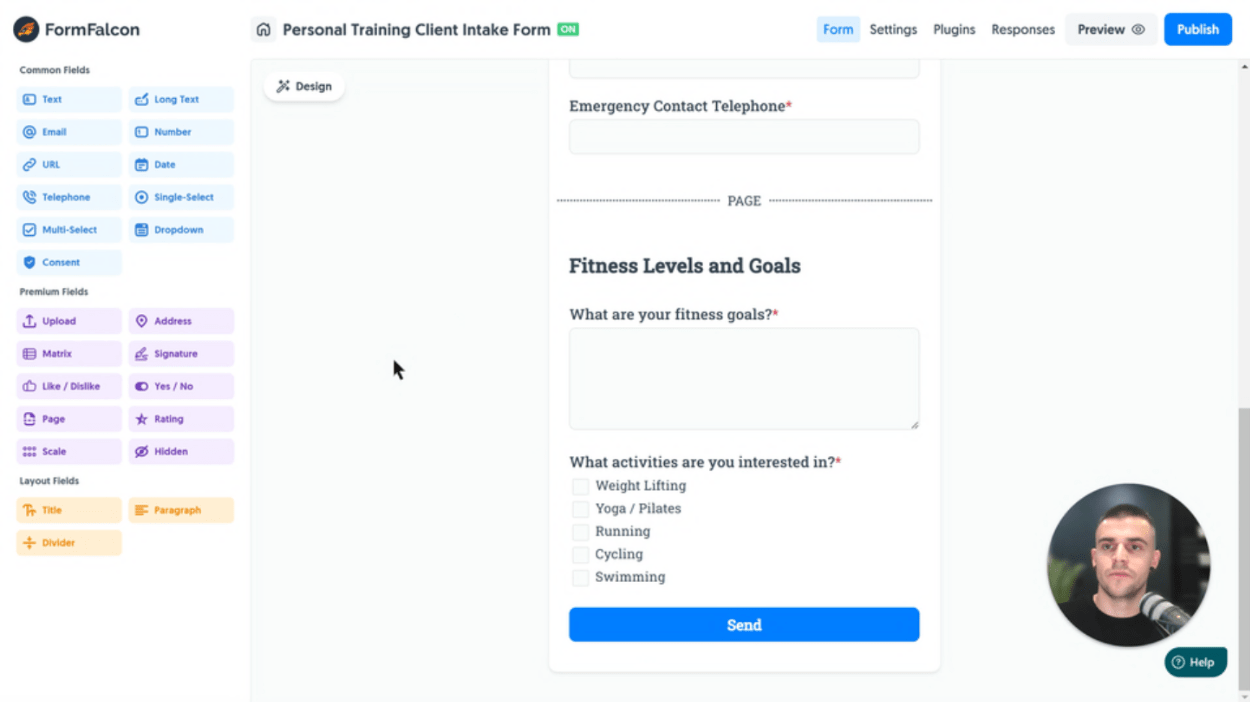
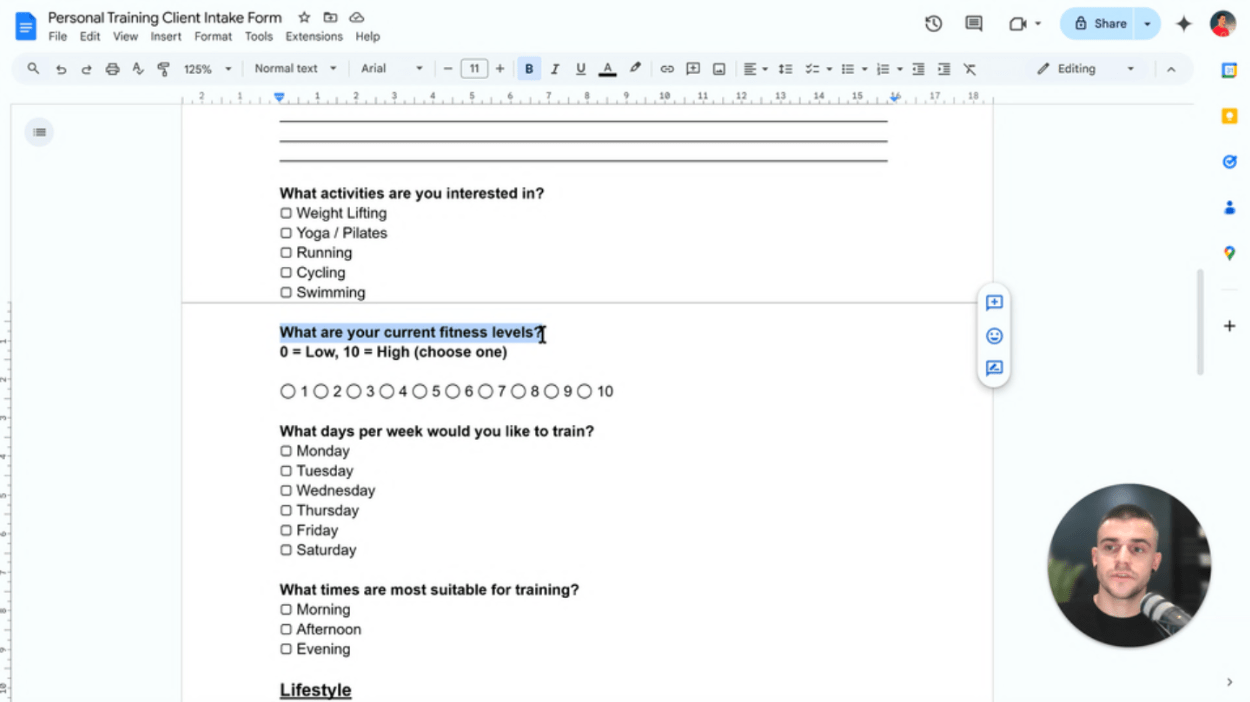
The next task is transforming our What are your current fitness levels? question, a numerical scale:
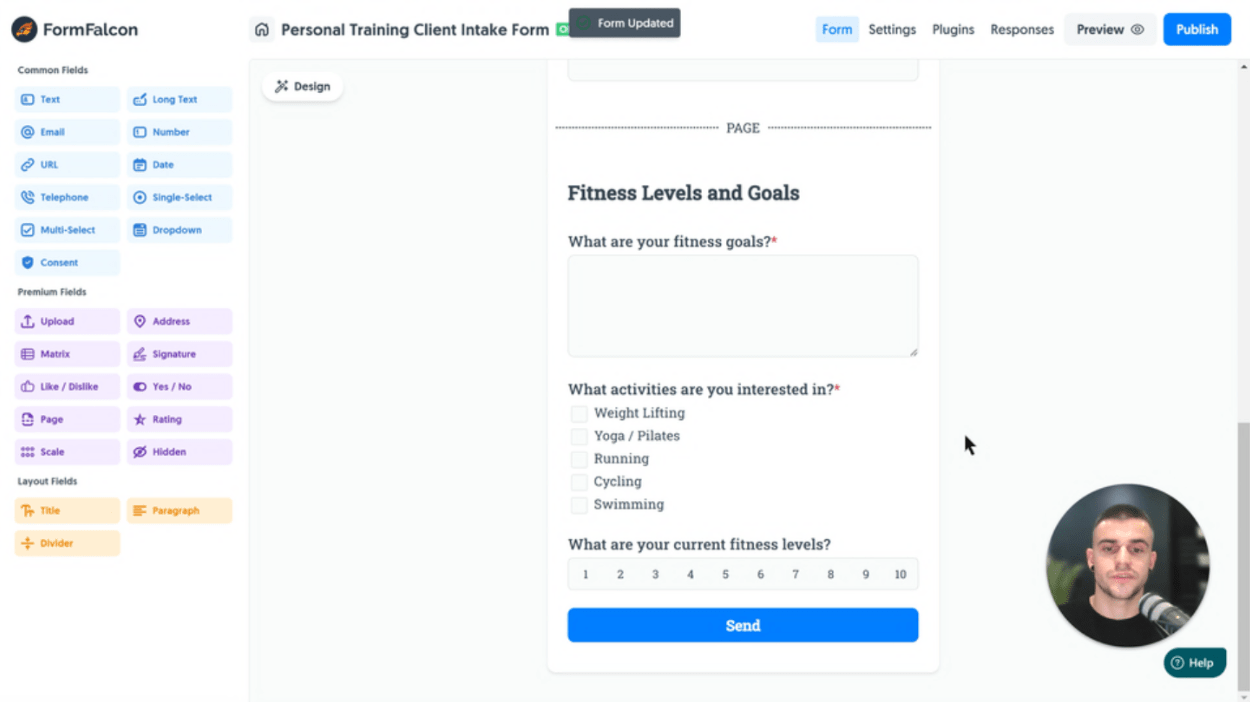
For this, we have the perfect field, the Scale Field which allows the user to select a single number from 1-10:
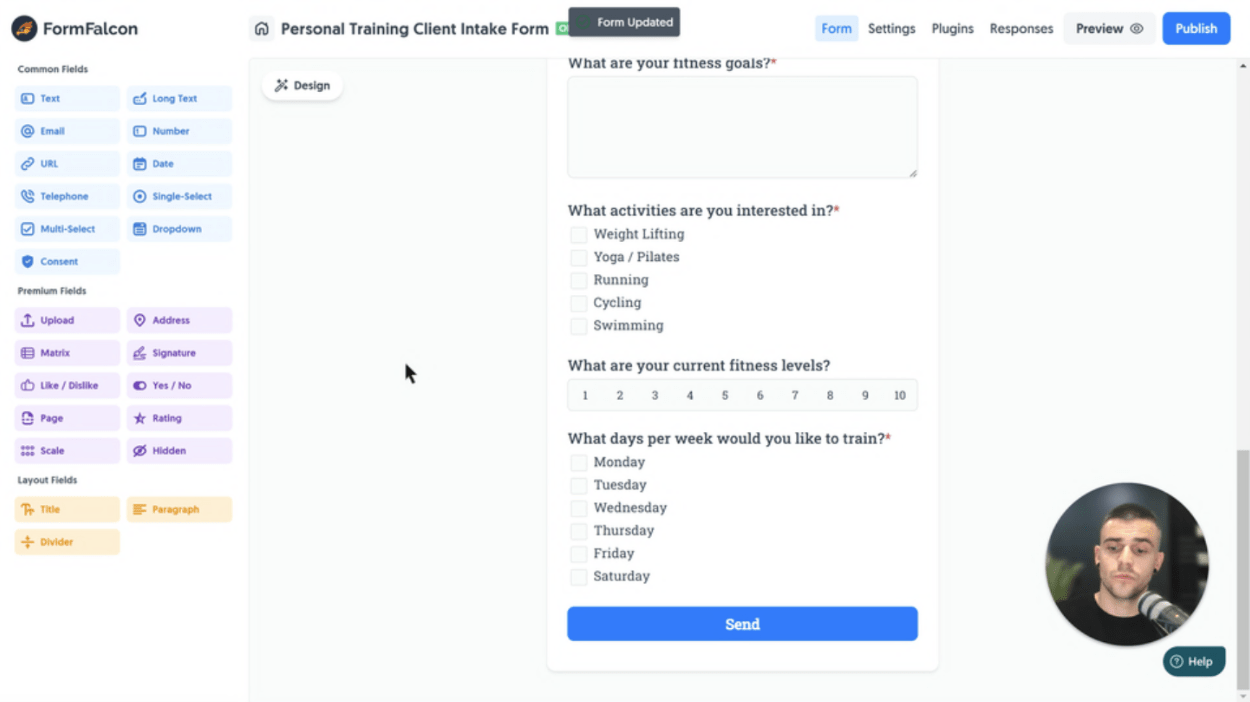
Next up we’ll tackle the What days per week would you like to train? as another Multi-Select Field and enter the applicable days as options:
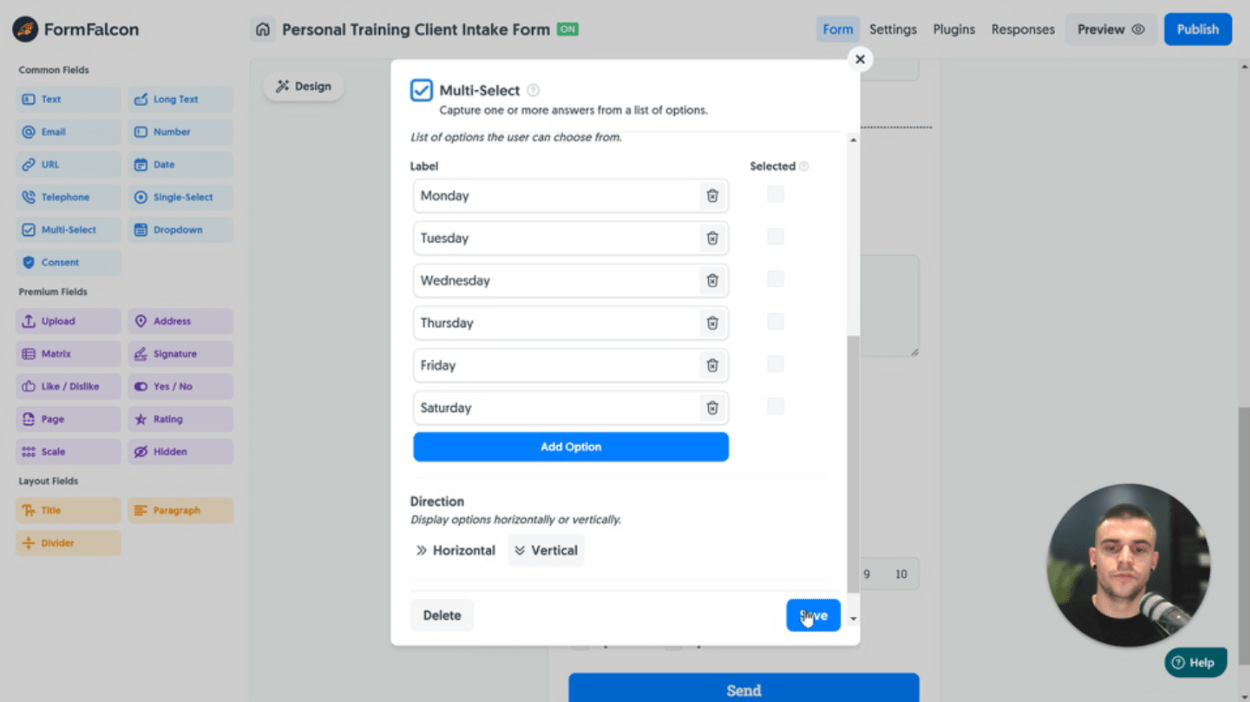
It’s starting to really come together now:
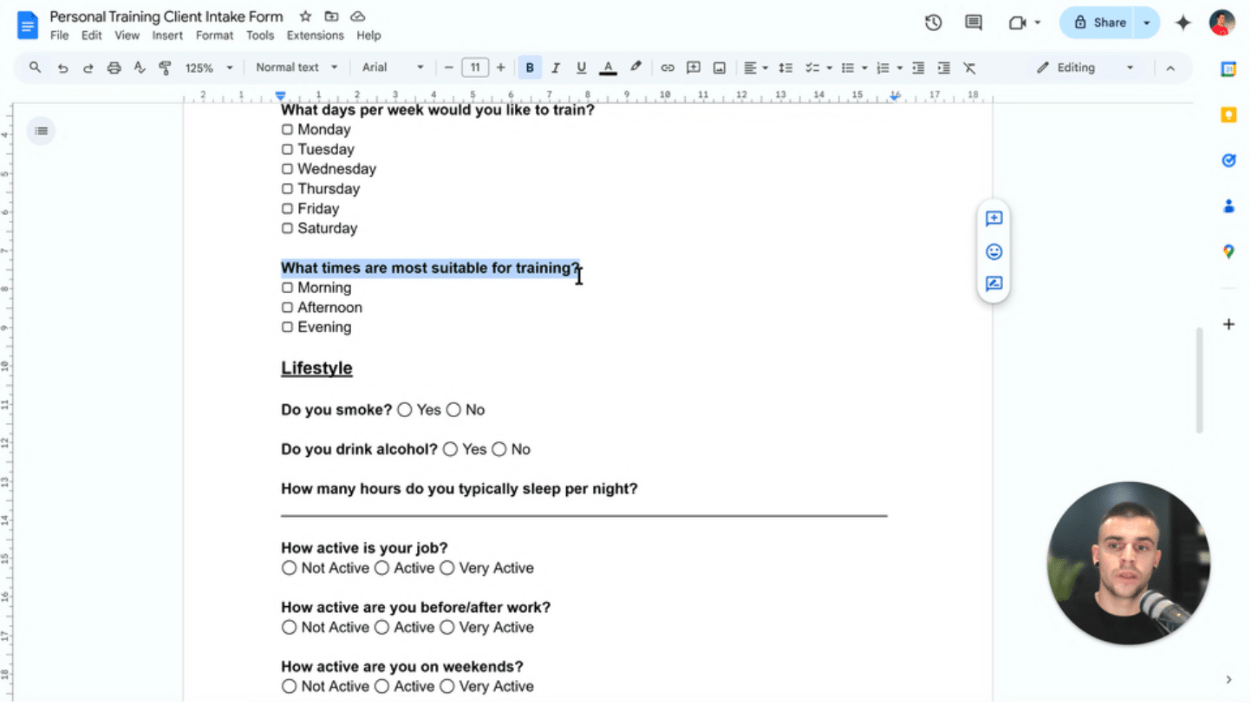
What times are most suitable for training? is a great question to qualify the frequency of new clients, and has a few simple options:
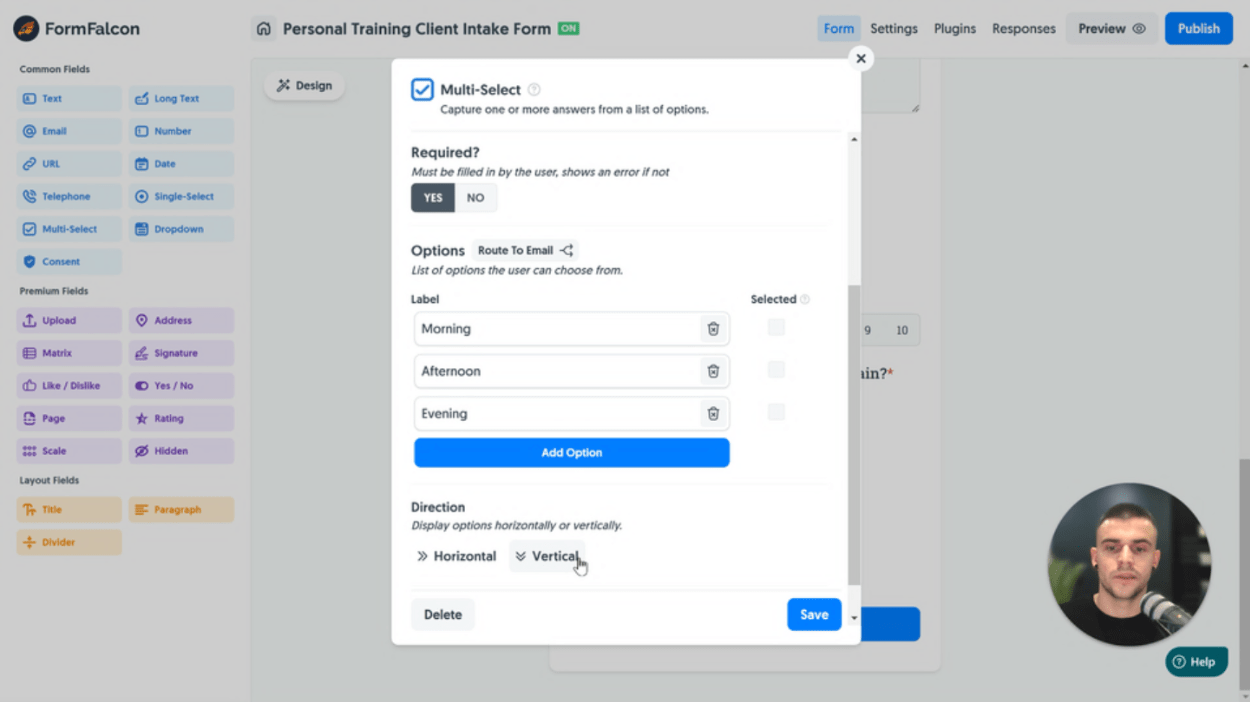
Let’s add another Multi-Select Field and add Morning, Afternoon and Evening as options:
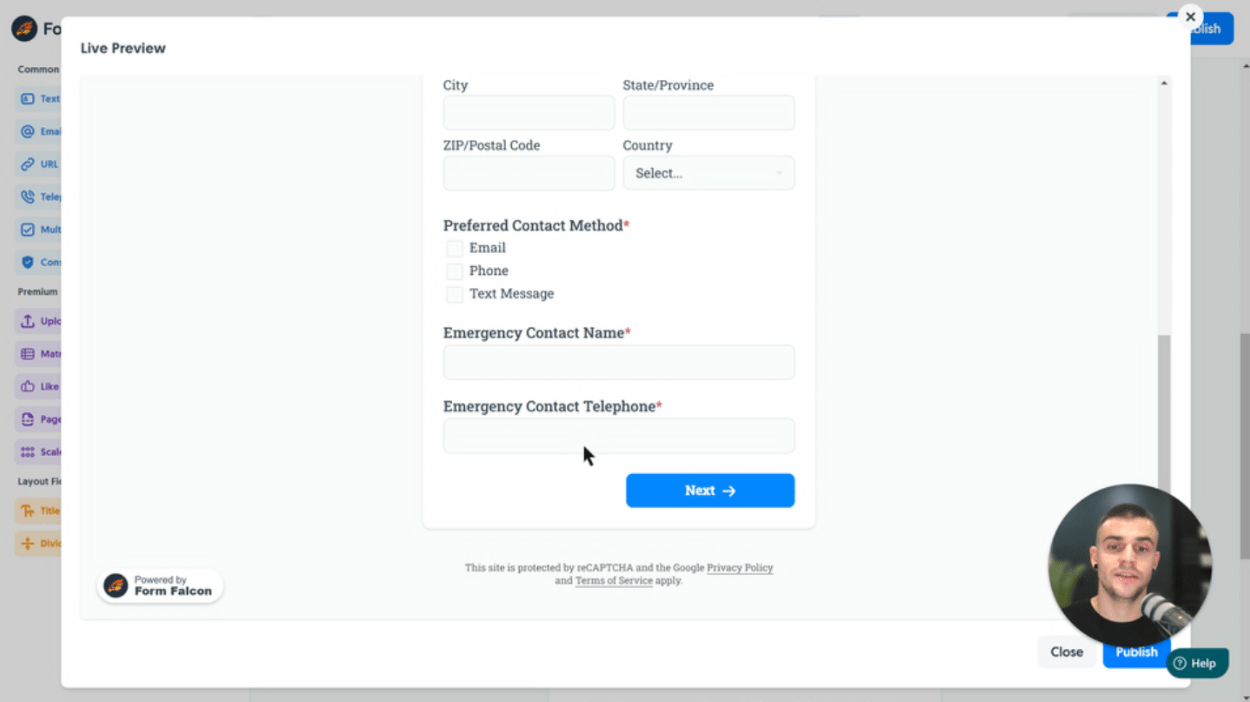
Now we’ve come this far, let’s test our form’s look and feel and how our Page Field works. Click Live Preview to generate a test preview of the form, a step we can perform before fully publishing:
Our Live Preview window pops up and we can test the fully working form in Test Mode:
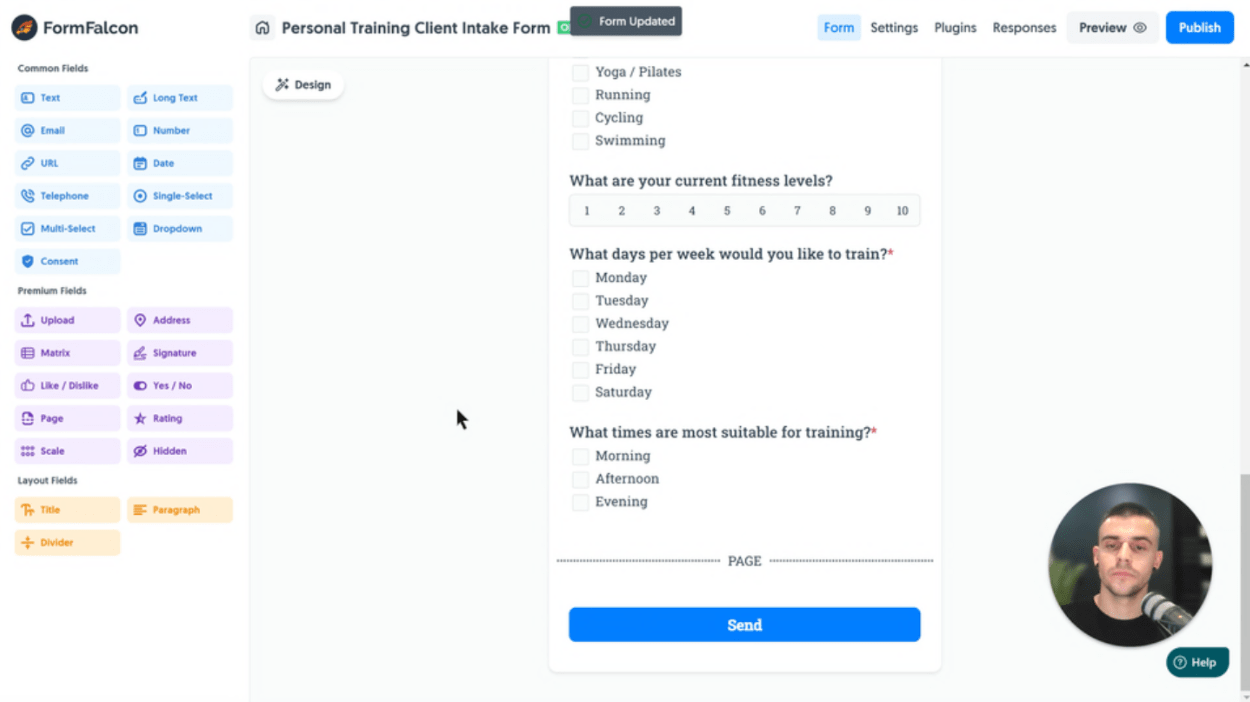
This completes our Fitness Levels and Goals block of questions, so let’s add a Page Field to start the next section:
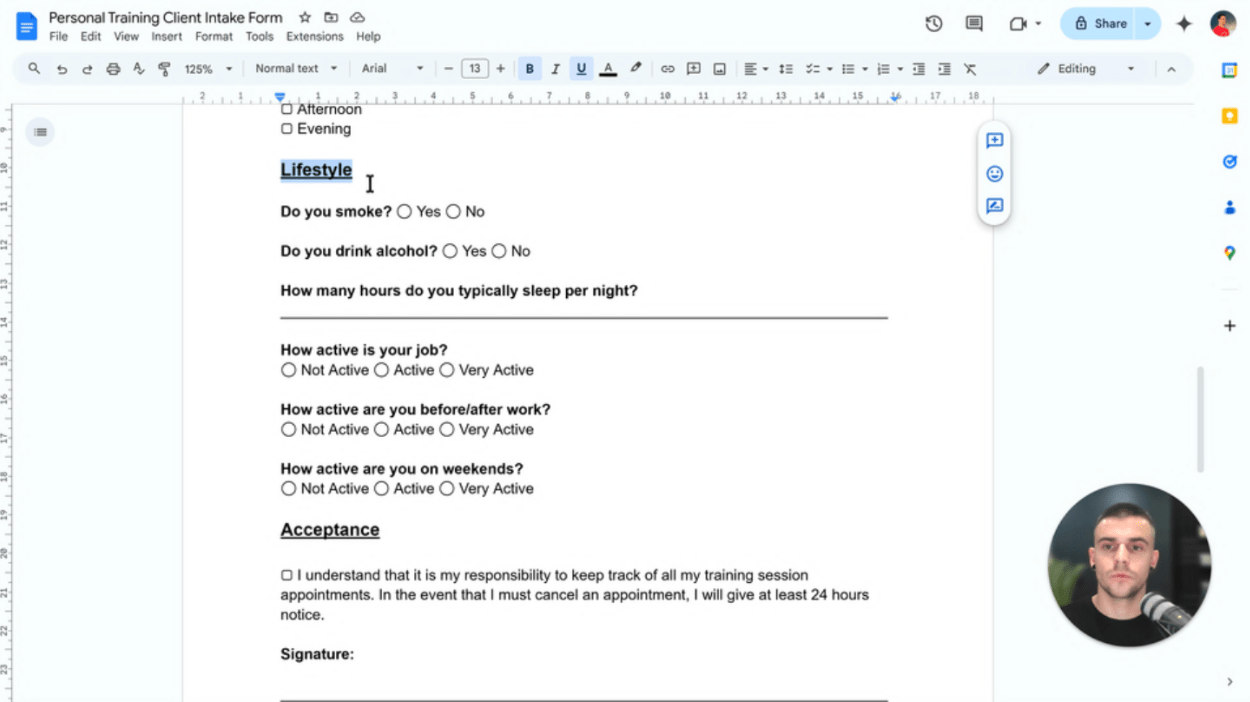
Lifestyle questions are up next, and we’ve got some interesting answers to transform into digital format:
First we’ll add a Title Field and set the Label to Lifestyle, and introduce a new field - the Yes/No Field:
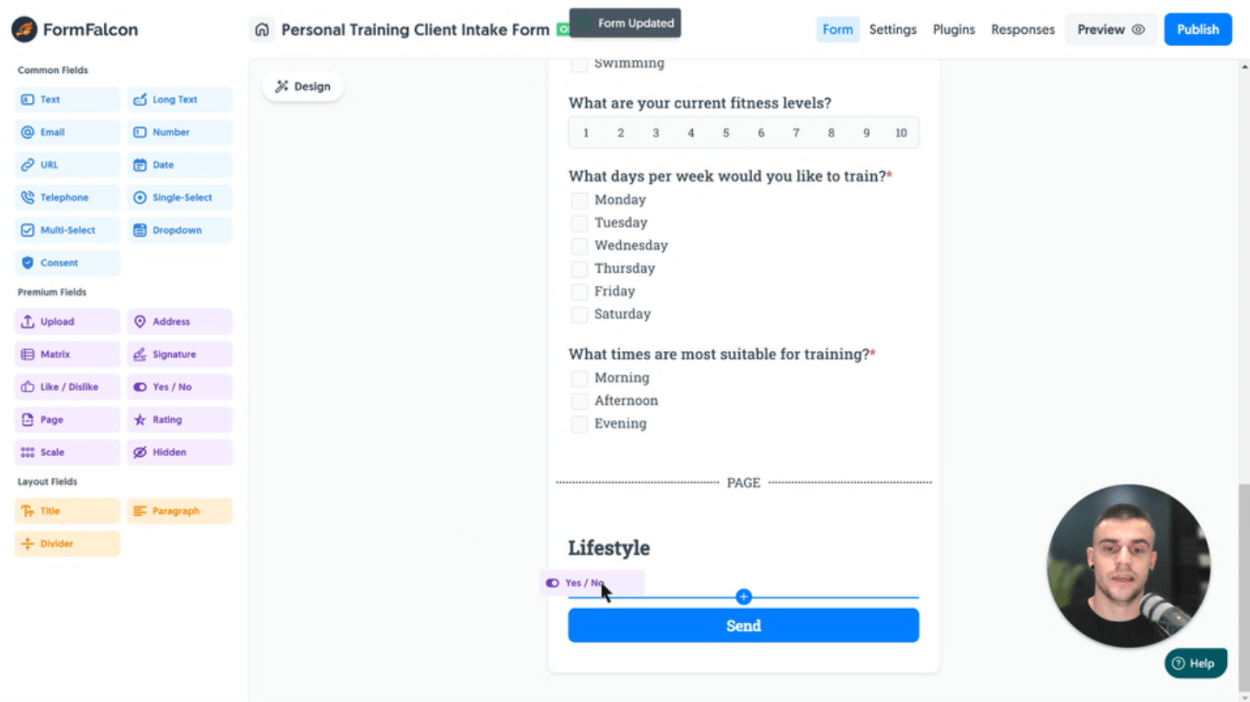
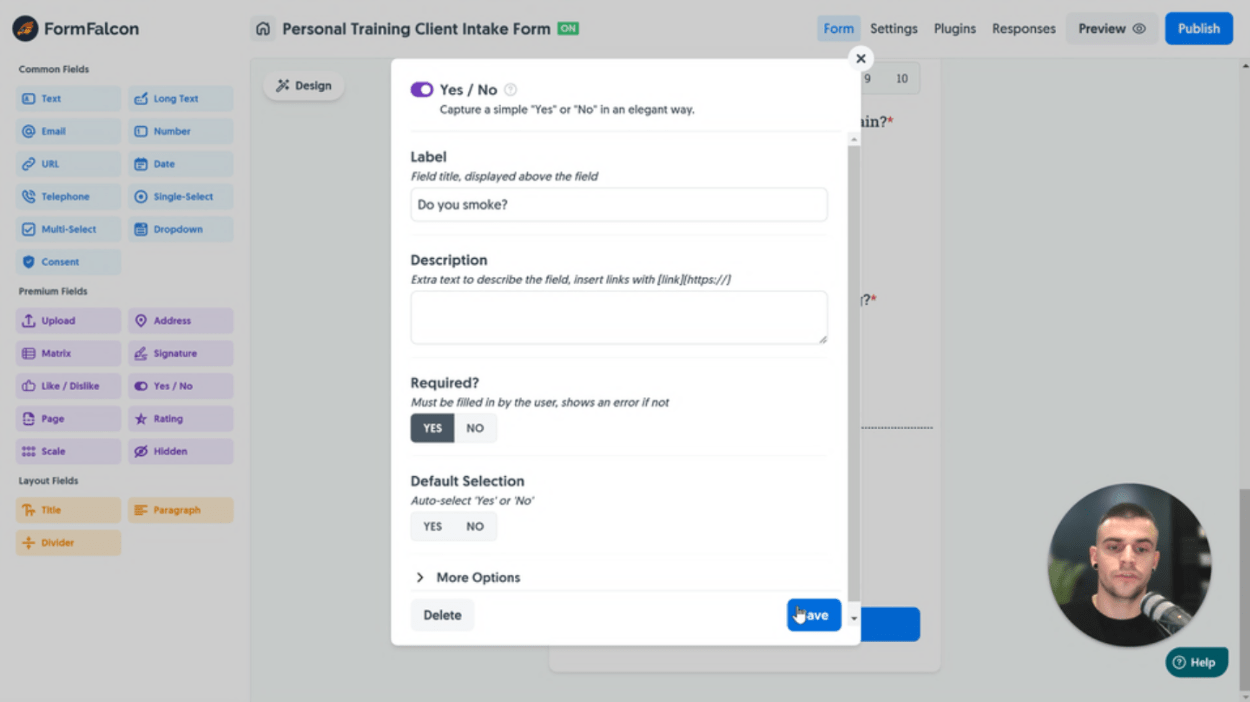
The Yes/No Field allows us to capture a simple Yes or No for a question in an elegant way, we’ll set the Label to our question and mark it as Required:
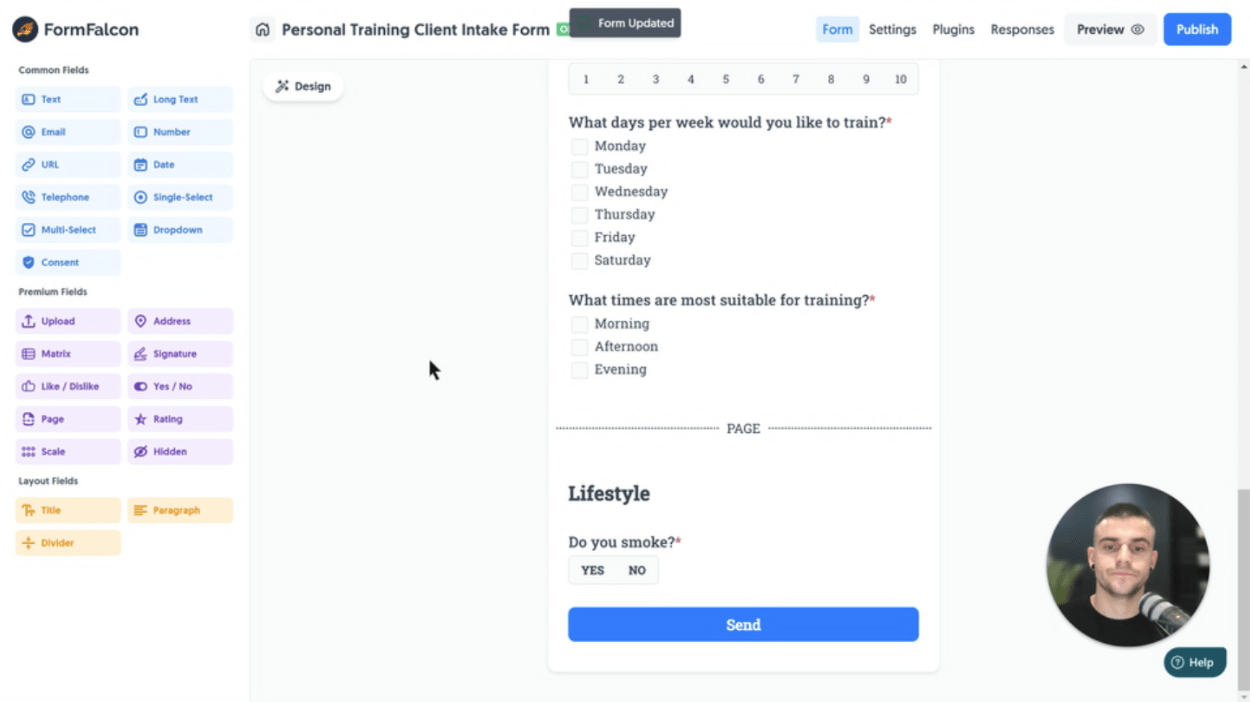
This gives us a nice field where the user can quickly and clearly select a Yes or No answer, giving them a better experience:
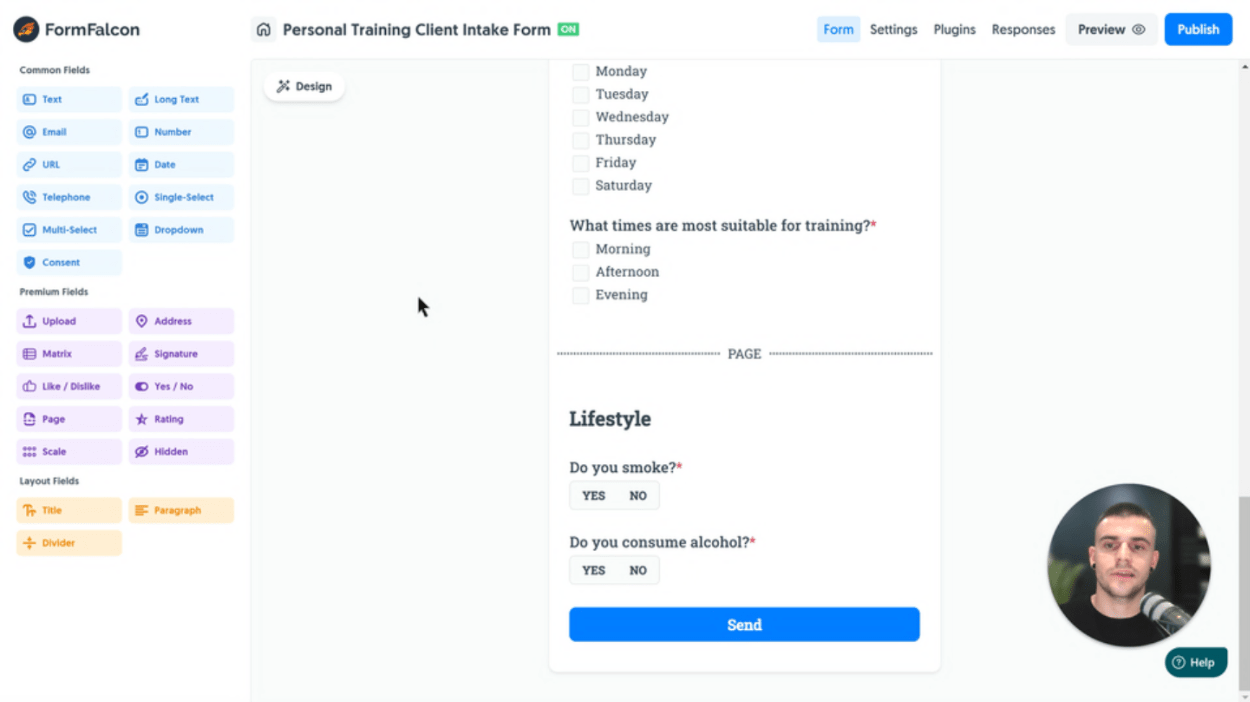
Add another Yes/No Field and we can set the question to Do you consume alcohol? to finish up these quick questions:
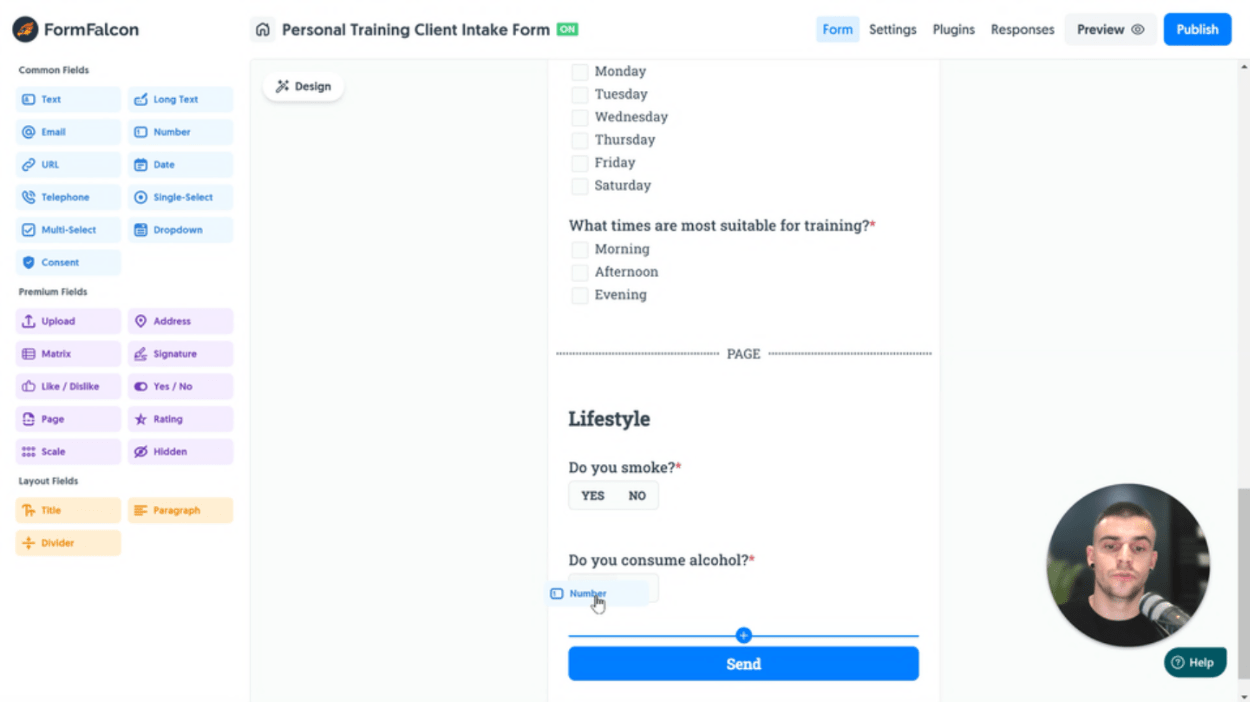
To tackle our How many hours do you typically sleep at night? question, it makes sense to opt for a Number Field - so let’s drag one in:
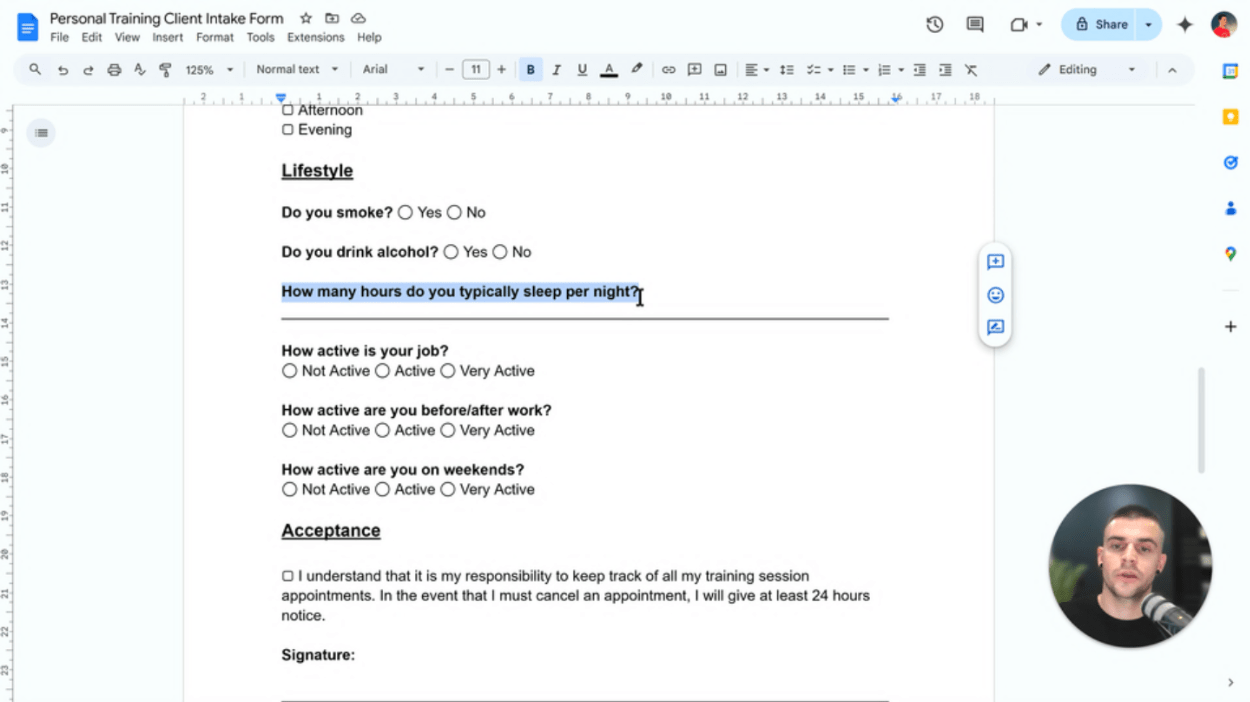
Our Paper Form has lots of space for any kind of answer:
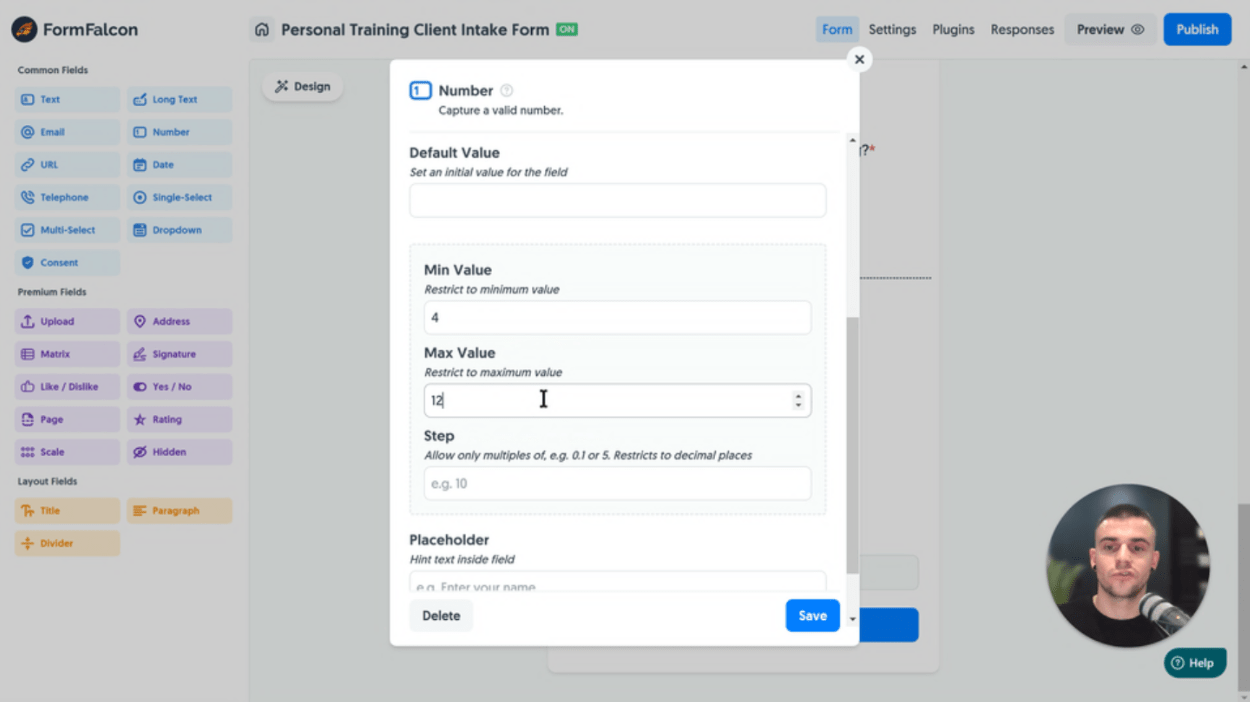
We’ll set a Min Value to 4 and a Max Value of 12 - these seem like sensible number options and will help prevent accidental typing issues (for example if the user entered 88 by mistake instead of 8):
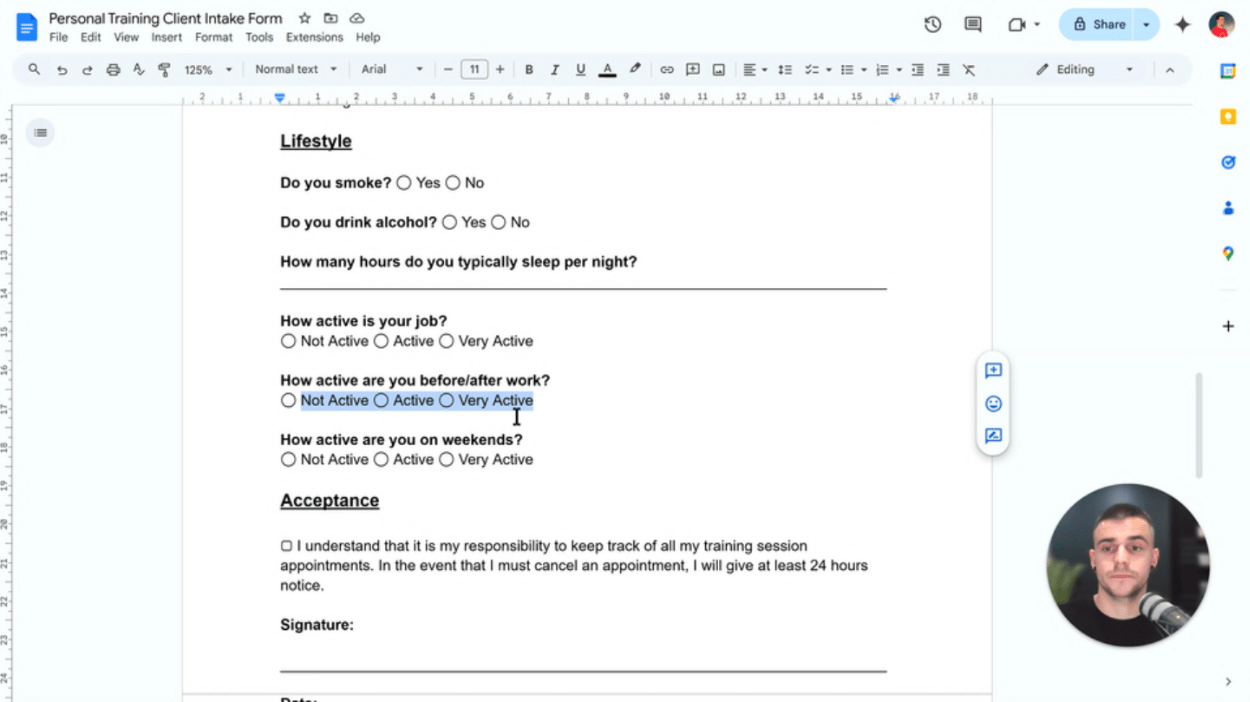
Our next questions are interesting as they all have the same possible answers:
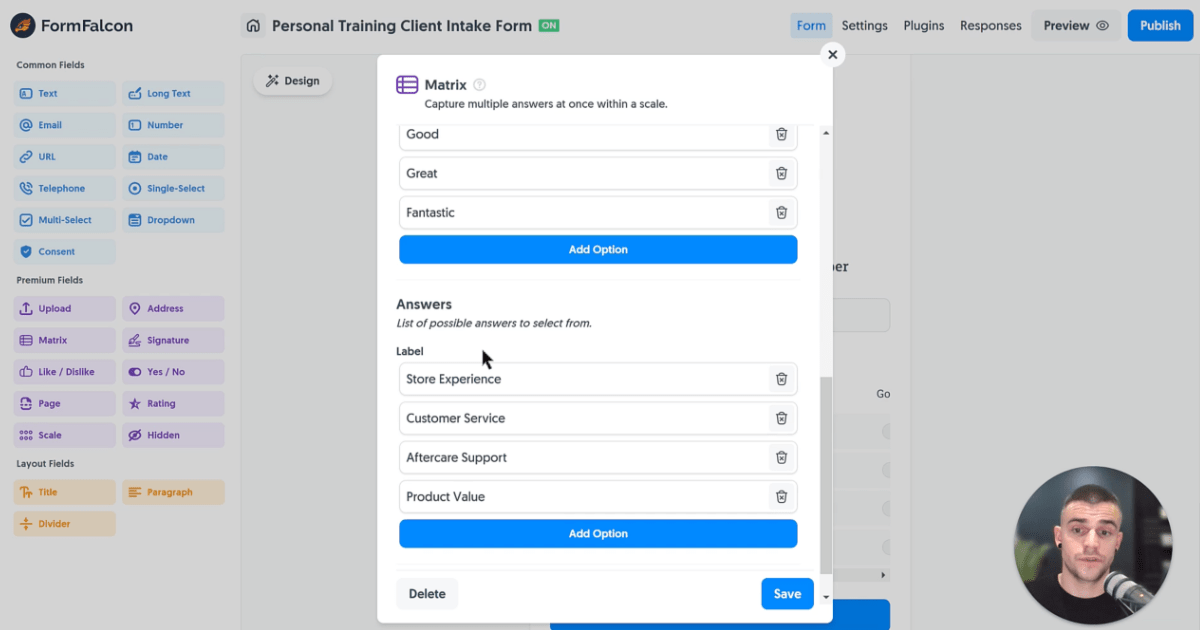
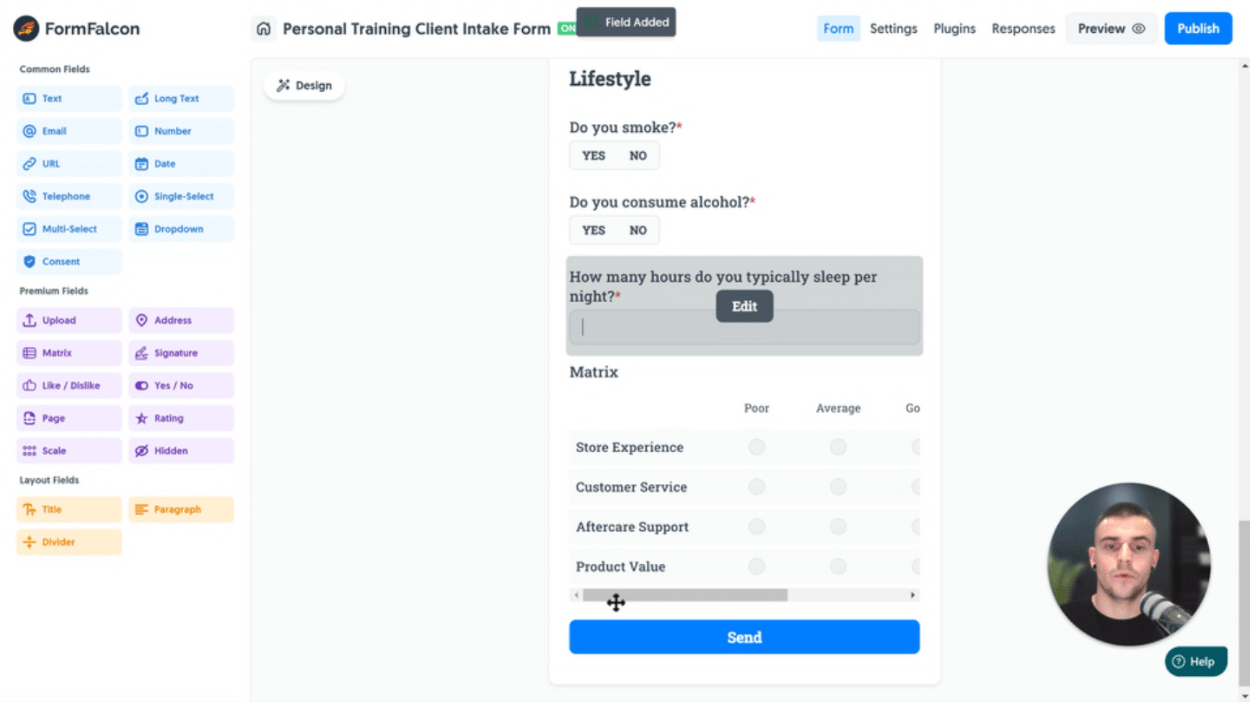
The perfect use case for the Matrix Field, to allow us to accept similar answers in a grid format. Let’s drag and drop one in:
Click Edit on the Matrix Field and enter our Not Active, Active and Very Active options into the Choices list:
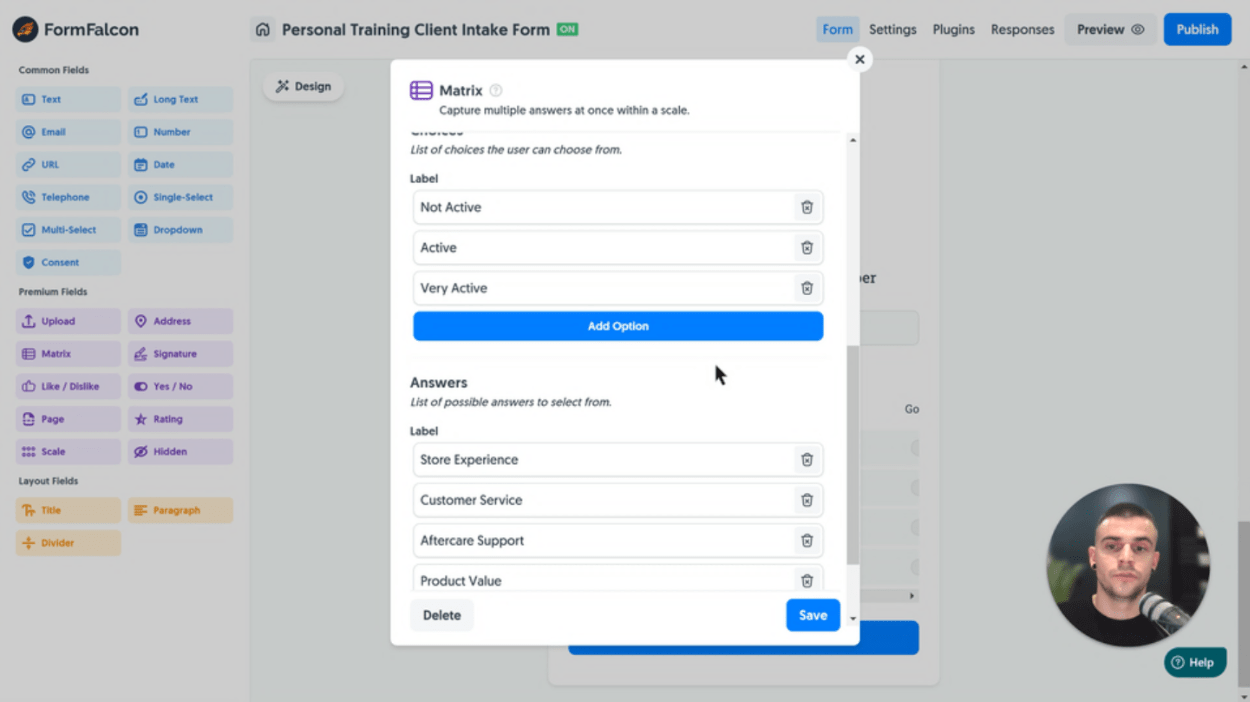
Similarly within the Answers list, we’ll add During Work, After Work and Weekends as rows to answer against the grid of options:
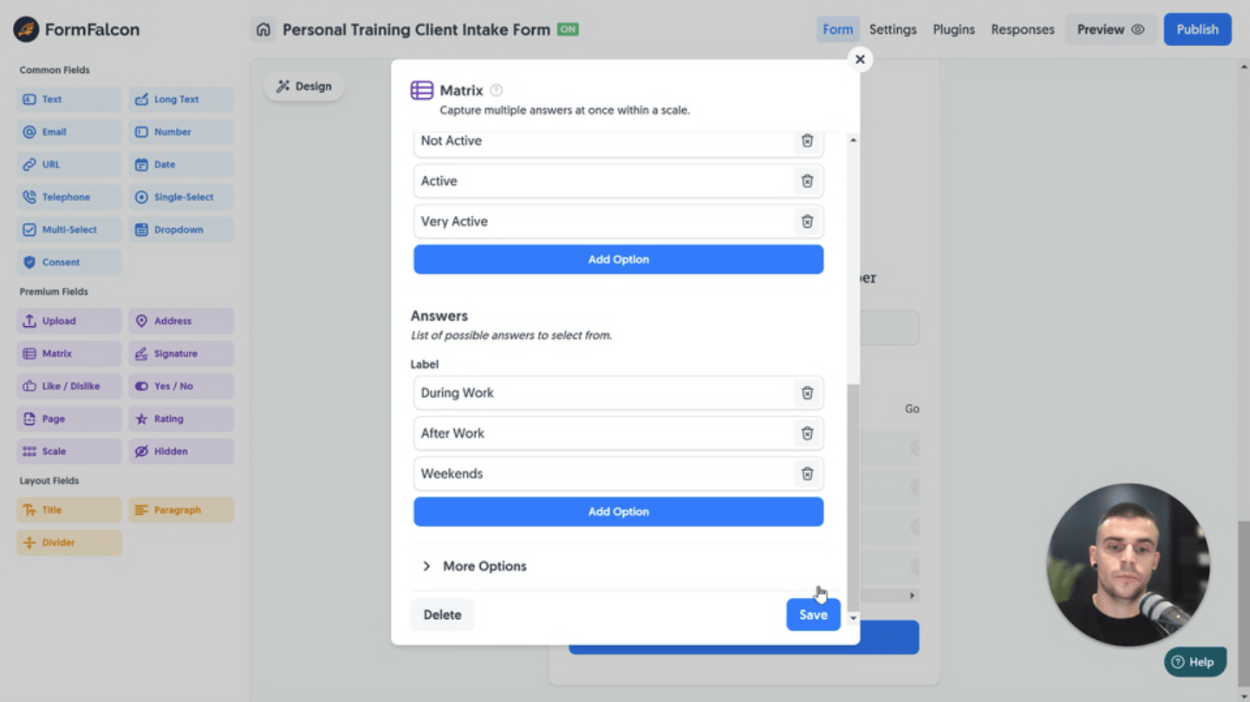
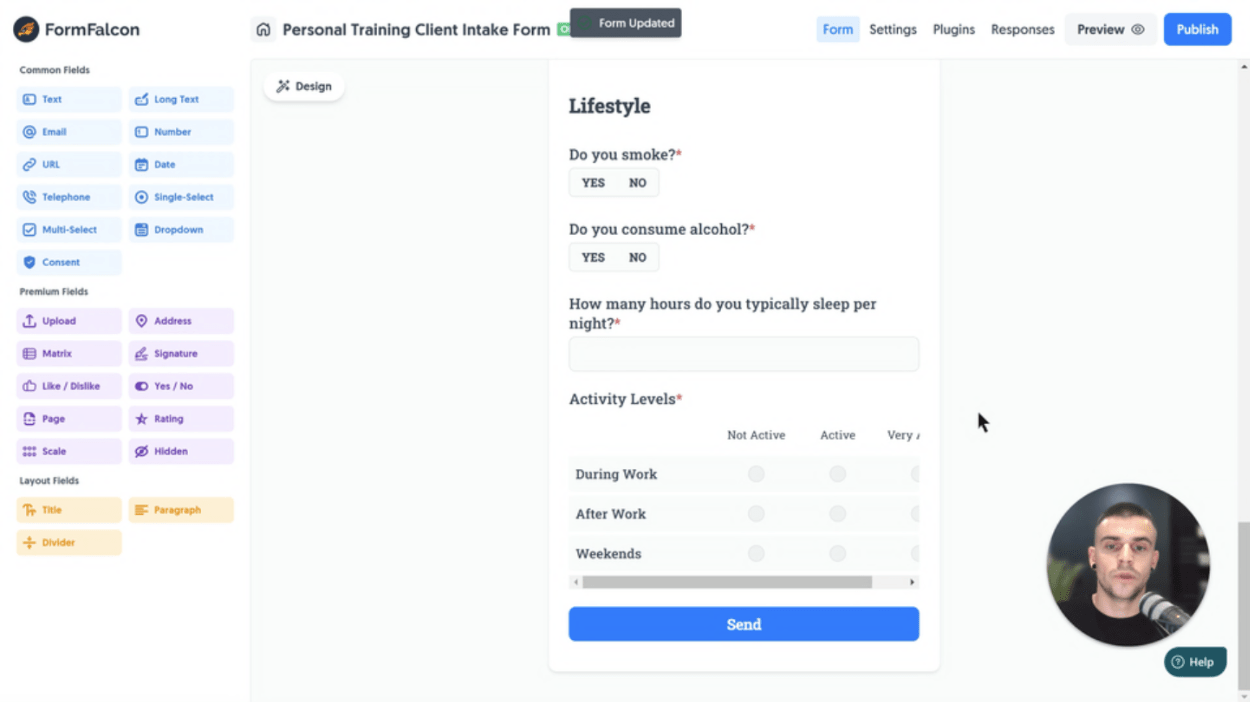
When we hit Save, we’re presented with a short and sweet Matrix Field the user can quickly fill out:
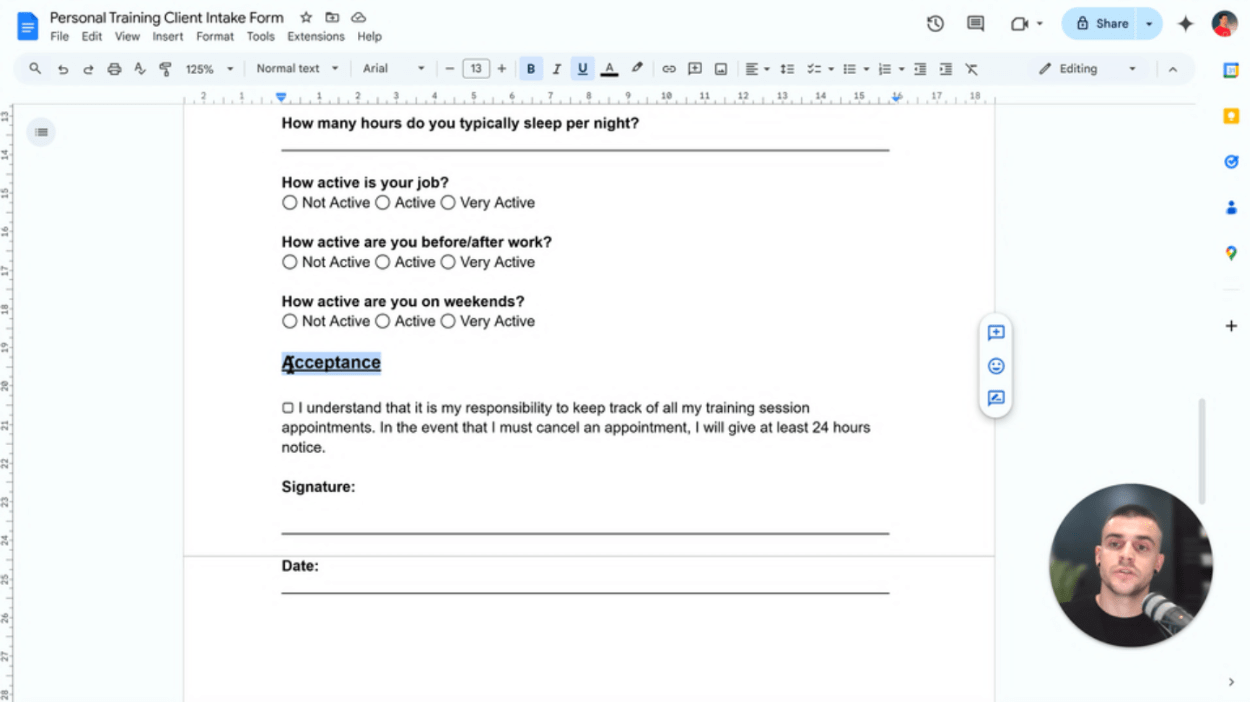
Our Acceptance block is up next, the final section of the form. Let’s take note here of the single checkbox and signature question:
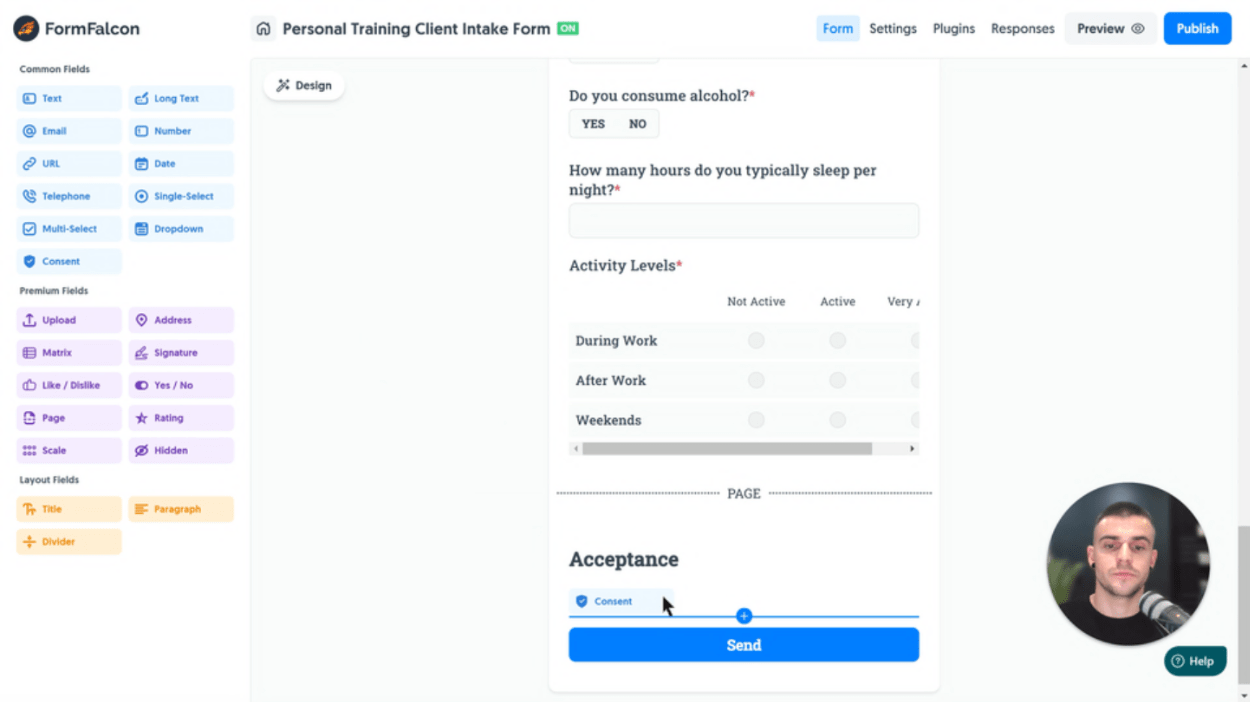
Add a final Title Field and set the Label to Acceptance, and drag in the Consent Field:
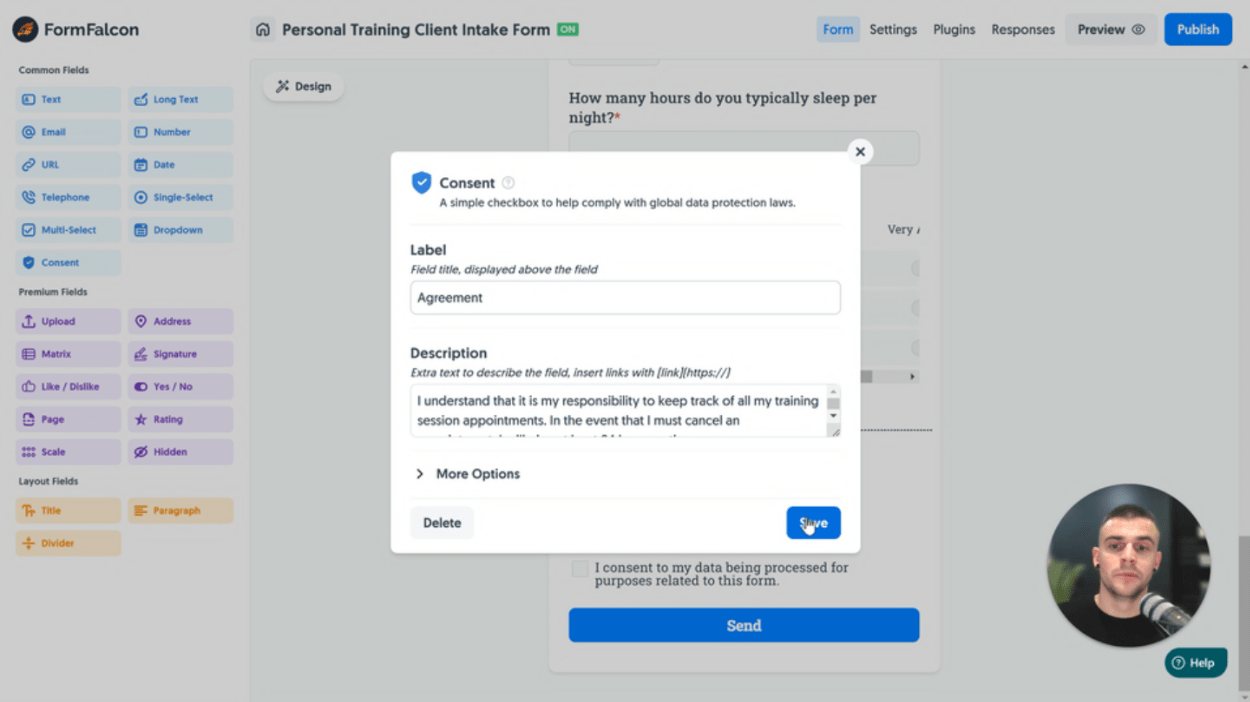
Click Edit on the Consent Field and enter our disclaimer that we want users to accept, then hit Save*:
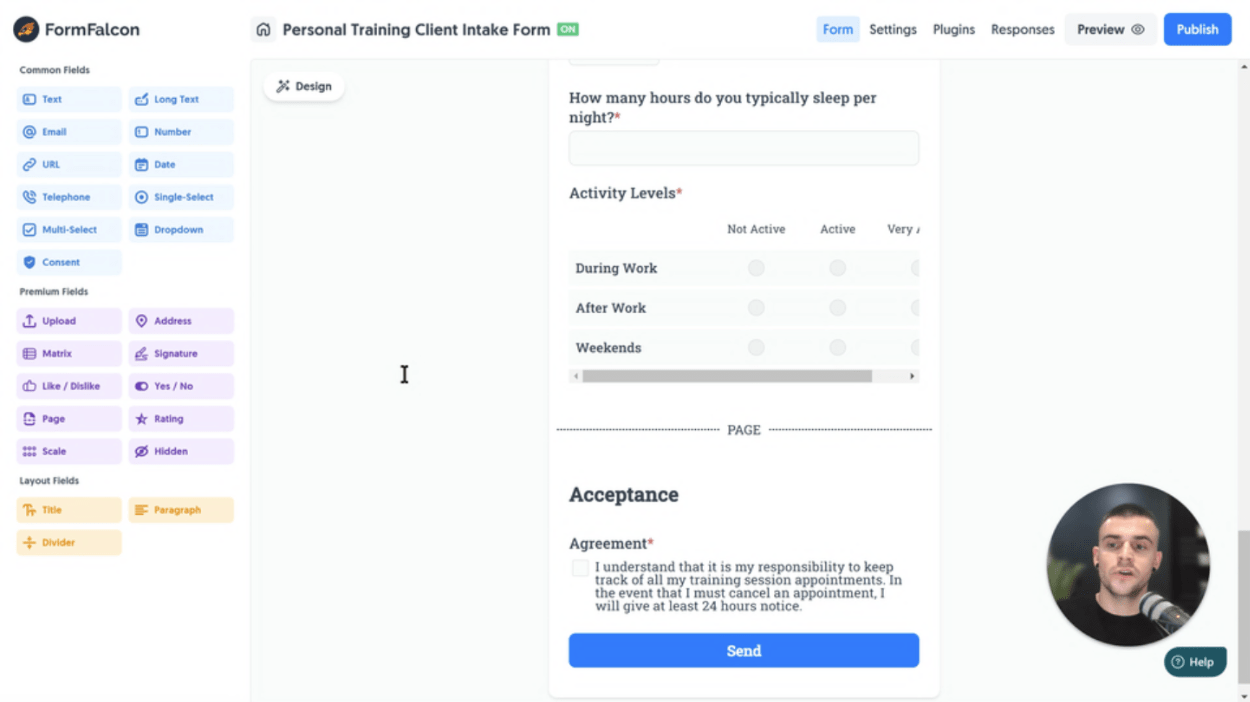
We then have a simple checkbox that is required to be ticked and accepted before the form will allow for submission:
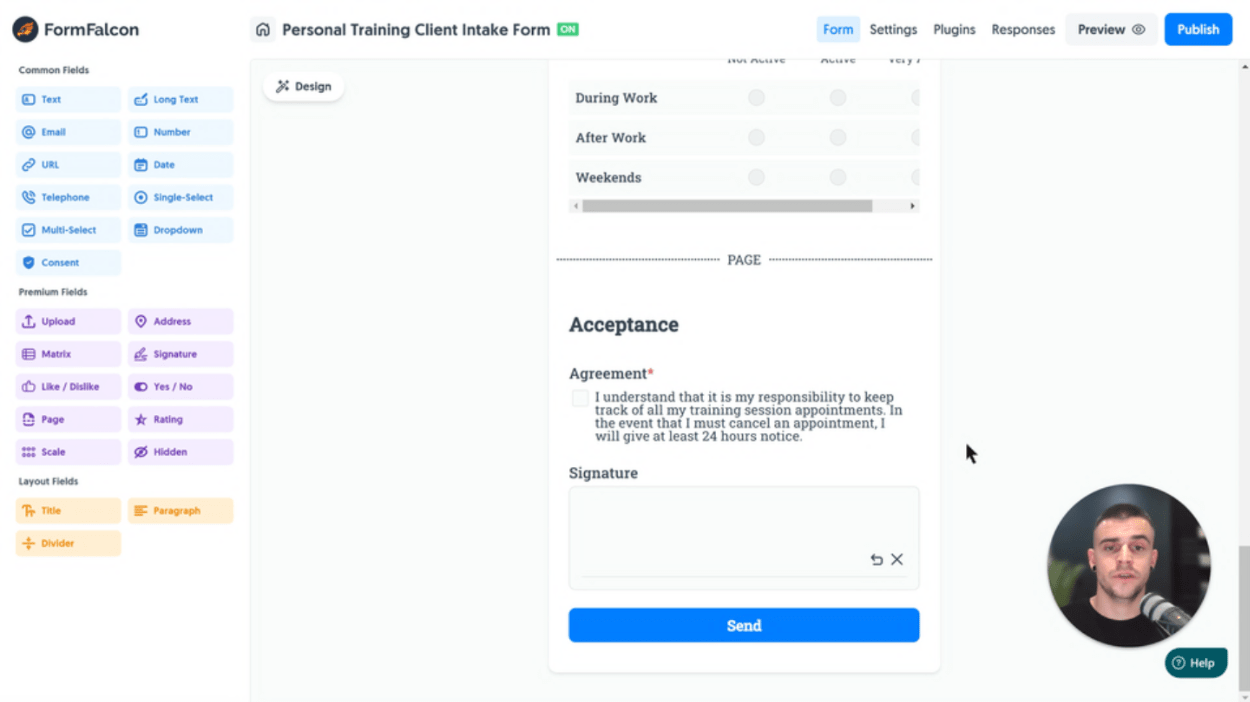
To add a signature, we’ll use none other than a Signature Field:
At this point, our form is complete. Or, is it? Let’s add some professionalism and branding!
Head across to the Design button:
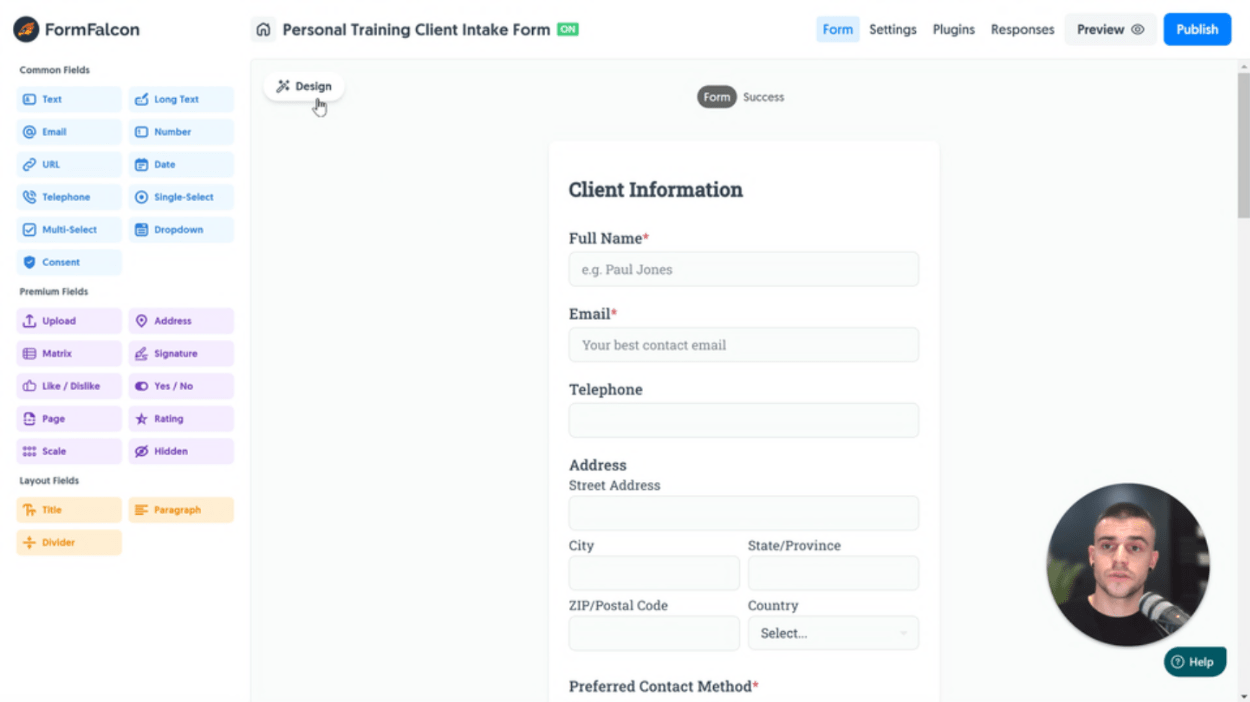
Click the Add Logo button and drag in your company logo for upload:
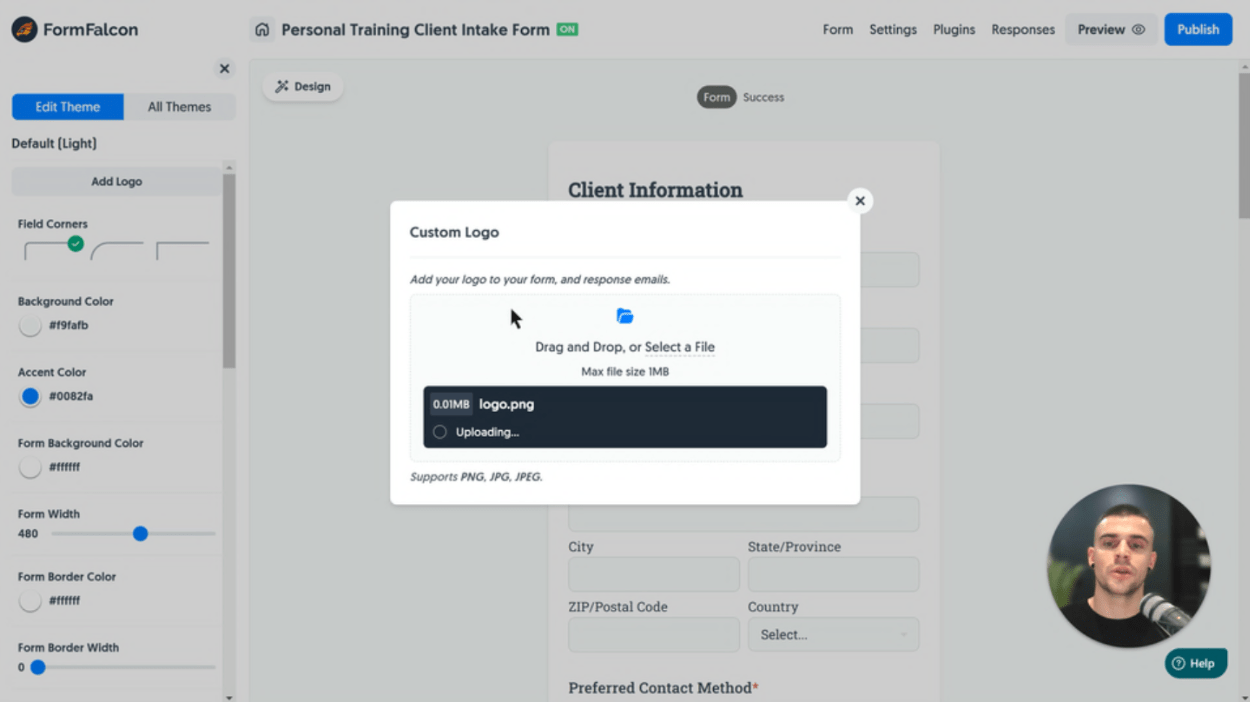
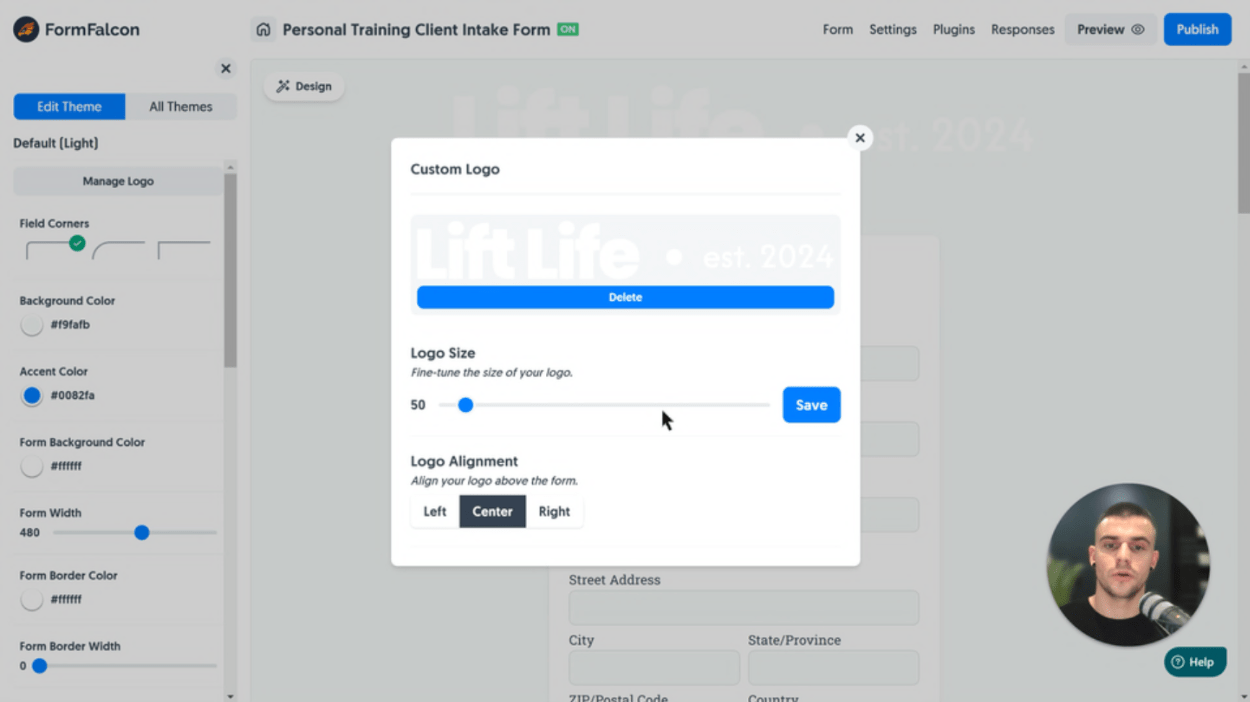
Once uploaded, we can resize the logo to fit:
Finally, let’s visit the Theme Library by clicking All Themes and selecting an appropriate one for our brand:
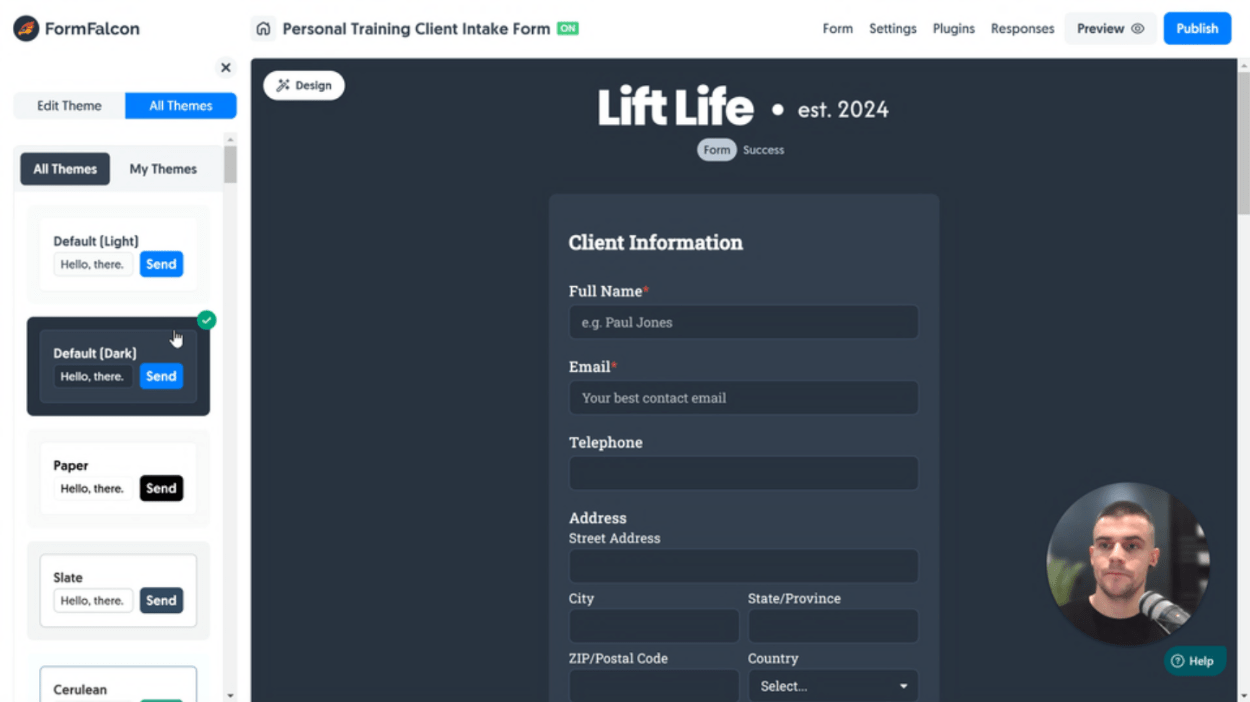
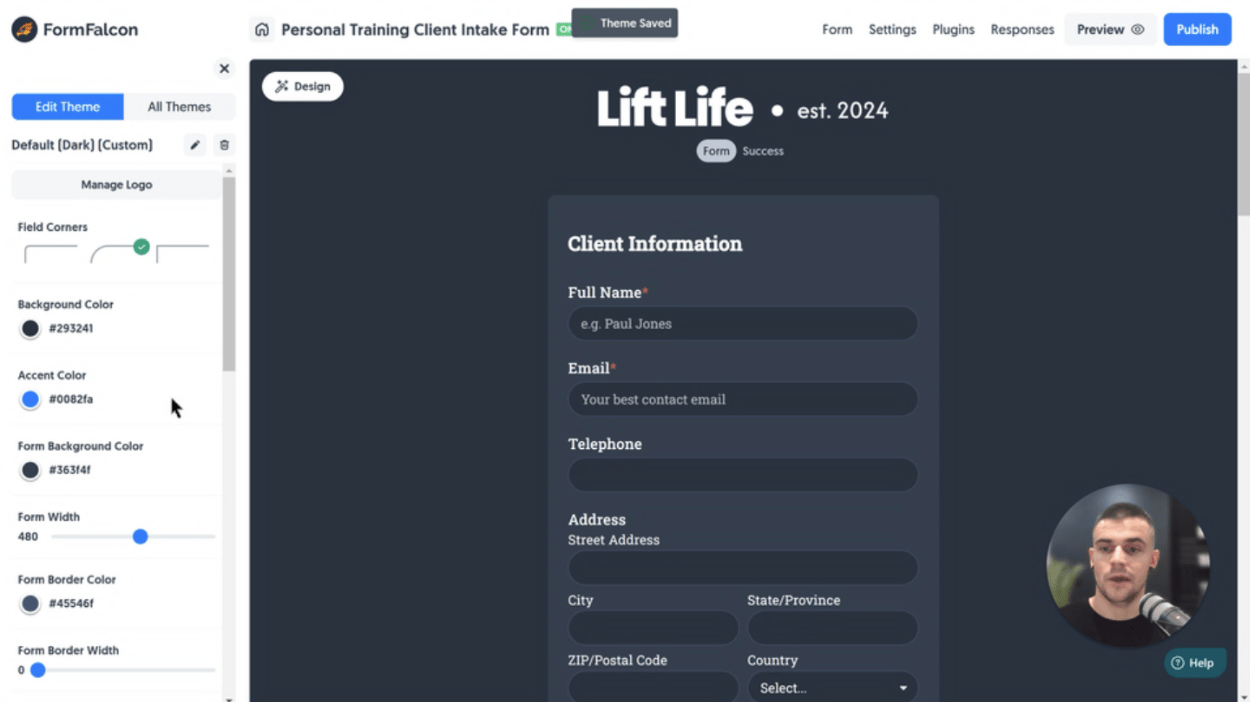
We’ll make a quick tweak to make the form fields nice and rounded for a softer look, done via the Edit Theme button and the Field Corners option:
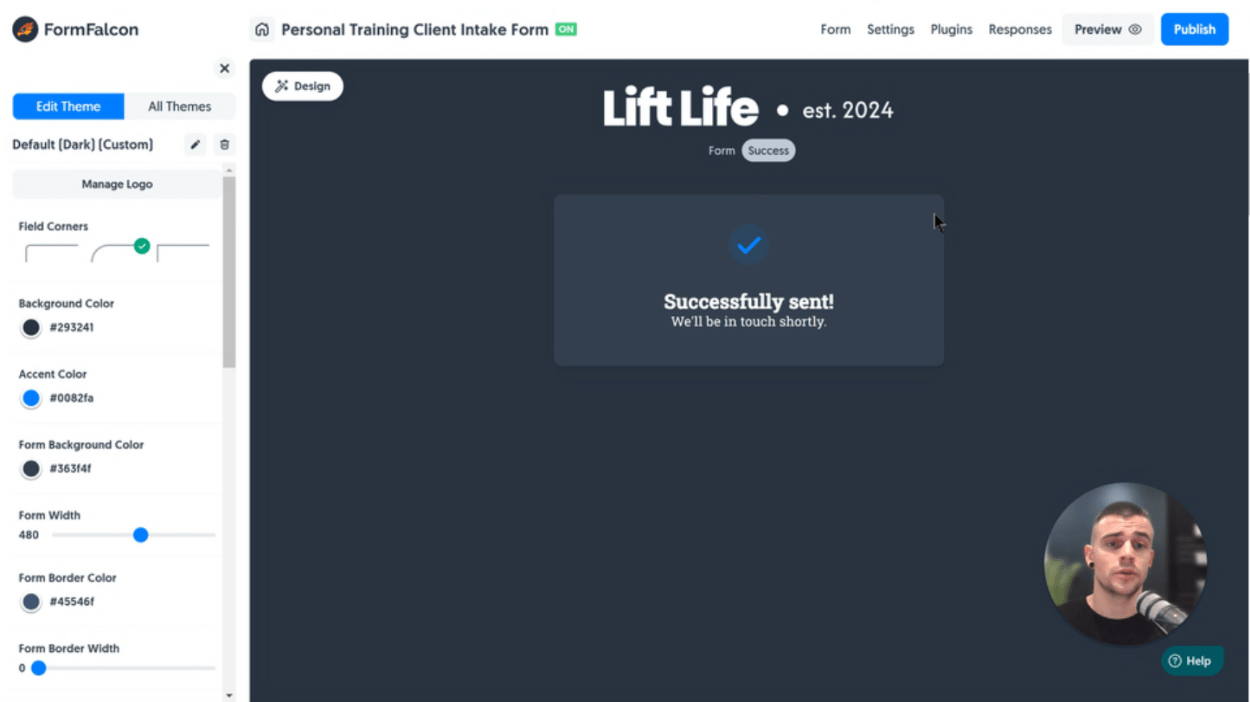
If we click the Success button above the form, we can also inspect what the form looks like after a user has submitted it:
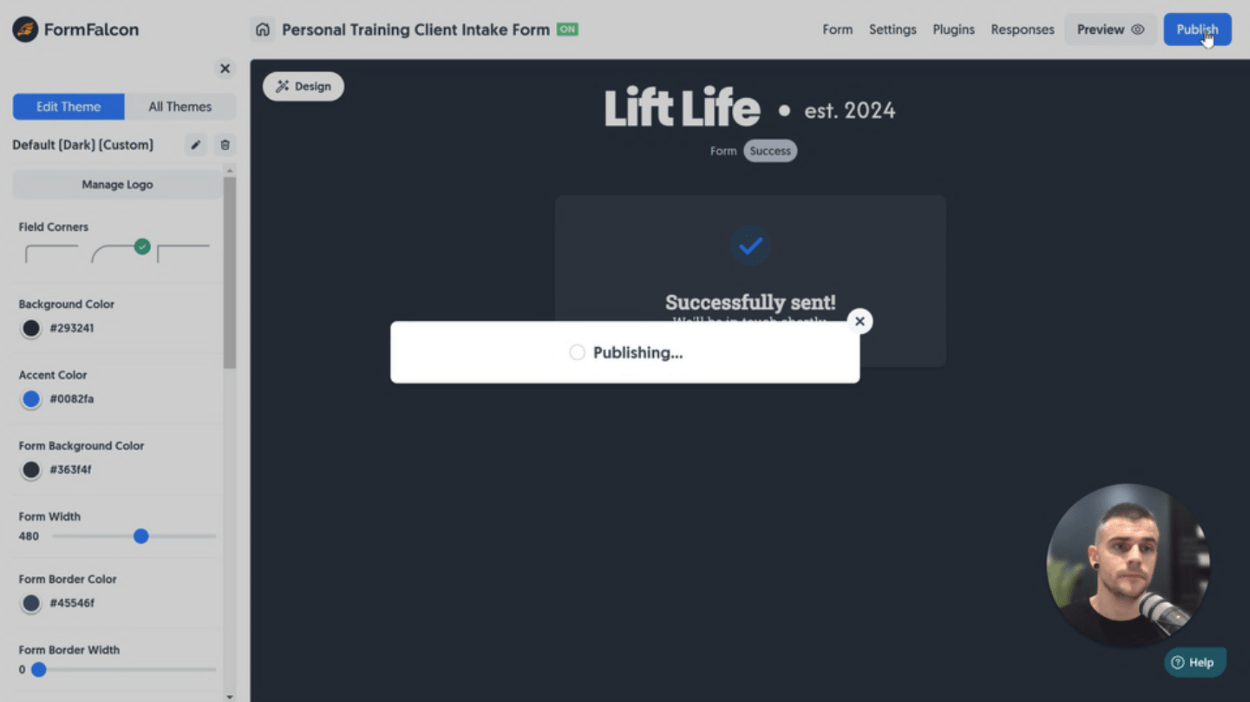
Time to publish and test it out! Click Publish in the top-right hand corner:
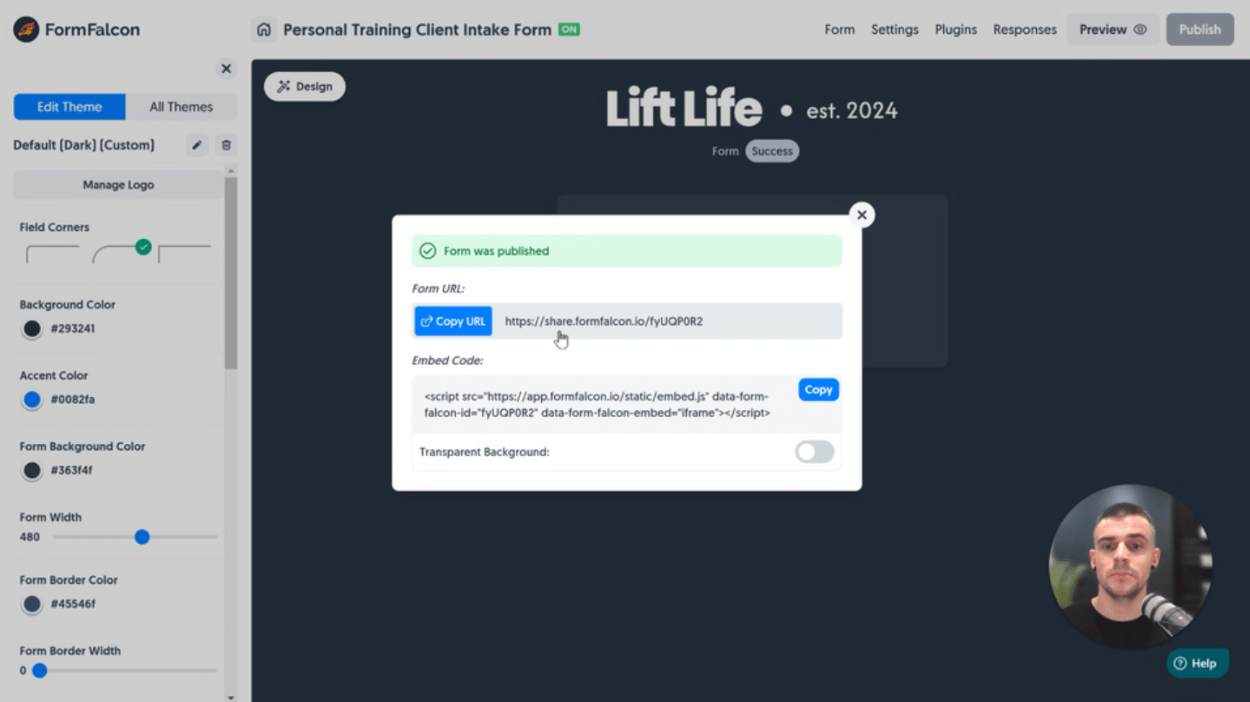
Once published, the form’s unique Share URL is available to either Copy or click to visit. Let’s click and visit our live form:
Let’s enter some real information into the form, acting as a real user:
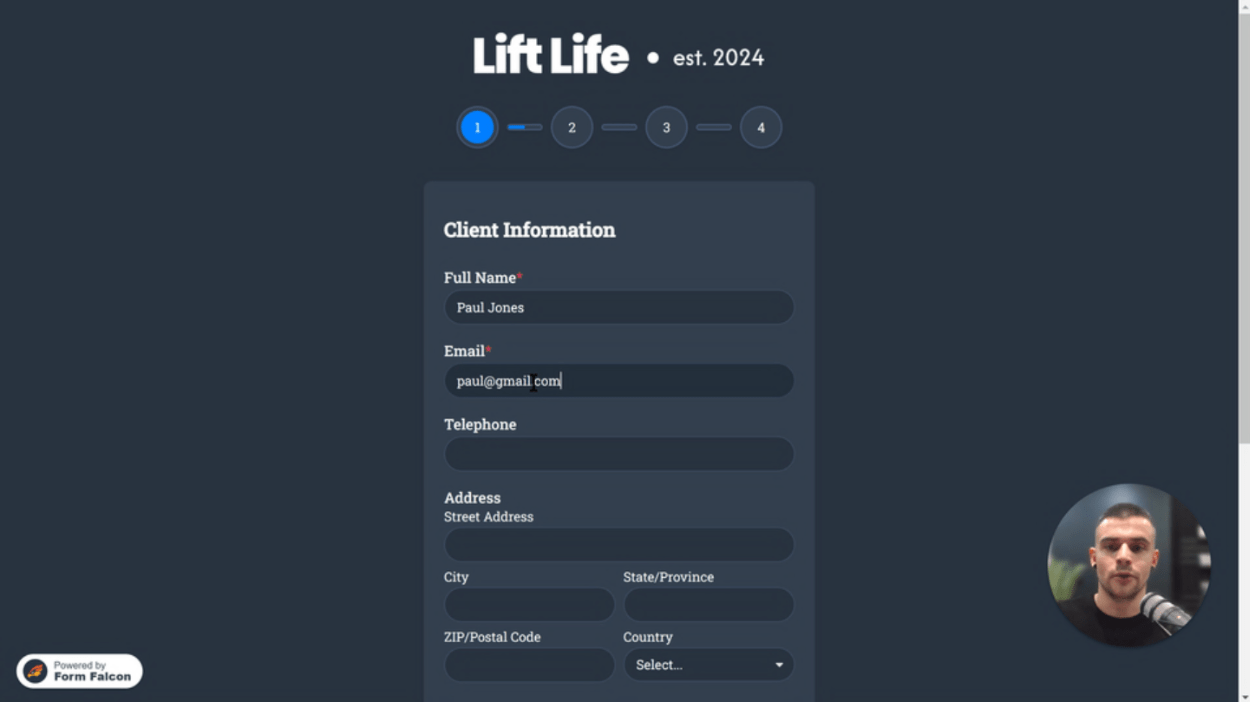
Proceeding to the next Page, we can also complete the answers:
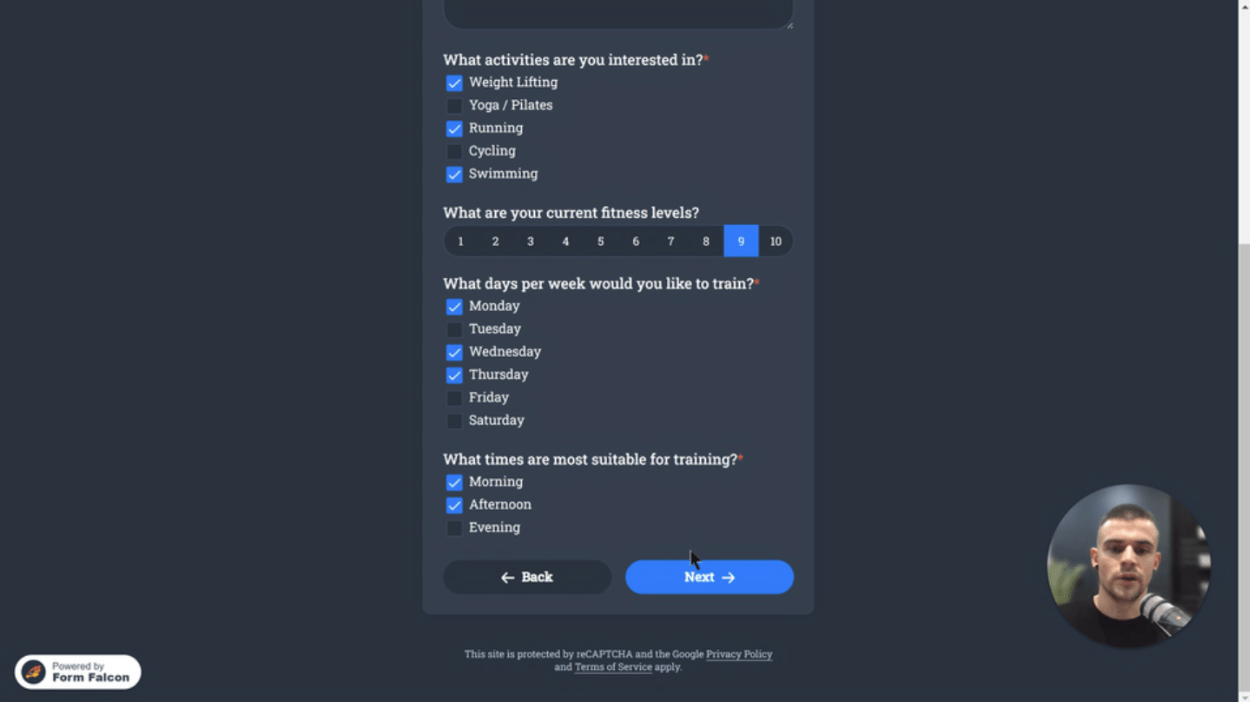
We’re almost done, so let’s answer some more questions and proceed to the next step:
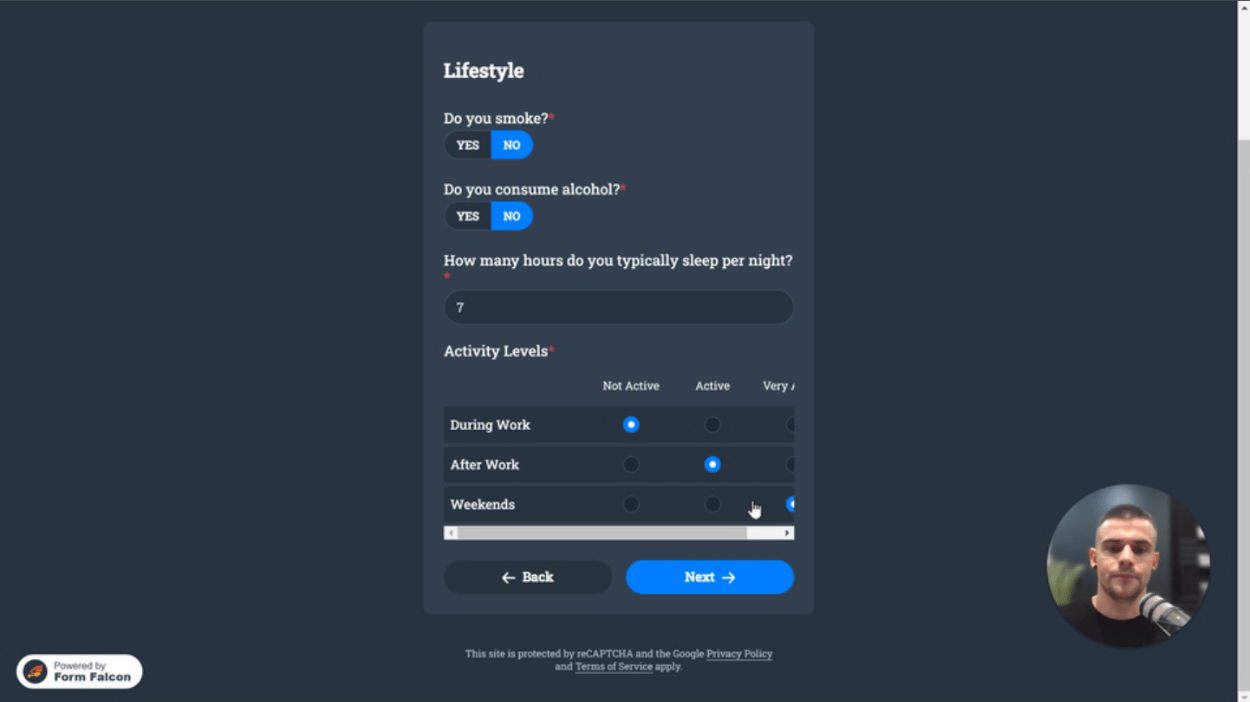
Check the box, enter a signature and hit Send:
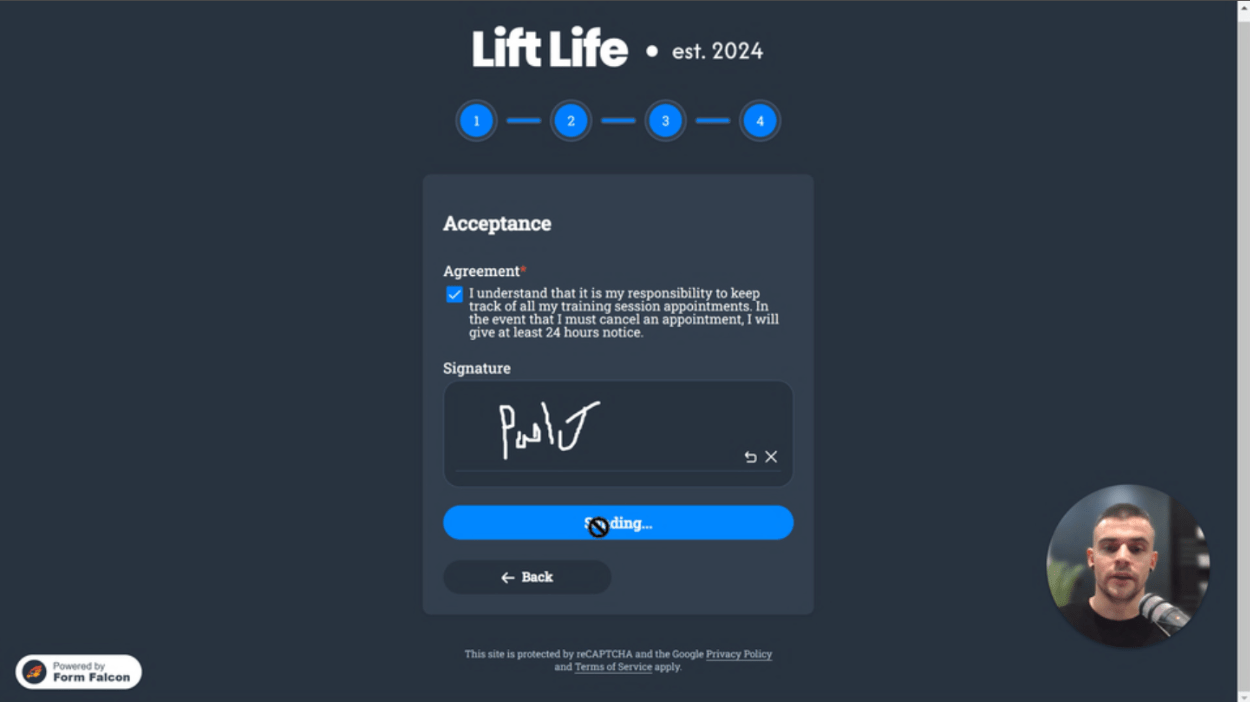
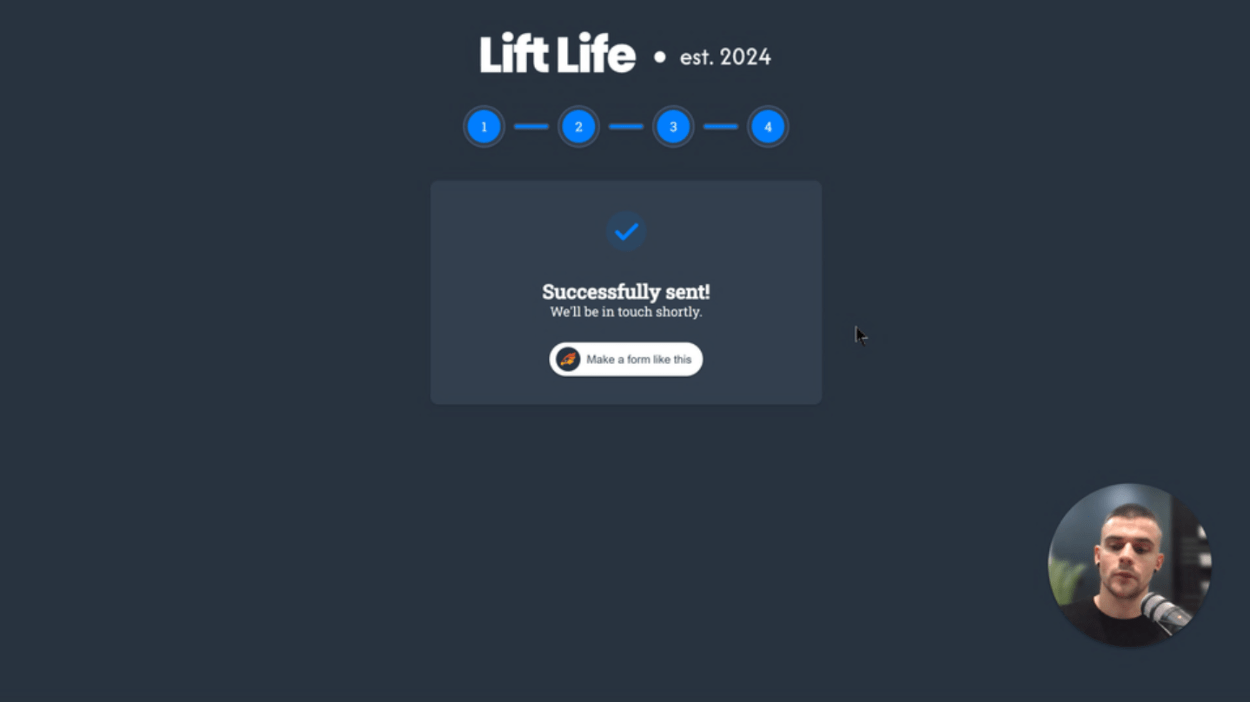
We’re then greeted with our Successfully sent! message, which is also fully customizable:
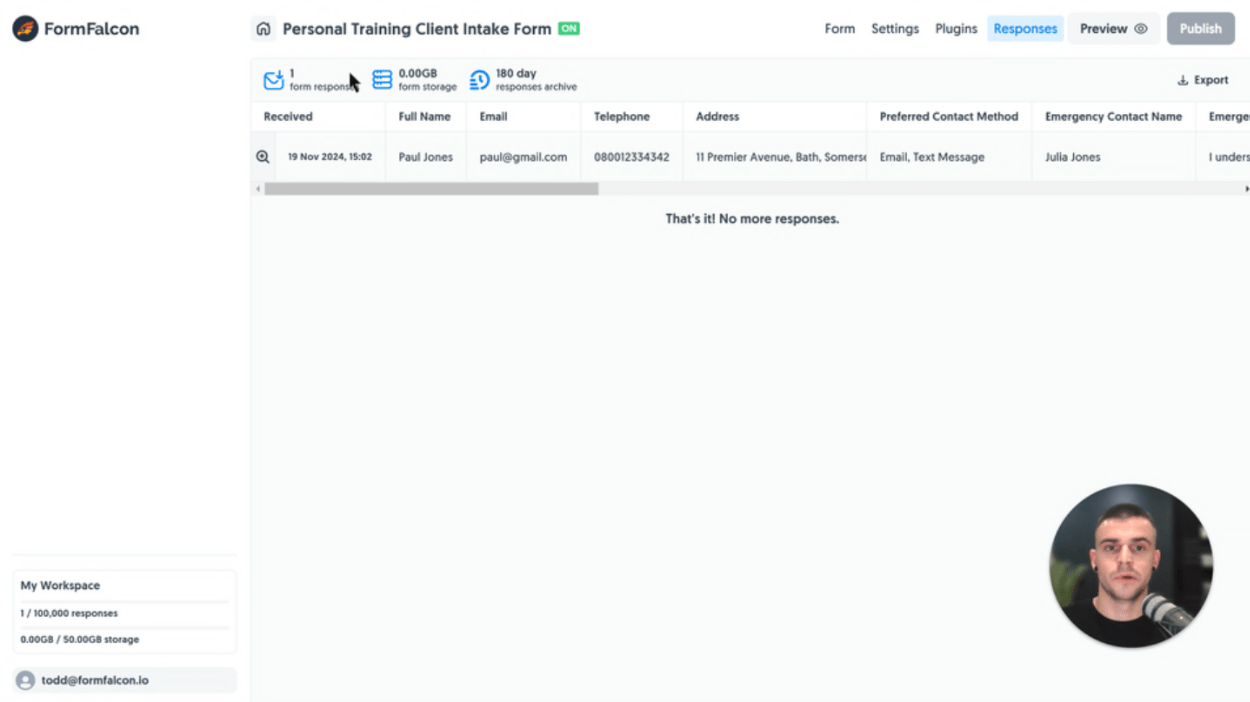
Back inside the Form Falcon app we can visit the Responses Dashboard and see the new response data:
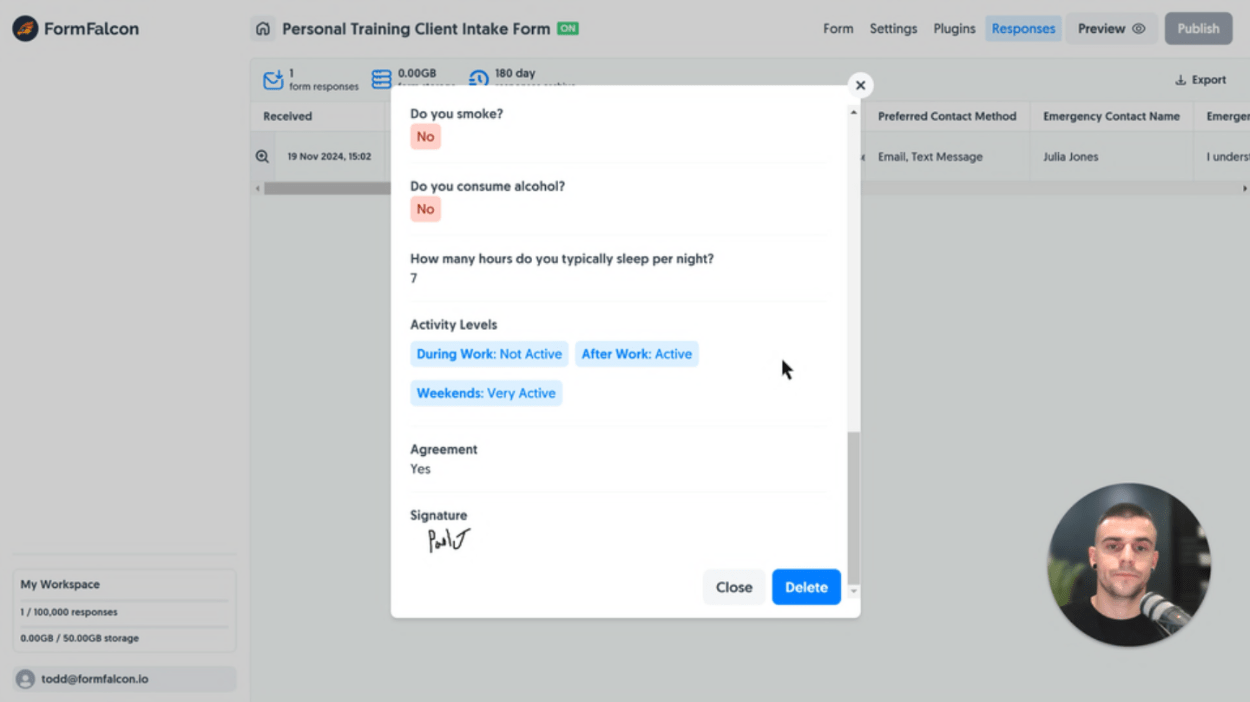
Easily click and expand to view the full response:
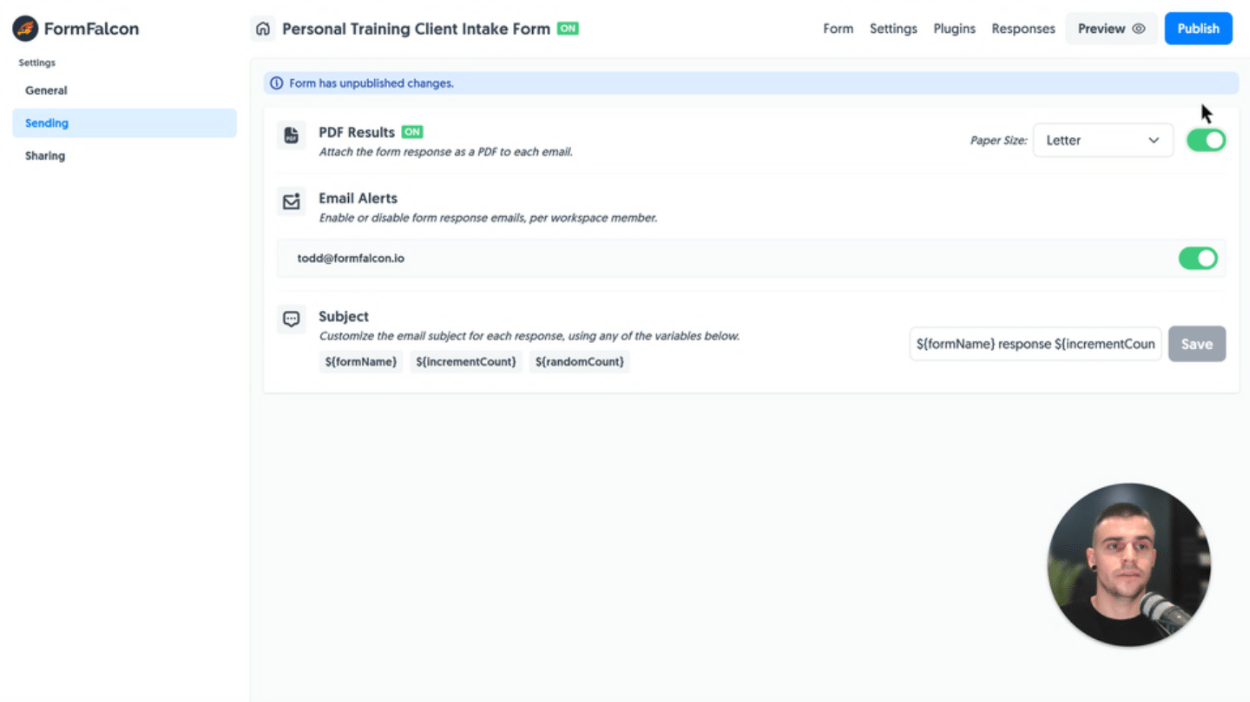
For use cases such as intaking client information with a signature, it’s also a great option to enable the PDF Results feature to send us not only the response via email, but a PDF Attachment of the response for easy download and safe-keeping:
And that’s it! It’s an easy process transforming a Paper Form into a Digital Form given the wide range of form fields available. We can not only save hours per week dealing with customer interaction, we’re streamlining our business efforts and processes to manage data more efficiently and reliably.
Plus, many customers can easily fill out your form in just a few moments - rather than burdening them with manually using pen and paper, scanning and emailing you the result back. That’s where lots of Paper Forms fall short in conversion rates, and Digital Forms can not only speed up the process for you and the customer, they’ll be far more likely to commit and get you the necessary data you’ve asked for - growing your business and leaving you to focus on running it.
If you’re ready to start your journey into the Digital Forms space, then we’d love to have you with us.
Simply create a free Form Falcon account and get started today. We’re always here to answer any questions too!
Create Forms that really convert your customers
Easily transform your out-dated paper forms into powerful digital forms to streamline your business.
Learn MoreCreate incredible forms to run your business.
