Available on plans: Professional, Premier, Enterprise
Use the Hubspot plugin to generate new contacts within a Hubspot account, complete with Lead Status and Lifecycle Stage options.
🚨 Note: For the creation and customization of each Hubspot contact, it’s essential to assign Custom Name values of each Hubspot internal property name to a form field. Refer to the tutorial below for detailed instructions. Any property names added to your form that do not exist in Hubspot will be disregarded.
Setup the Plugin
Navigate to the Plugins tab on your selected form, choose “Hubspot” then click the Connect to Hubspot button to launch the authorization popup:

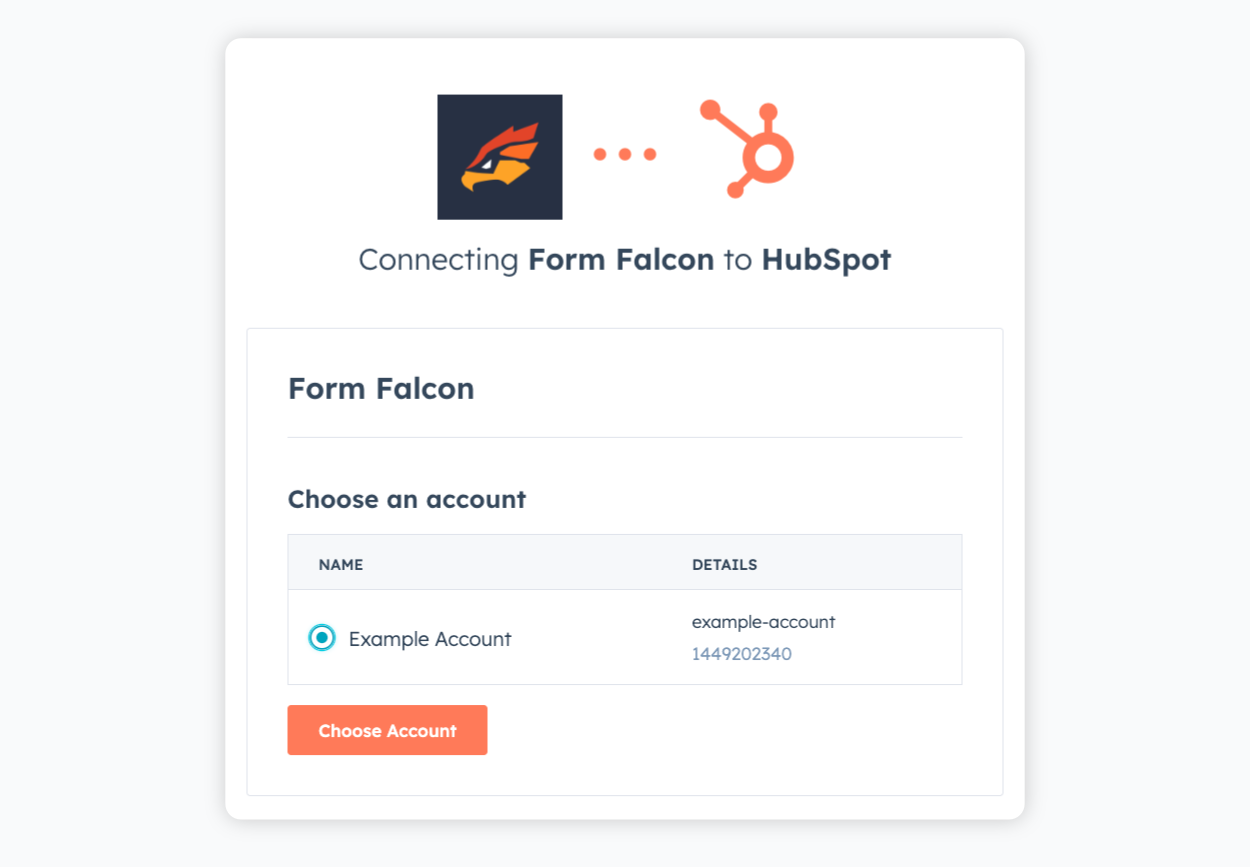
This opens an authorization window where you can select an account or sign in. Click “Choose Account” once logged in to proceed:
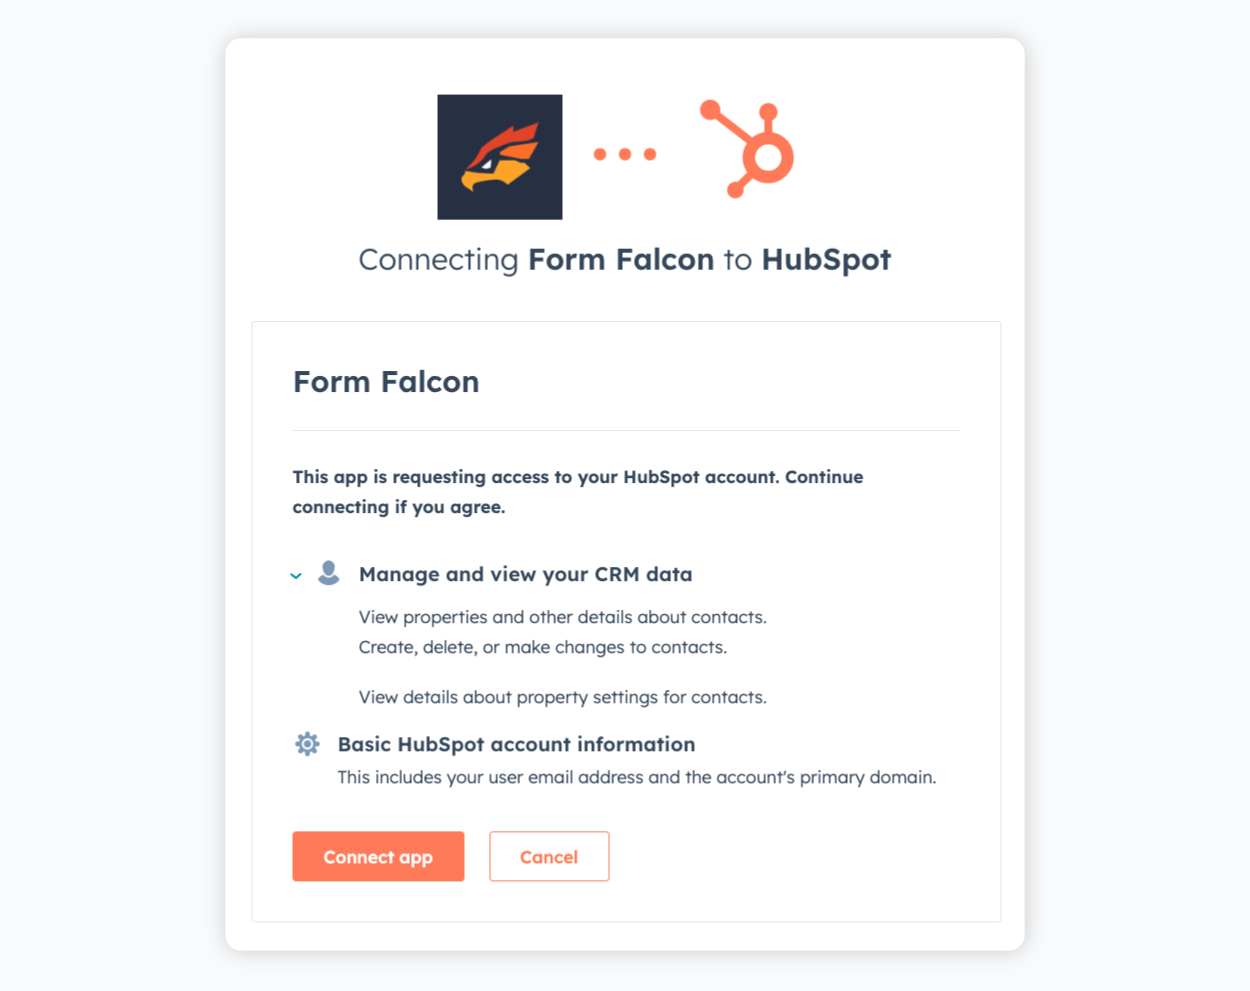
Next, you’ll see the permissions required to add new contacts to your account. Click “Connect app” to complete the authorization process:
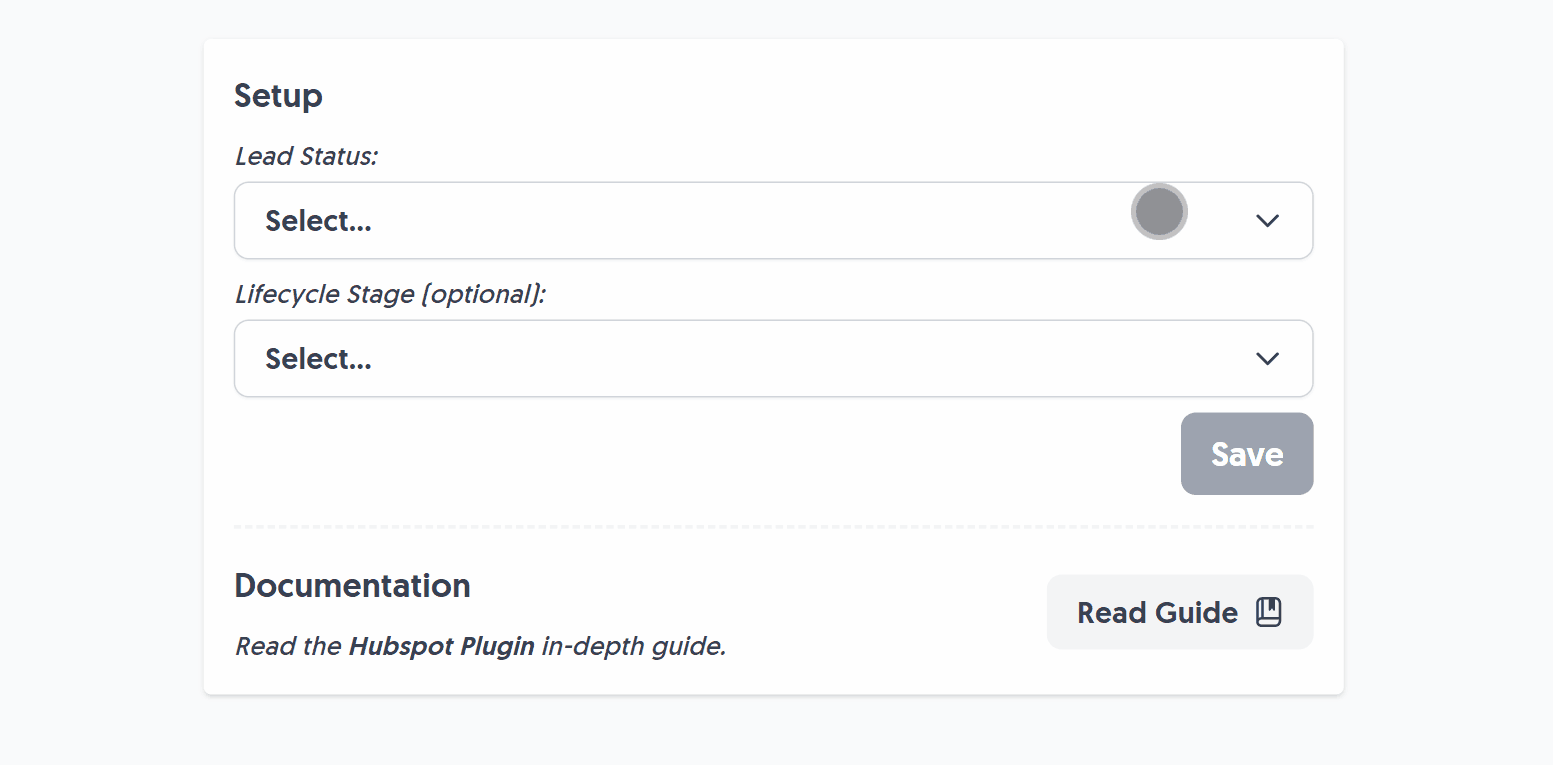
Once Hubspot is authorized, we’ll display a Lead Status and (optional) Lifecycle Stage option to select from:
🔗 Learn more about Hubspot Lead Status and Lifecycle Stages.
Once setup, you’ll see your chosen Lead Status and Lifecycle Stage.
Customization
Sync Contacts with Hubspot
To generate new Hubspot contacts in your contact list, with fields such as First Name, Last Name, Company or Email, you need to specify the Hubspot “internal property name” as custom name values in form fields.
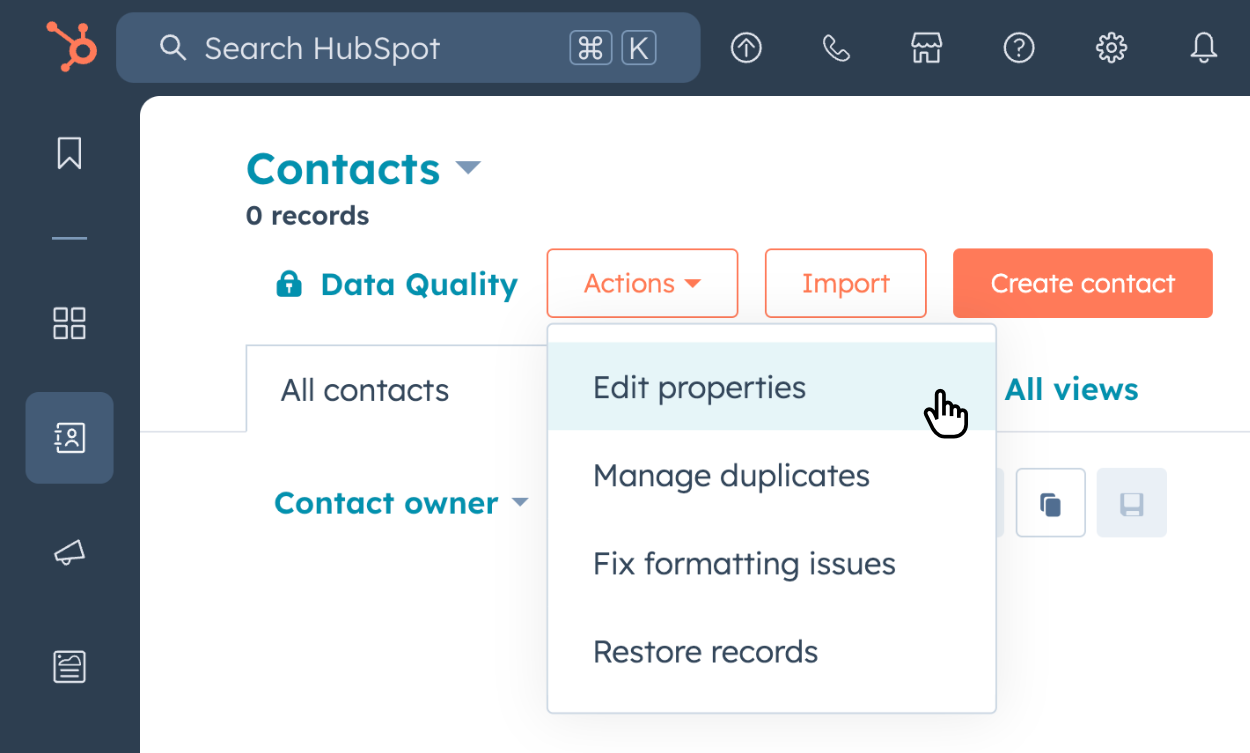
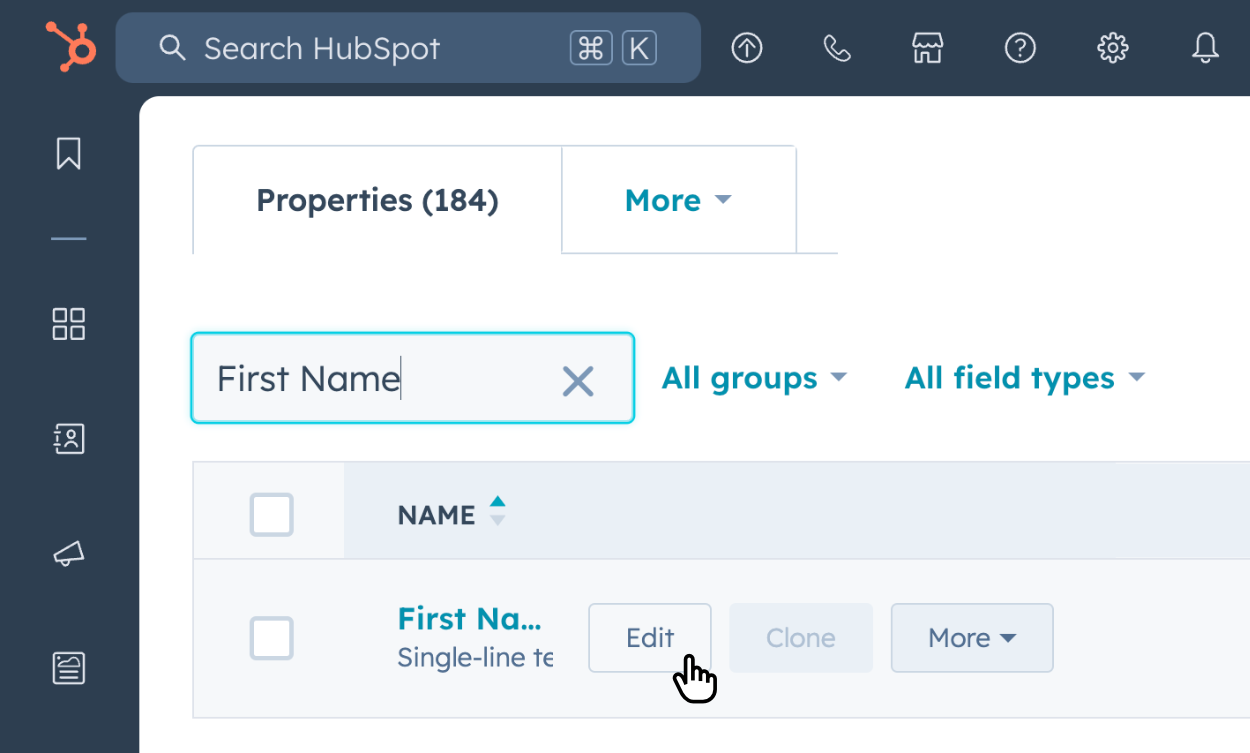
First, click on Contacts inside Hubspot and then click the “Actions” button to select “Edit properties”:
This takes you to a new page of 100+ property names Hubspot has available by default, you can find a property by scrolling or type its name into the filtering box, such as First Name. Once you’ve found a property you wish to use, click “Edit”:
This reveals a popup which exposes the Hubspot “internal property name” behind the </> icon, go ahead and copy it to use it in your form.
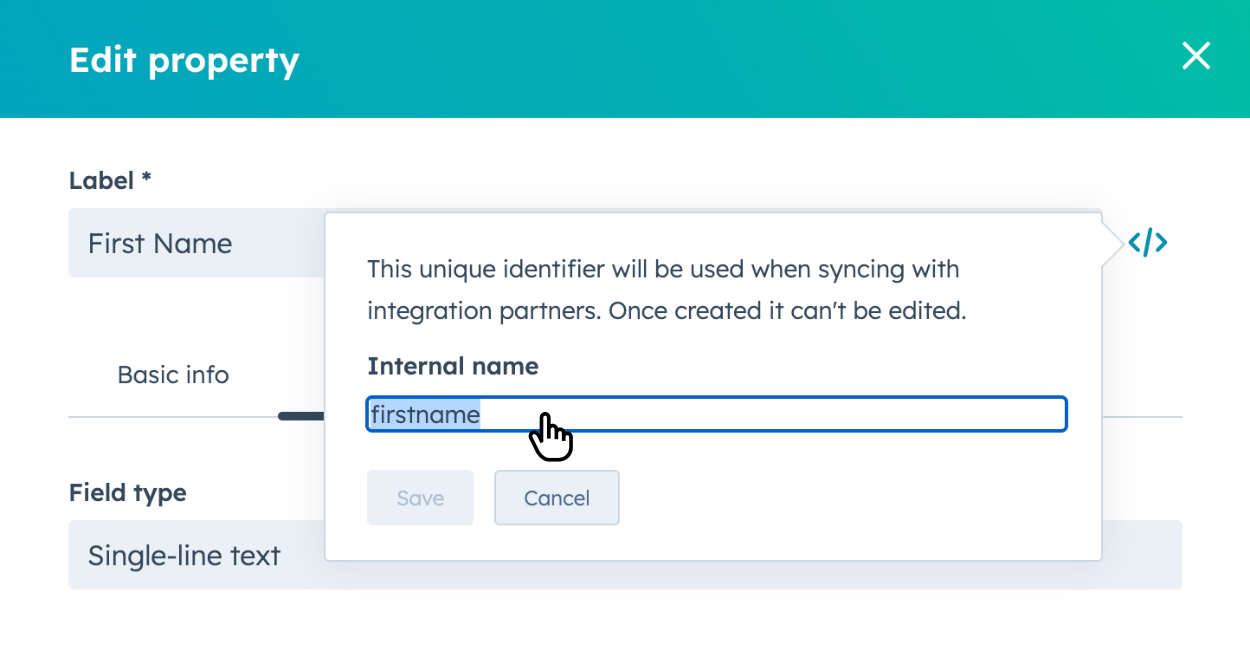
For instance, when viewing the “First Name” property, note that “firstname” is the Internal name. These are necessary to reference the correct fields and accurately set contact data.
🔗 Here’s a list of all Hubspot’s default contact properties for easy access.
Examples of common Hubspot property names:
email- required for a new contact’s emailfirstname- contact’s first namelastname- contact’s last namesalutation- contact’s salutationcompany- contact’s company nameindustry- contact’s industry sectorjobtitle- contact’s job titlephone- contact’s phone numbermobilephone- contact’s mobile phone numberaddress- contact’s street addresscity- contact’s citystate- contact’s state/regionzip- contact’s zip/postal codewebsite- contact’s website URL
To associate any of these internal property names with a form field, click “Edit” on a form field, select “More Options” at the bottom and enter any Hubspot property name in the “Custom Name Value” field:
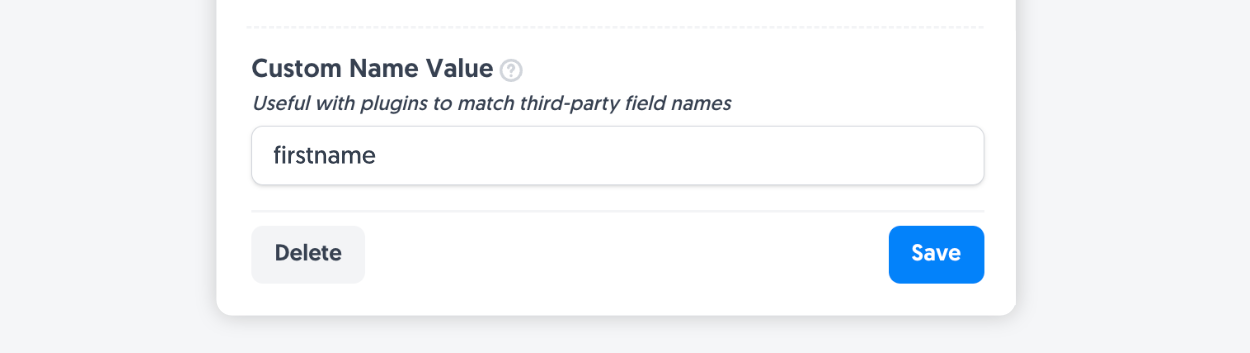
Once this field is populated, its value will be assigned as the Hubspot property value.
Merging Lead Status and Lifecycle Stages
When a Hubspot Contact is created for the first time, it will contain your configured Lead Status and Lifecycle Stage.
These Hubspot options help you manage each contact in your CRM, and you will be responsible for updating them within your Hubspot account.
This plugin supports updating contacts, which means you need to merge or ignore any existing Lead Status and Lifecycle Stage values if the same user fills out your form again (or perhaps you have another form connected to Hubspot as well).
Example: if you’ve changed a Lead Status inside Hubspot for a contact from “New” to “Open”, and they submit another form response - by default the plugin uses your configured Lead Status and Lifecycle Stage values to update that contact every time. In our scenario, this means that even though you’ve changed the Lead Status from “Open” to “New”, it will set it back to Open if you check the “merge” option.
Leave the merge options alone if you wish to set their Lead Status and Lifecycle Stage only once, and ignore it for any future updates where the contact may fill in your form again.
Pro Tip: The Lifecycle Stage value can only move forward in the lifecycle stages when merged, and cannot be set ‘backwards’ upon updating an existing contact. The Lead Status can be merged and updated to any value.
Plugin Demo
After setting up the Hubspot Plugin, it’s time to take it for a spin.
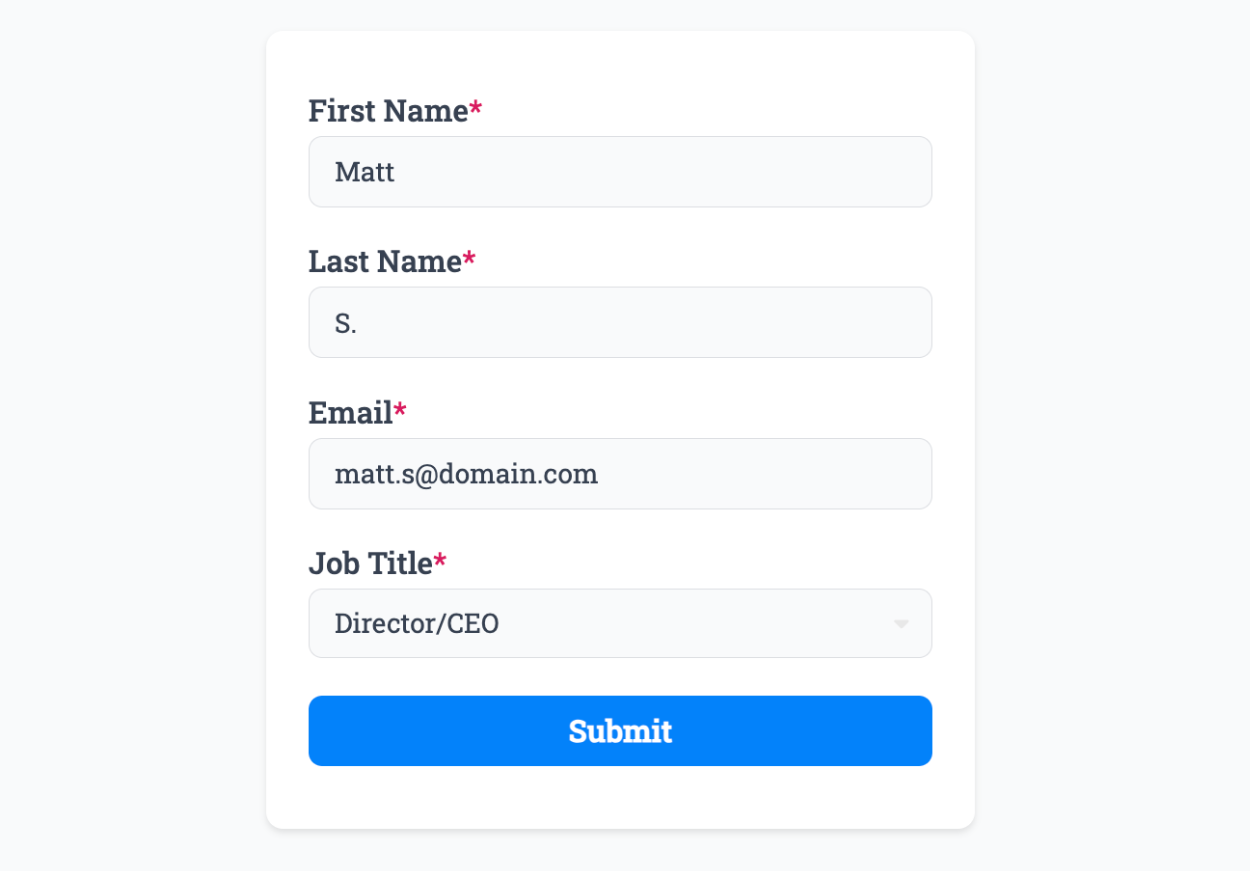
This form has been configured using a Custom Name Value to use the Hubspot internal property name references.
- “First Name” field is
firstname - “Last Name” field is
lastname - “Email” field is
email - “Job Title” field is
jobtitle
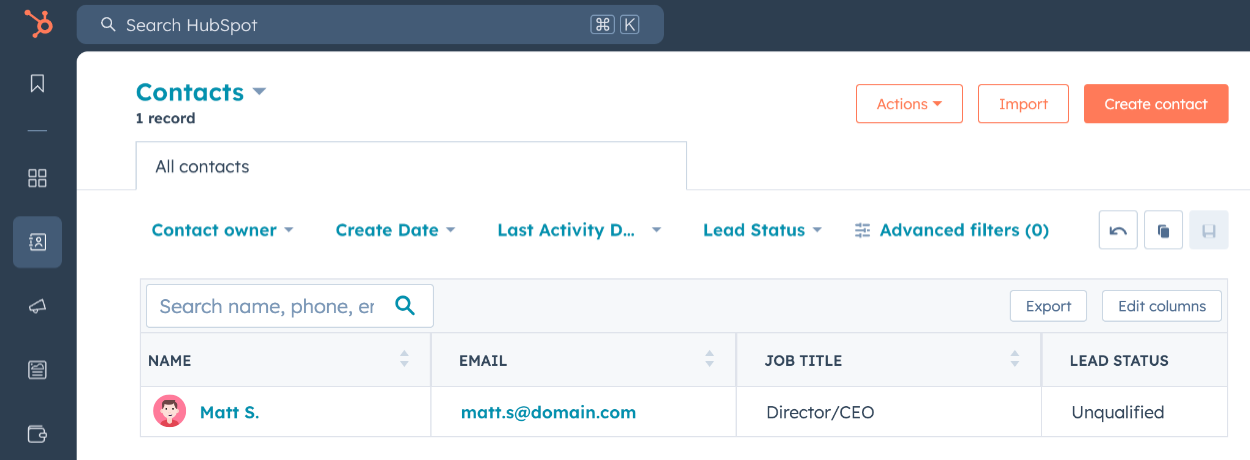
When we submit the form, a Hubspot contact is created with all the relevant property data in the correct fields:
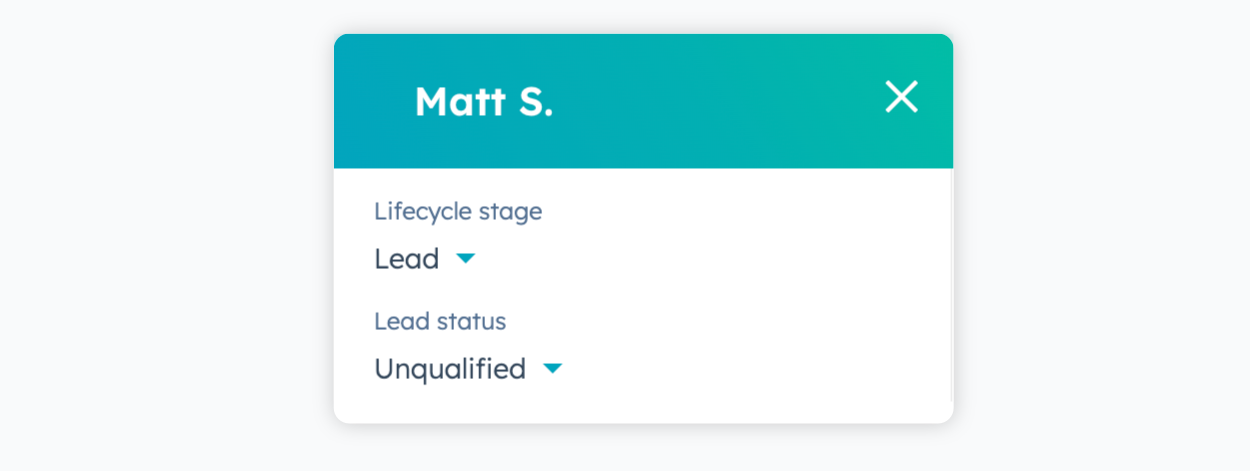
Finally, you can click on a contact to inspect the Lead Status and Lifecycle Stage that we set earlier during the plugin configuration.
From now on, every time a user submits your form, the Hubspot Plugin will create a new contact for you.
That’s it! You can contact us for help anytime.
Create incredible forms to run your business.
Join companies of all sizes using Form Falcon to manage their business, generate more sales and power custom workflows.
Try It FreeFree 30-day trial, no credit card required.