Available on plans: Professional, Premier, Enterprise
Use the Mailerlite Plugin to create Mailerlite subscribers from new form responses, and update any existing subscribers.
✅ Add new subscribers to your subscriber list and optionally slot them into single or multiple groups, complete with options for conditional opt-in or always opt-in.
Setup the Plugin
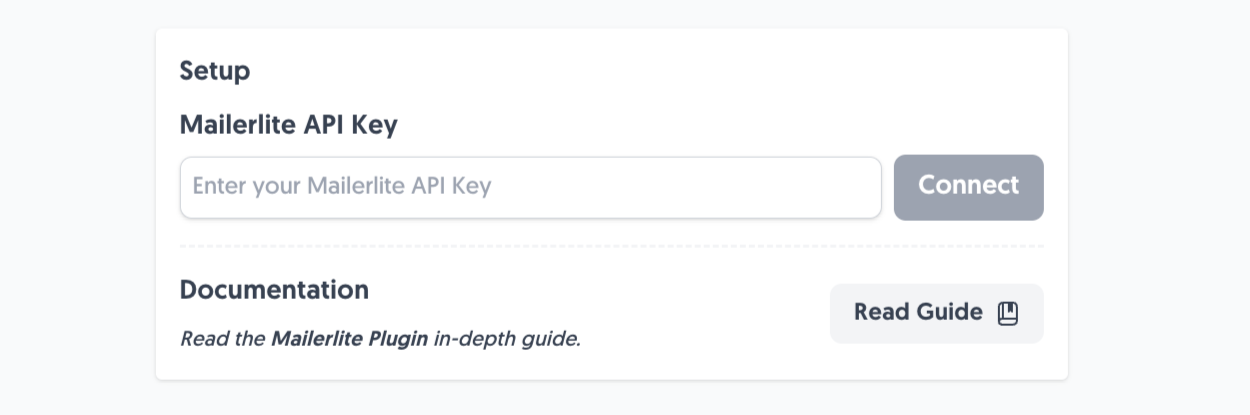
Navigate to the Plugins tab on your selected form, choose “Mailerlite” then you’ll see a field to drop in your Mailerlite API Key:
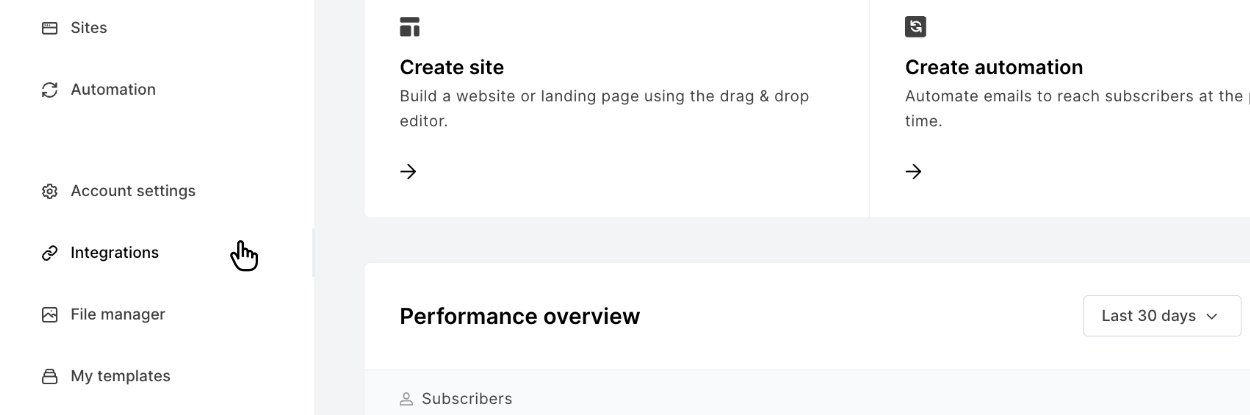
To get a Mailerlite API Key, you’ll need to visit your Mailerlite Account to get this.
🚨 Hold Up: If you’re using the “Classic” version of Mailerlite, you’ll get your API key this way instead.
Once logged in, visit the Integrations tab:
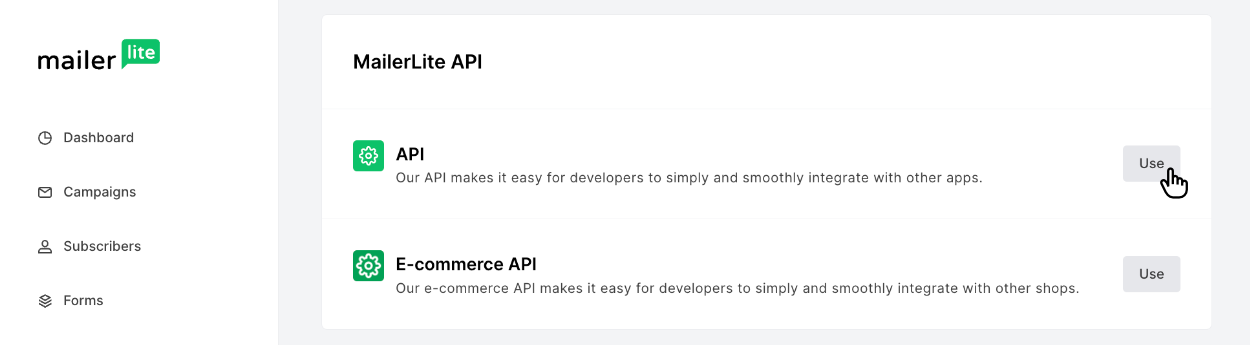
Then, head over to the API section and click “Use”.
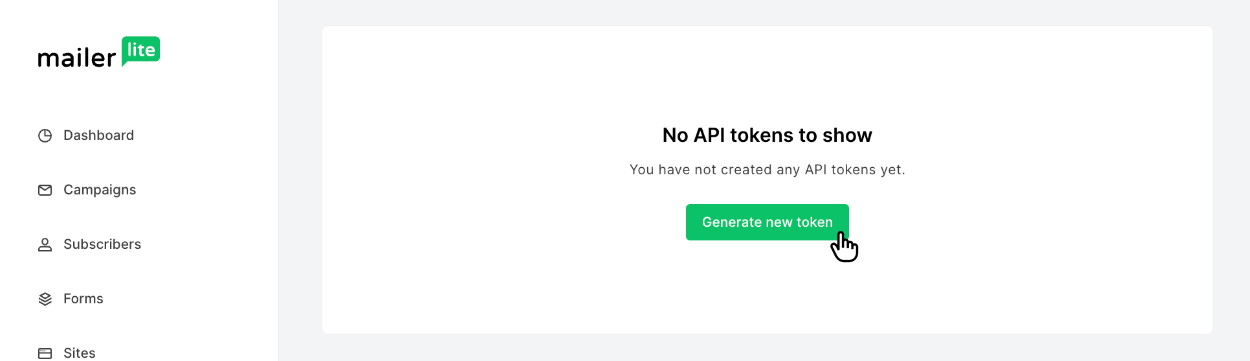
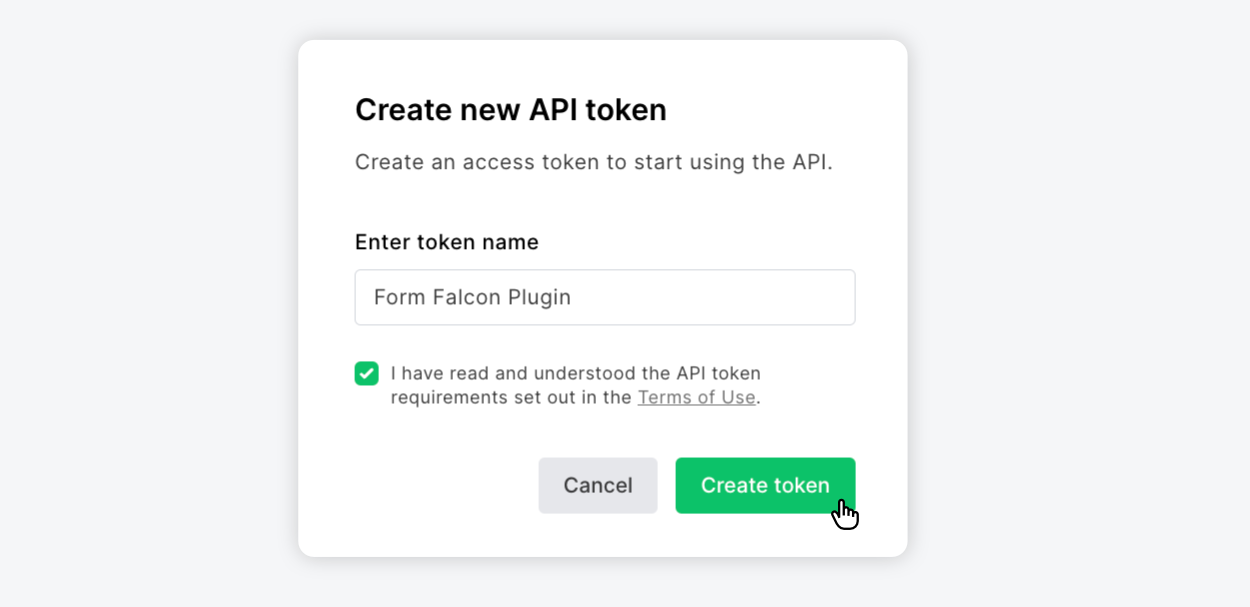
Click “Generate new token”
This pops up a box that asks what you’d like to label the API key, then press “Create token”:
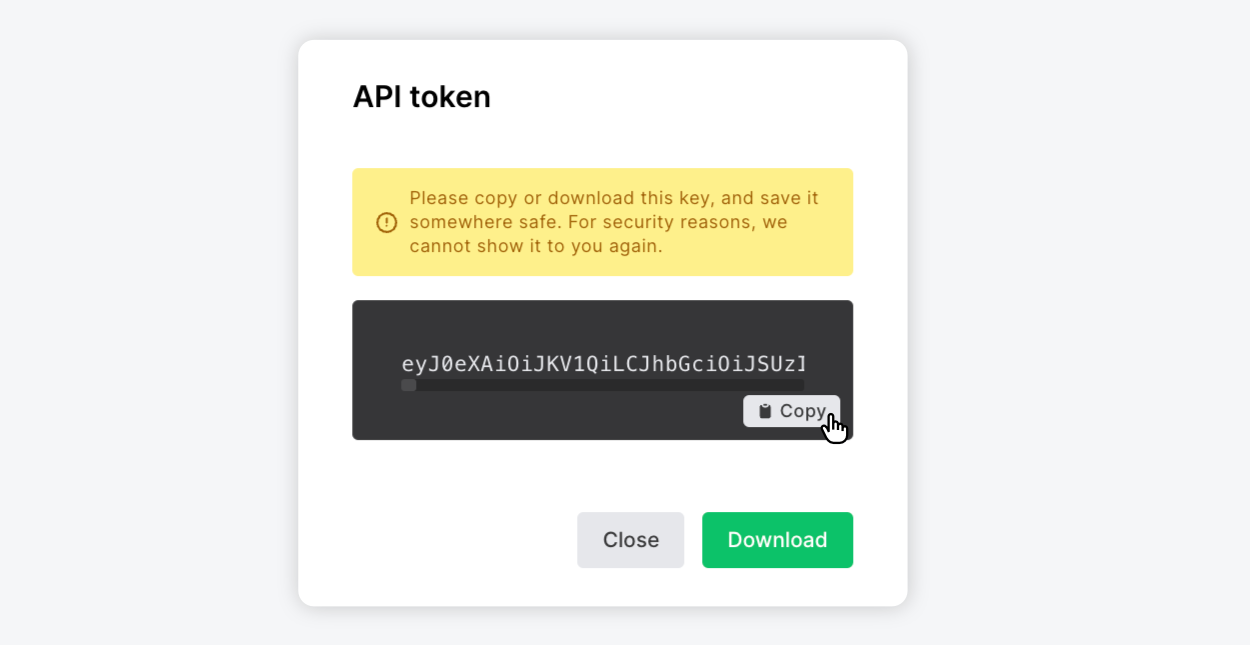
Then, copy the token that’s given to you:
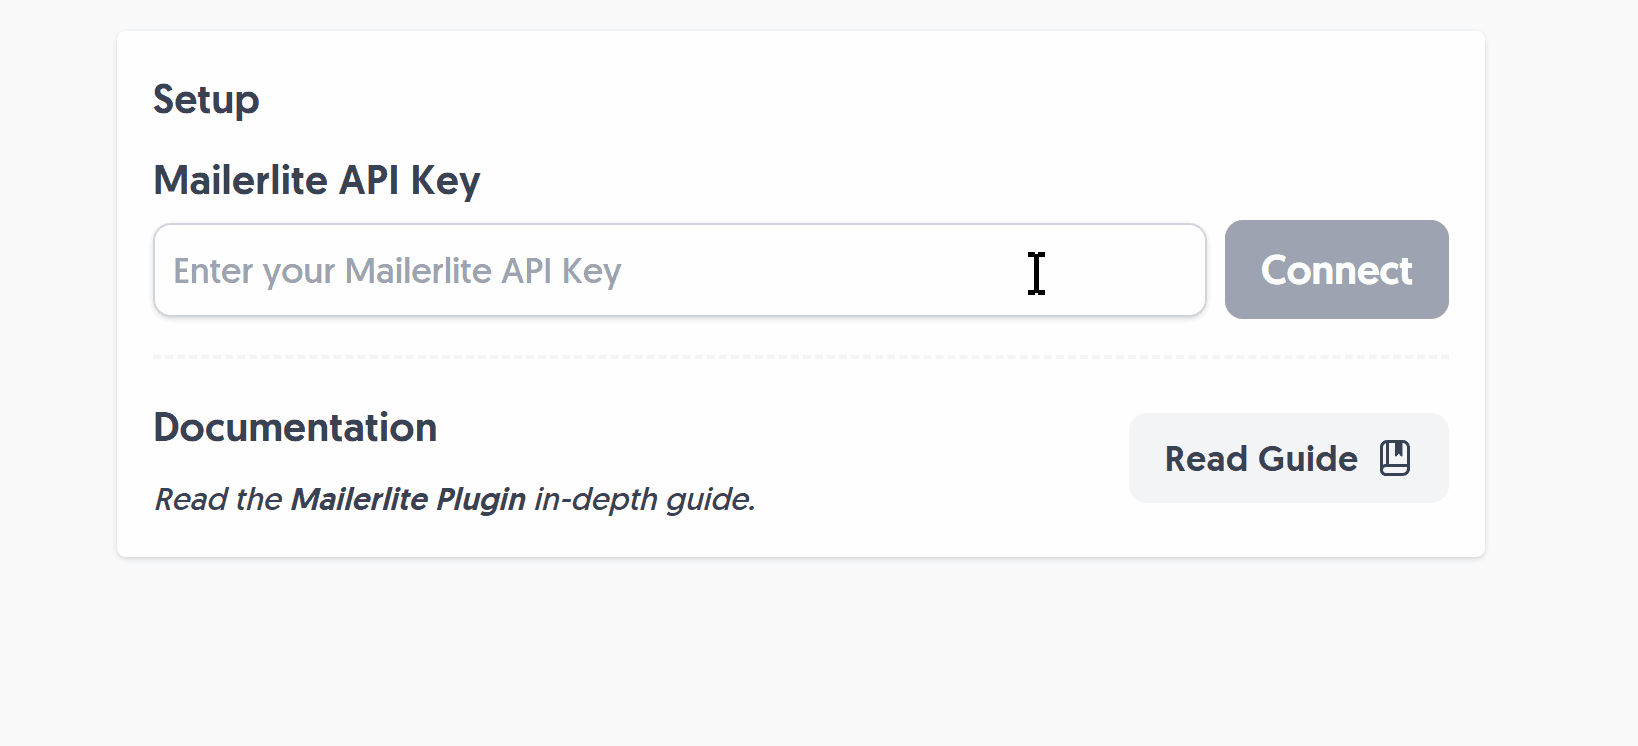
Then, head back to the Mailerlite plugin inside Form Falcon, paste in your token and click “Connect” to complete the setup:
Once setup, you’ll see the name of your Mailerlite account in the plugin configuration.
Create Subscribers with Mailerlite
Adding new Mailerlite subscribers is simple and offers you lots of flexibility on adding to single, or multiple groups, including additional metadata such as Name and Last Name fields, an Opt-In checkbox and more.
Subscribe with Email
After setting up the Mailerlite Plugin, it’s time to take it for a spin.
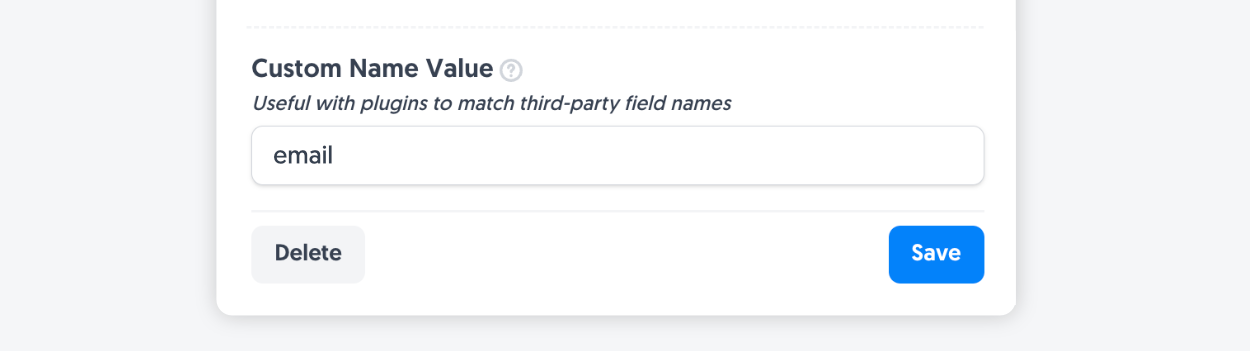
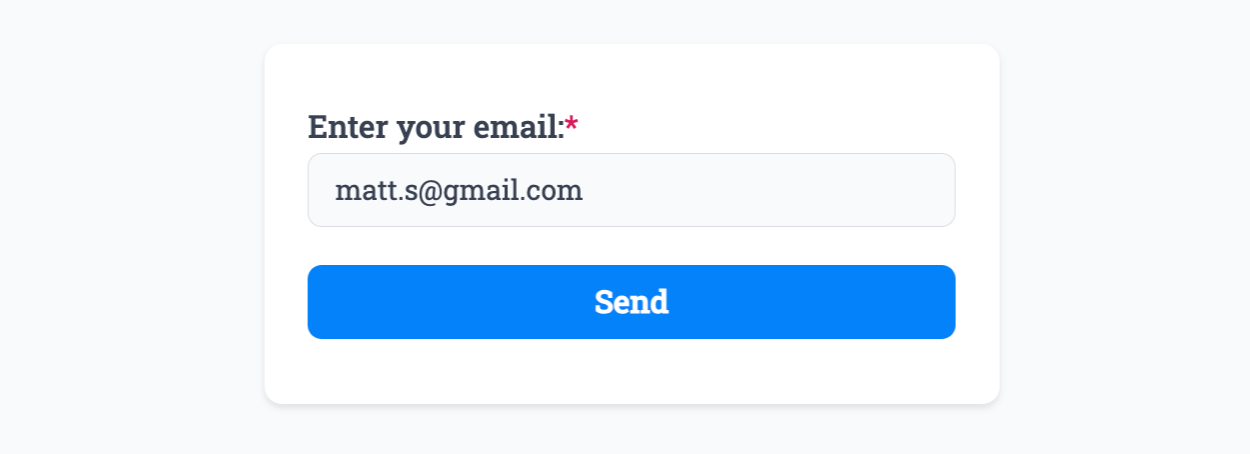
To add a new subscriber via their email address, add an Email Field and click “Edit” on the field, select “More Options”, and enter email in the “Custom Name” field:
Now when we enter an email address into the form, it will connect that field with the Mailerlite Plugin to create subscribers from that field value:
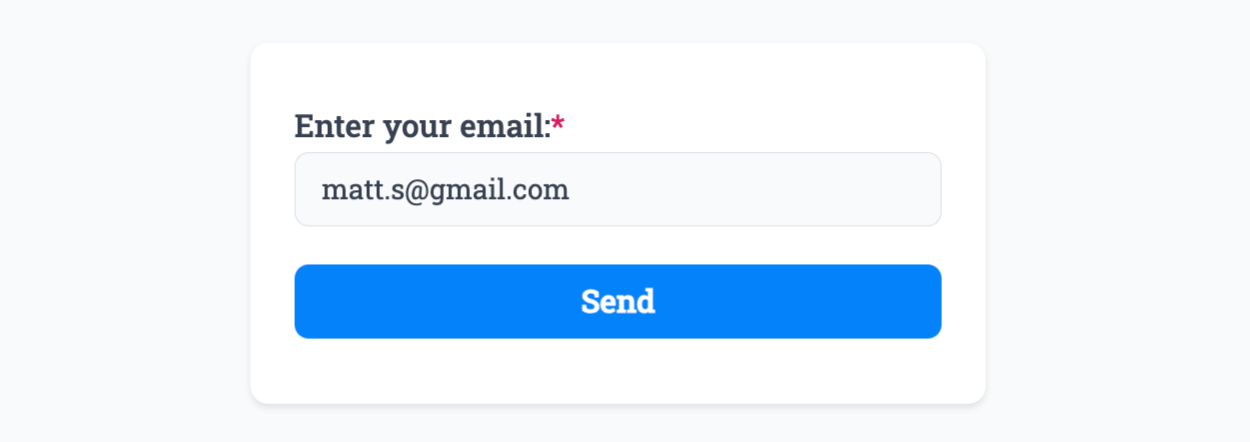 Field type ‘Email’, custom name is ’email’
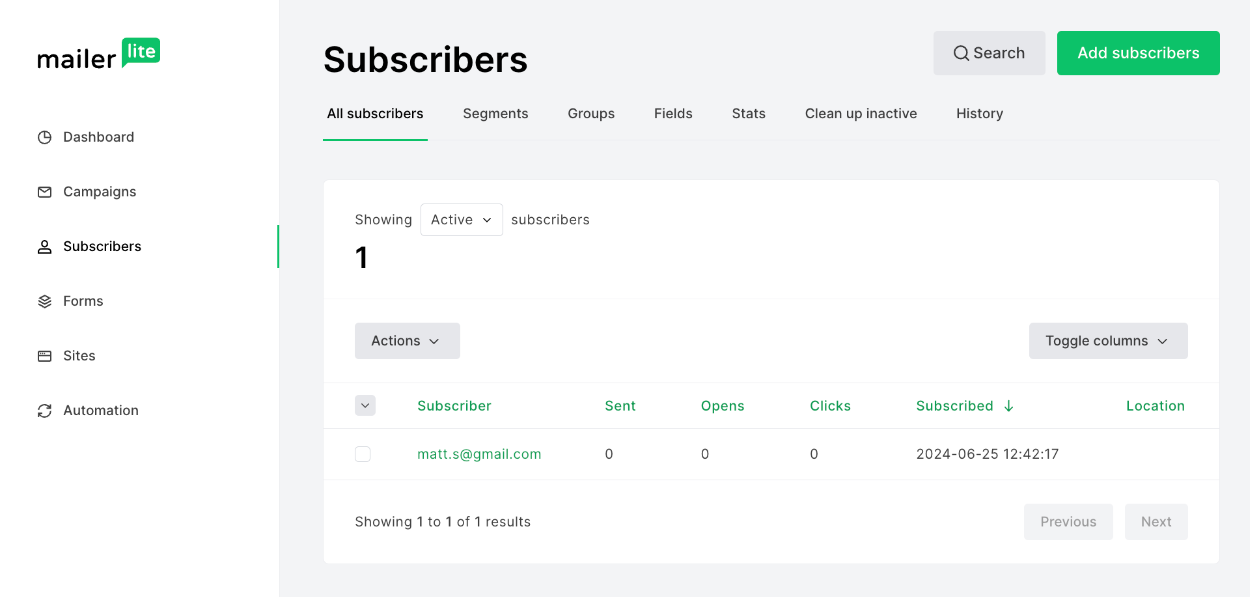
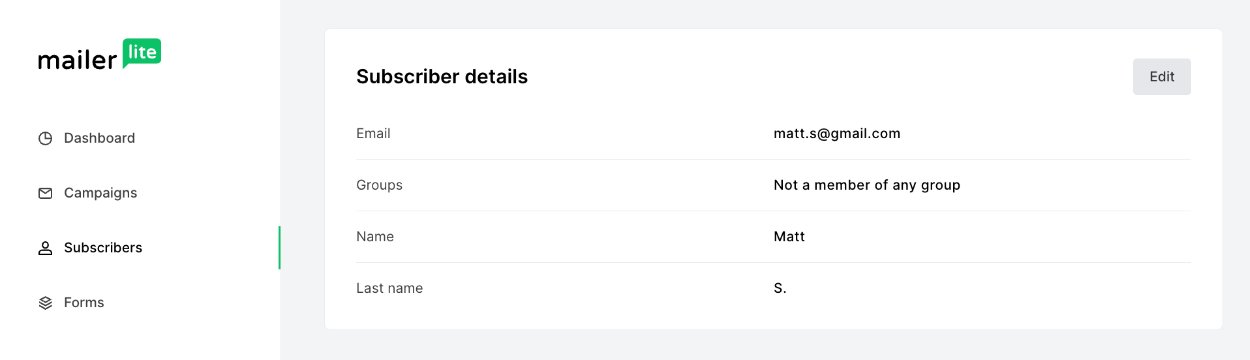
The Mailerlite subscriber is then created from the email entered value when the form is submitted:
That’s it! The most basic subscriber setup. If you need extra field data, groups, opt-in checkboxes then keep reading.
Subscribe with Extra Fields
To subscribe a new email with extra field data such as their First Name, Last Name, Company and more - we need to use Mailerlite’s Field Tag names as custom name values in form fields (in the same way we just added the ’email’ custom name value).
These field names are your secret code to unlock specific Mailerlite data fields for each subscriber. They play the crucial role of mapping the form response data with your Mailerlite account data.
🔗 For the inquisitive minds, Mailerlite’s Custom Fields Guide is the holy grail of information for both the new and Classic Mailerlite versions.
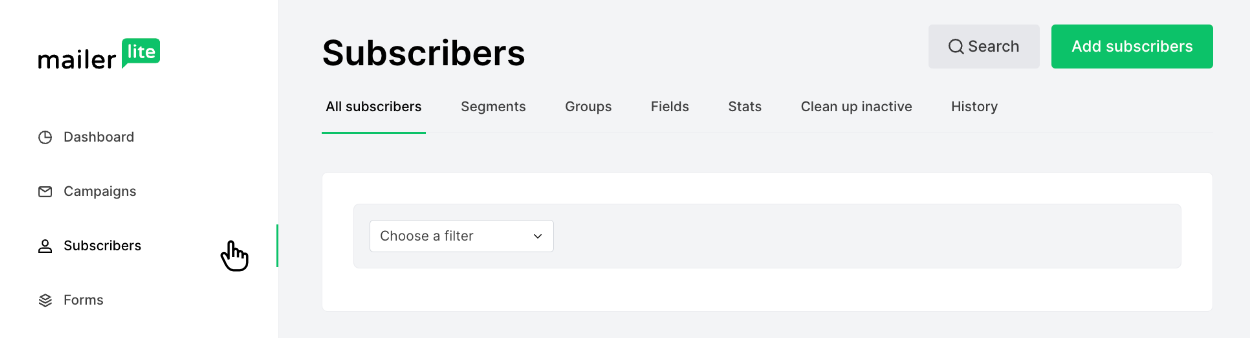
Getting the field names is simple. You can either click here to view your fields or visit to the “Subscribers” tab in the Mailerlite app:
Click “Fields” and in the Tag column you’ll see the field reference names we need to connect with relevant form fields in Form Falcon:
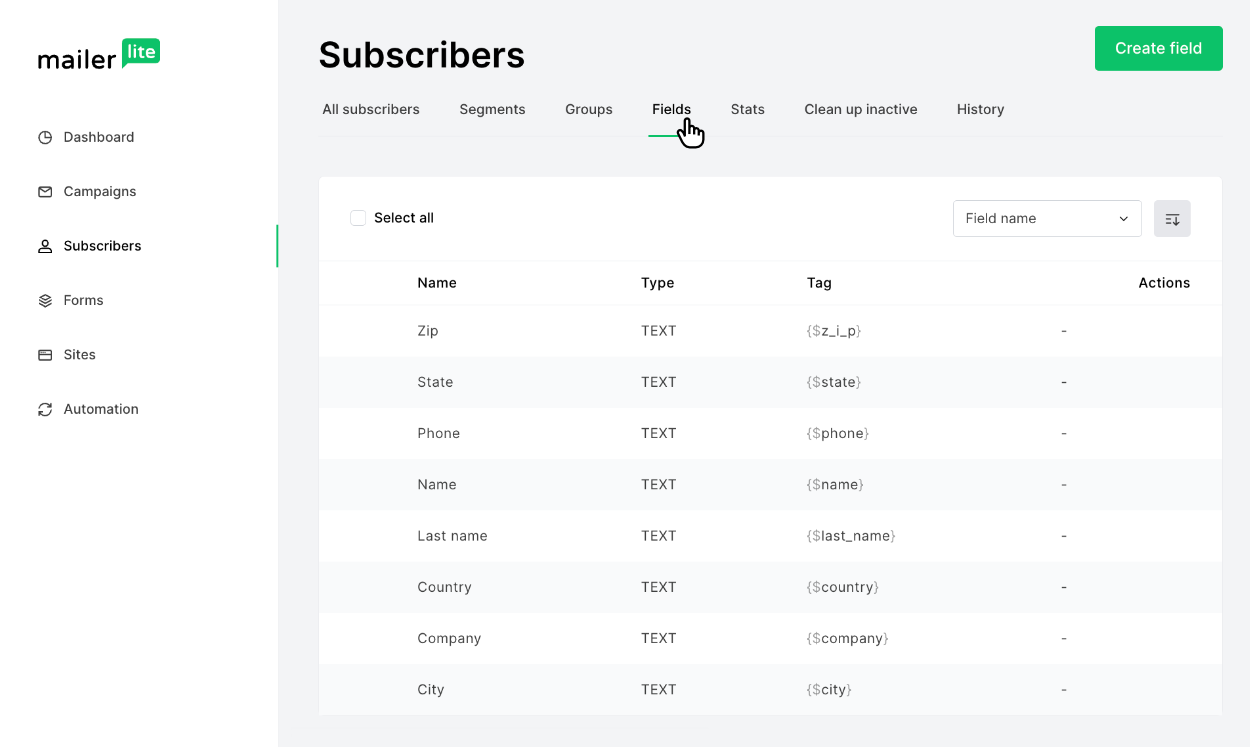
🚨 Important: We only need the tag itself, such as
nameandlast_name, so you can ignore the symbols{$}surrounding each field name as this is Mailerlite syntax for their emails.
Here is the full list of Mailerlite field names for you to copy, you can pick and choose which to use for your form:
z_i_p- Subscriber ZIP/postal Codestate- Subscriber state locationphone- Subscriber phone numbername- Subscriber first namelast_name- Subscriber last namecountry- Subscriber country locationcompany- Subscriber company namecity- Subscriber city location
In the below form example, the “First Name” field’s custom name value is name, the “Last Name” field’s custom name value is last_name, and the “Enter your email” field’s custom name value is email:

Then click the new subscriber to view the new extra data within Mailerlite to confirm the connection:
You can use any combination of the above Mailerlite field tags to compose the perfect form.
Adding to Group(s)
The Mailerlite Plugin fully supports adding new contacts to a single group or multiple groups.
Start by clicking Subscribers again and then select Groups:
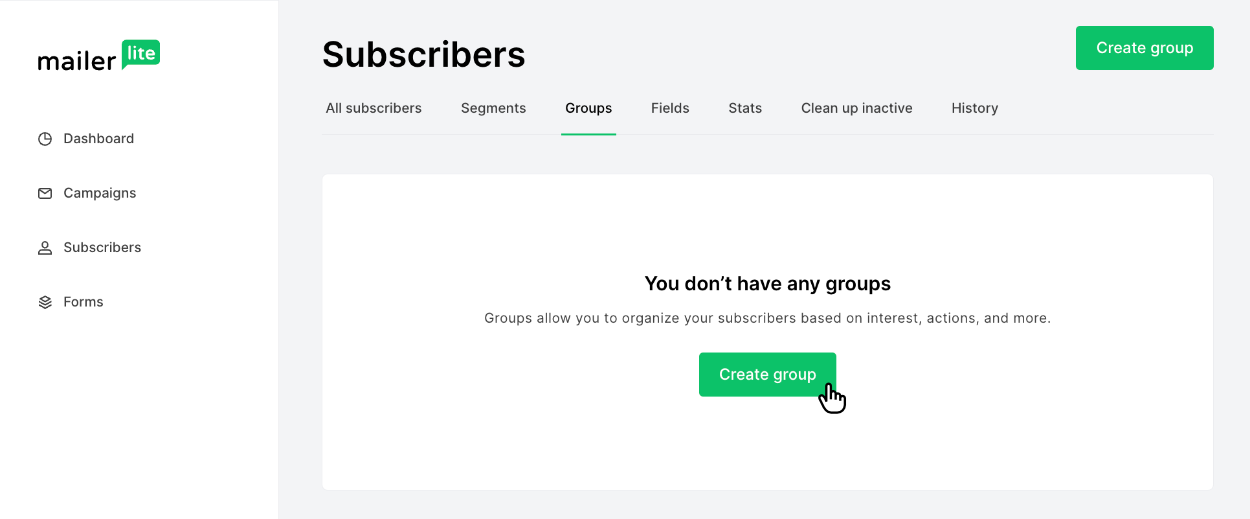
If you’re yet to create a group, click “Create group” and enter a group name:
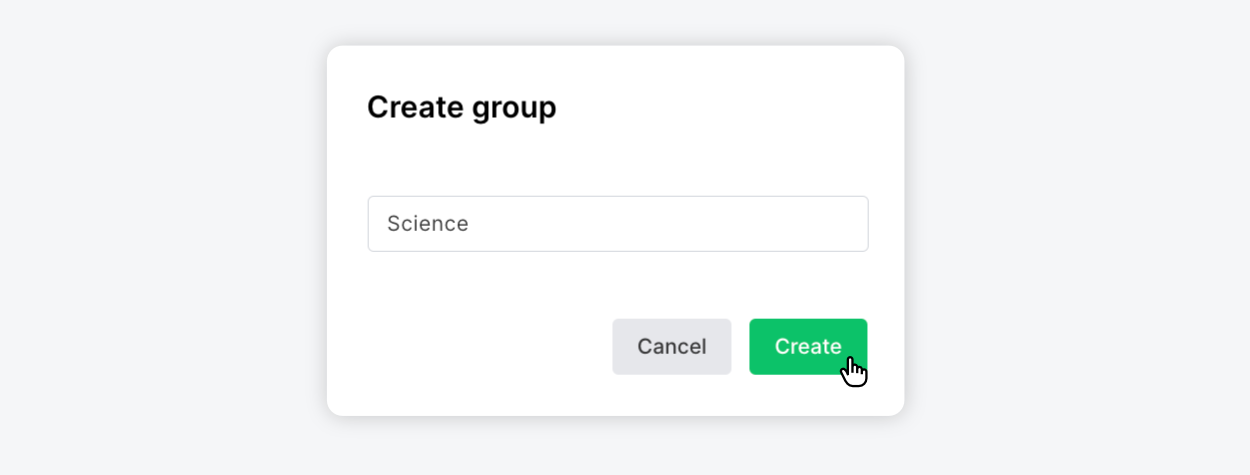
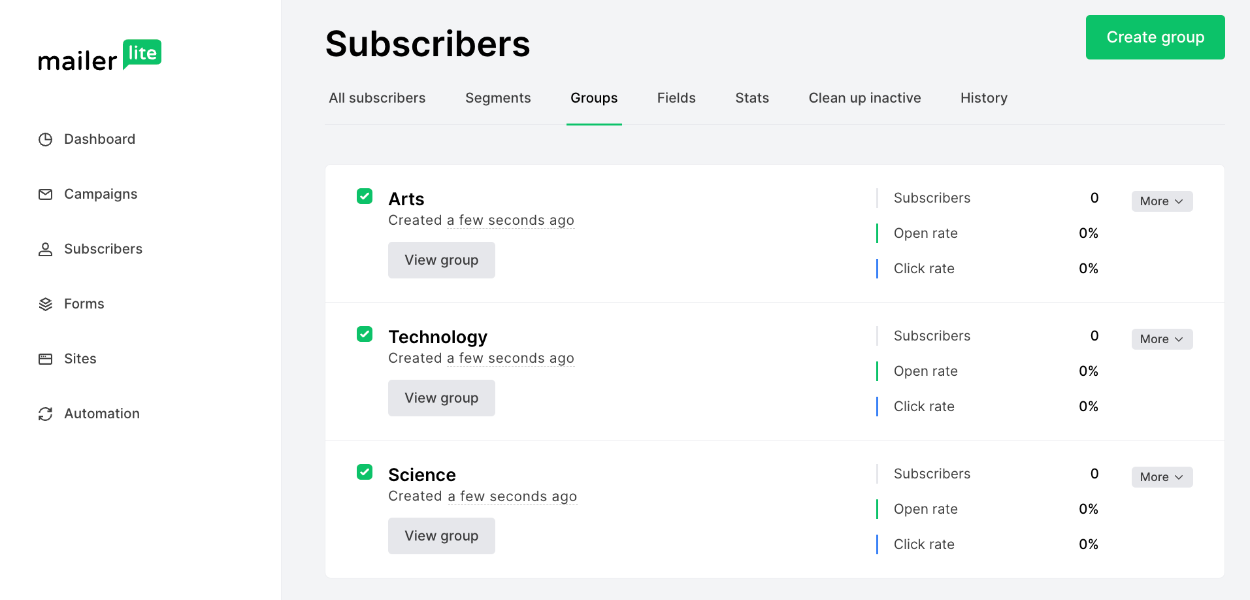
Repeat the process to create more groups, which we will copy each name and associate with a form field option:
Single Groups: To allow the user of your form to be added to a single group you’ll want to use a Single-Select Field or Dropdown Field.
Multiple Groups: To allow the user to select multiple groups at once you’ll want to use the Multi-Select Field.
After adding either a Single-Select, Multi-Select or Dropdown Field to your form, click Edit and visit the Options list - and add each Mailerlite Group name, ensuring they are case sensitive. At the same time, enter a unique reference such as group_interests into the custom name field - this must be prefixed with group_ to tell the Mailerlite Plugin that it’s intended to be a group:
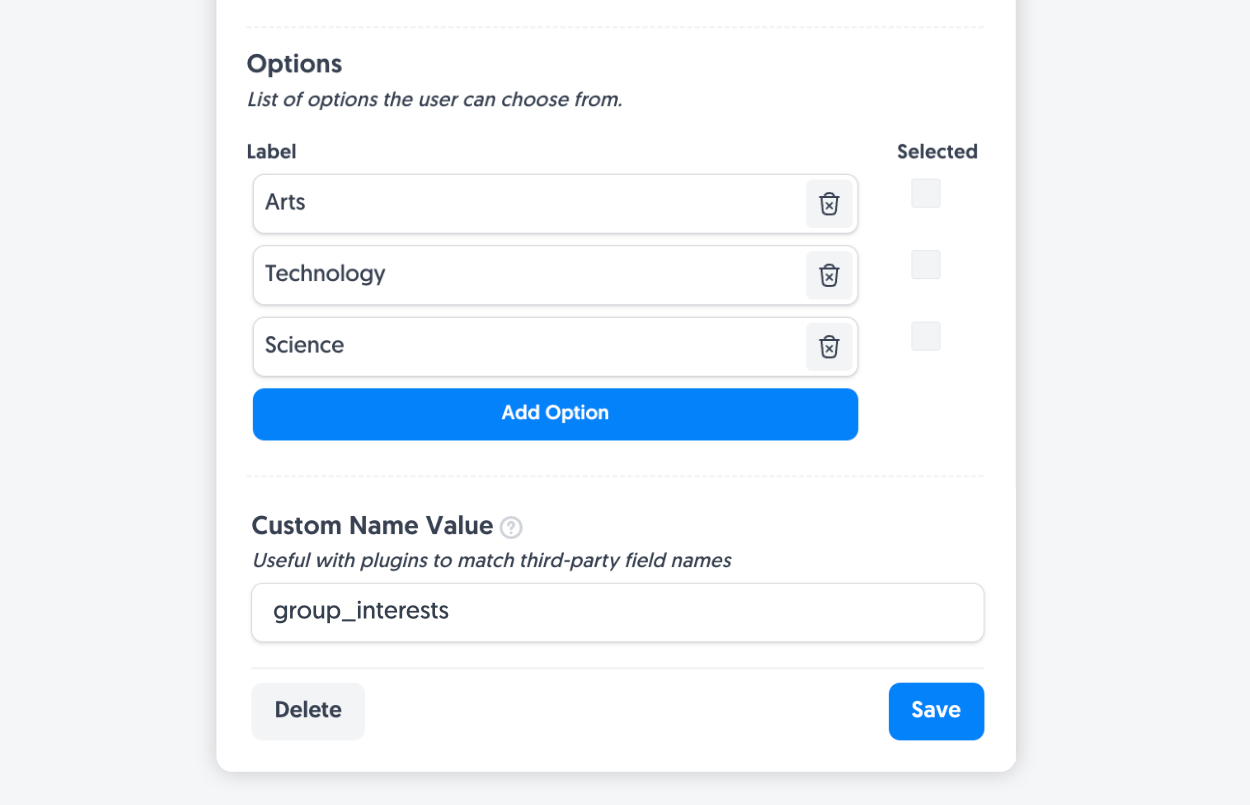
The custom name value
group_interestshas no special meaning, it is purely there to tell the Mailerlite Plugin that this is a group of options - you can rename_intereststo anything else.
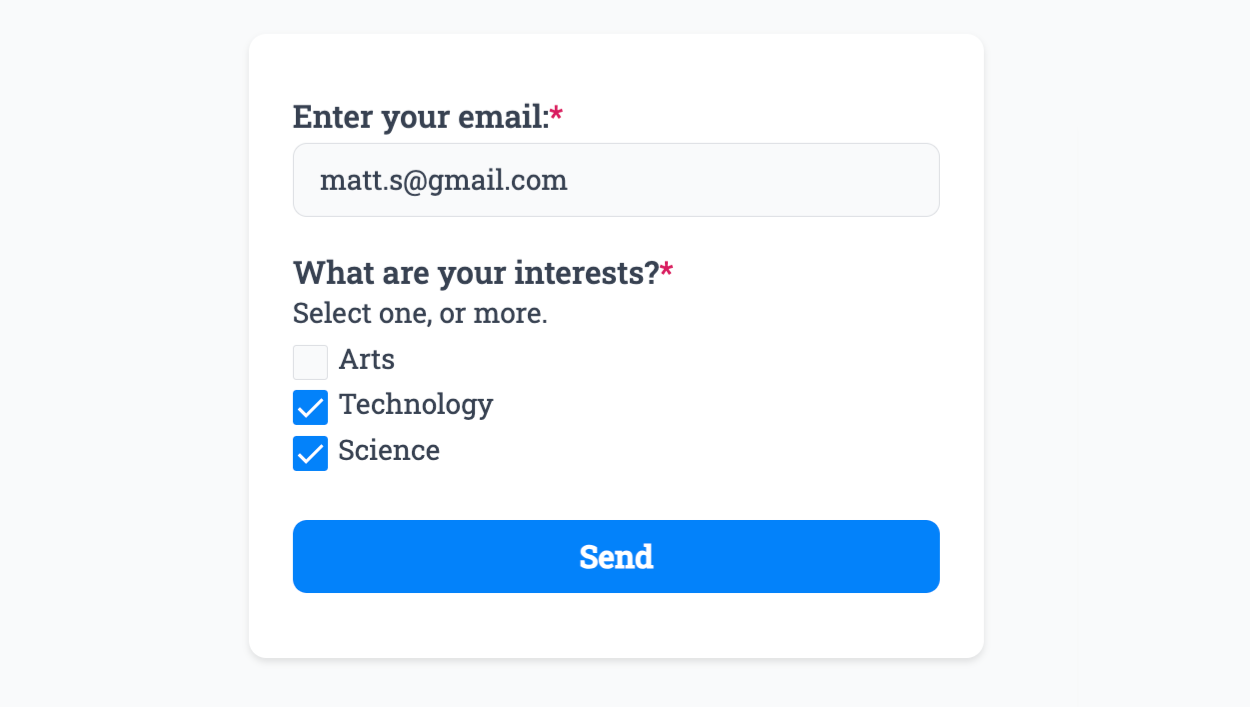
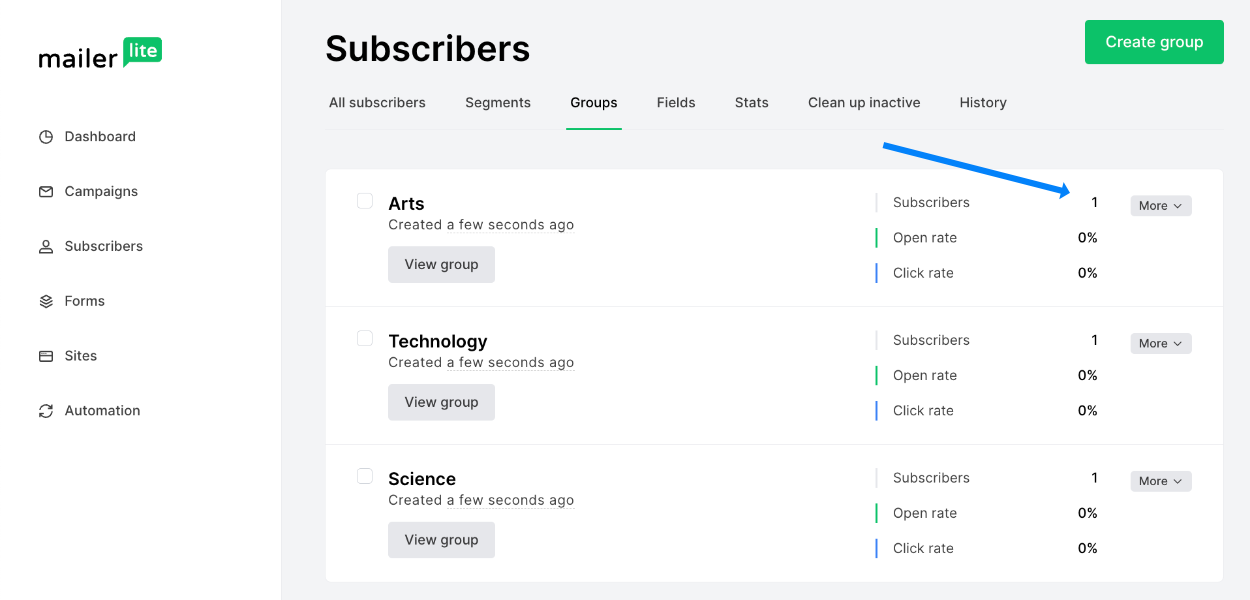
Publish the form and select a few groups, then hit submit:
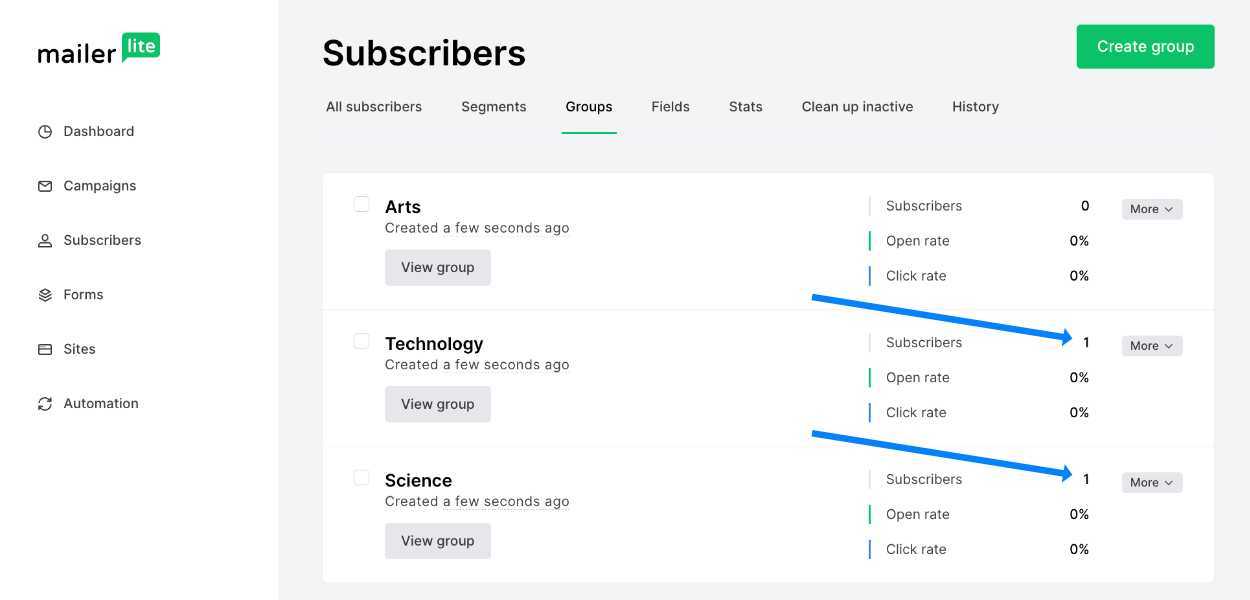
Then view the new group data within Mailerlite to confirm the connection:
And the best part? You can repeat the process for more groups by creating even more form fields and linking them to other groups. The Mailerlite Plugin thrives on handling multiple groups simultaneously. Just create more Mailerlite groups, specify the group names as options, then add the group_ prefix to a form field’s custom name value.
Auto-Add to a Single Group
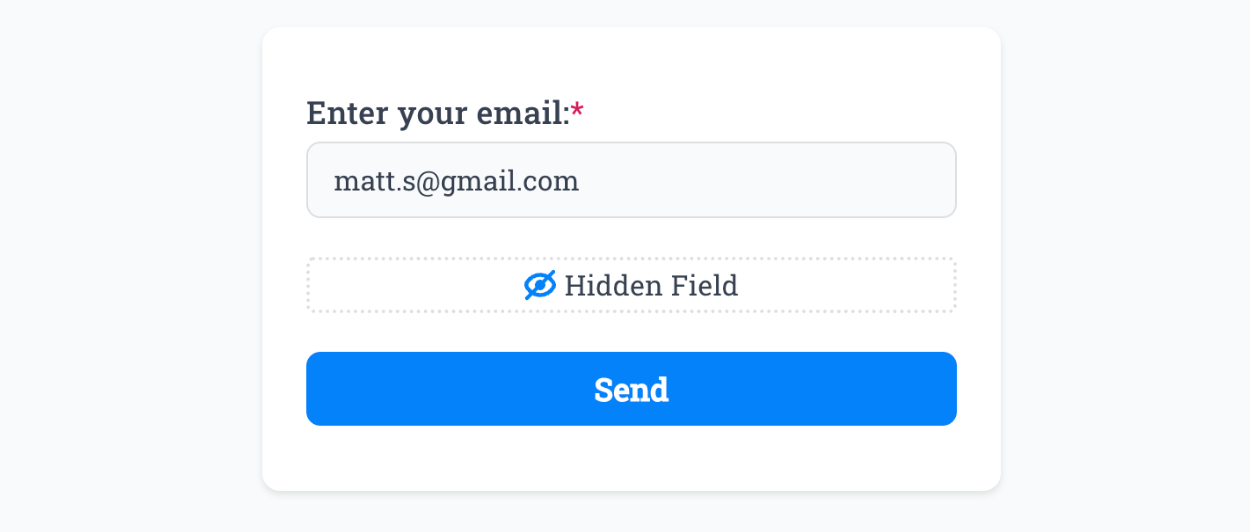
To automatically add users to a single group, without them even knowing they’re being added to the group, you’ll want to opt for the Hidden Field in your form:
 Viewing the form inside the Editor
Once added, click Edit and you’ll see Key and Value. Enter a unique group_ prefixed name into the Key field, followed by the group name inside the Value field:
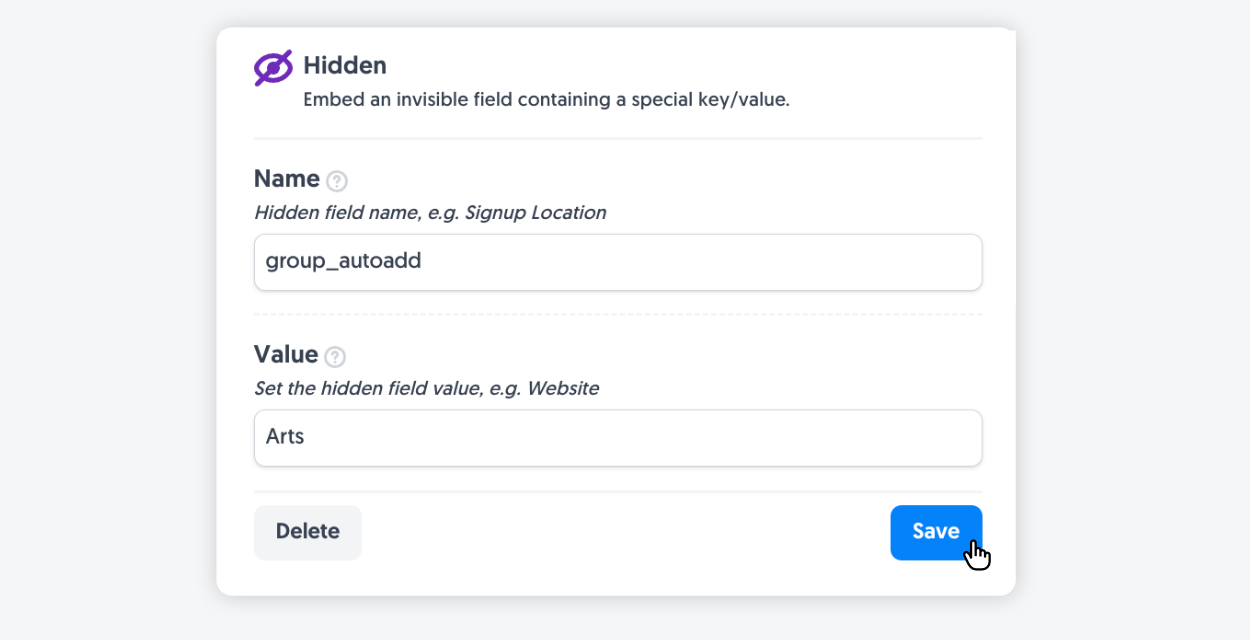
Publish the form and submit it, you’ll notice the Hidden Field is not visible to the user:
 Viewing the published form the user will see
This will construct a hidden input in your form code, so that users are automatically added to the group you’d like, without them seeing or selecting anything - useful for particular campaigns or signup locations.
Then view the new group data within Mailerlite to confirm the connection:
Opt-In Permission
To maintain good compliance with many data laws, it may be appropriate to use our Opt-In feature - where users can ‘agree’ to be added to your marketing list. If they don’t agree, your form response is still processed but they are not added to your Mailerlite subscribers.
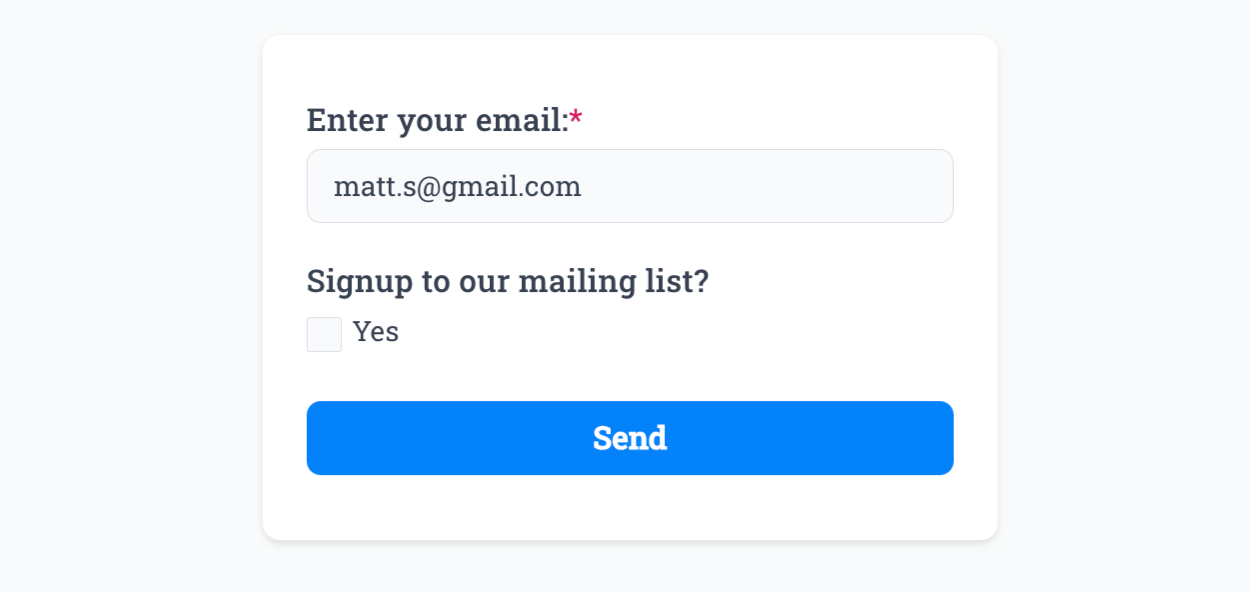
Our recommended field to use for this is the Yes/No Field, where the user can select a simple Yes or No choice to agree to be signed up:
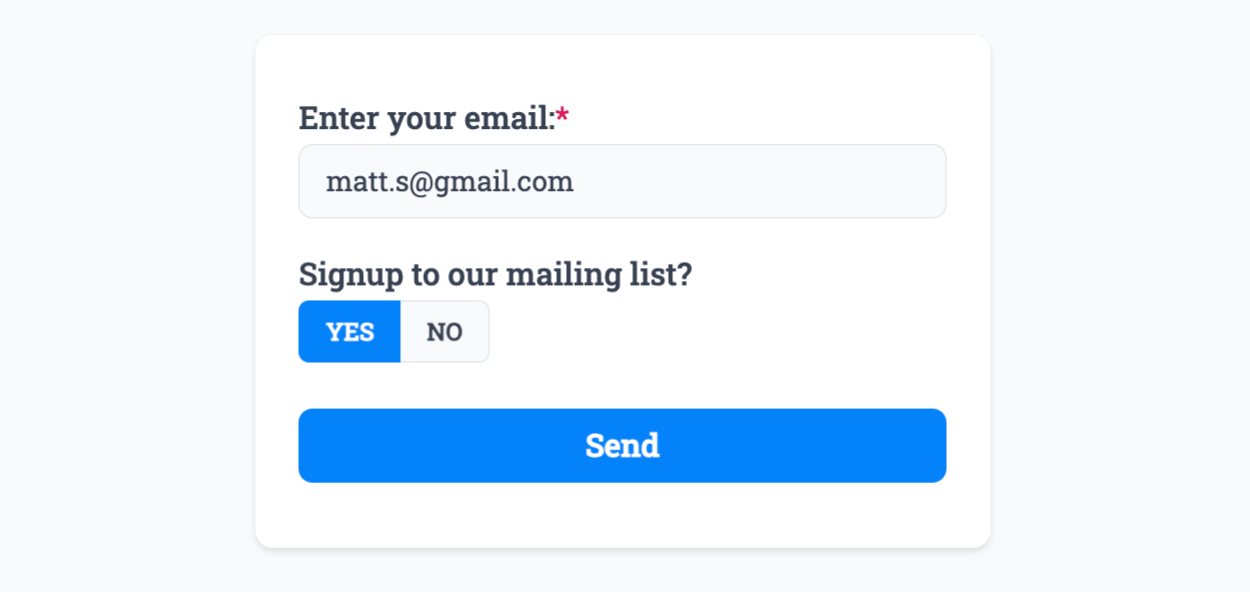 Field type ‘Yes/No’, custom name is ‘opt_in’
While editing the Yes/No Field, click Edit and find More Options and enter opt_in as the value, hit save and Publish the form:

If the user selects “No” - the form will still be submitted, but it won’t bring a new subscriber into Mailerlite.
The Multi-Select Field may also be used if desired, however must only include one option:
 Field type ‘Multi-Select’, custom name is ‘opt_in’
Explainer: Only one option is allowed when using the Multi-Select Field due to the flexibility of the field and associating a selected item with what you intend to be a ‘Yes’ vote to opting a user in. If two or more Multi-Select fields are used, the field will be ignored by the Mailerlite Plugin. If the field is also marked as Required the field is also ignored, as you can’t force a user to agree.
That’s it! You can contact us for help anytime.
Create incredible forms to run your business.
Join companies of all sizes using Form Falcon to manage their business, generate more sales and power custom workflows.
Try It FreeFree 30-day trial, no credit card required.