Available on plans: Professional, Premier, Enterprise
Use the Trello Plugin to create new Trello cards from new form responses.
✅ Tip: You can customize each Trello card title by assigning a Custom Name value of
TRELLO_CARD_TITLEto a form field. This will make the title reflect the user’s form response data. The plugin also supports Start Date and Due Date functionality.
Setup the Plugin
Navigate to the Plugins tab on your selected form, choose “Trello” then click the Connect to Trello button to launch the authorization popup:
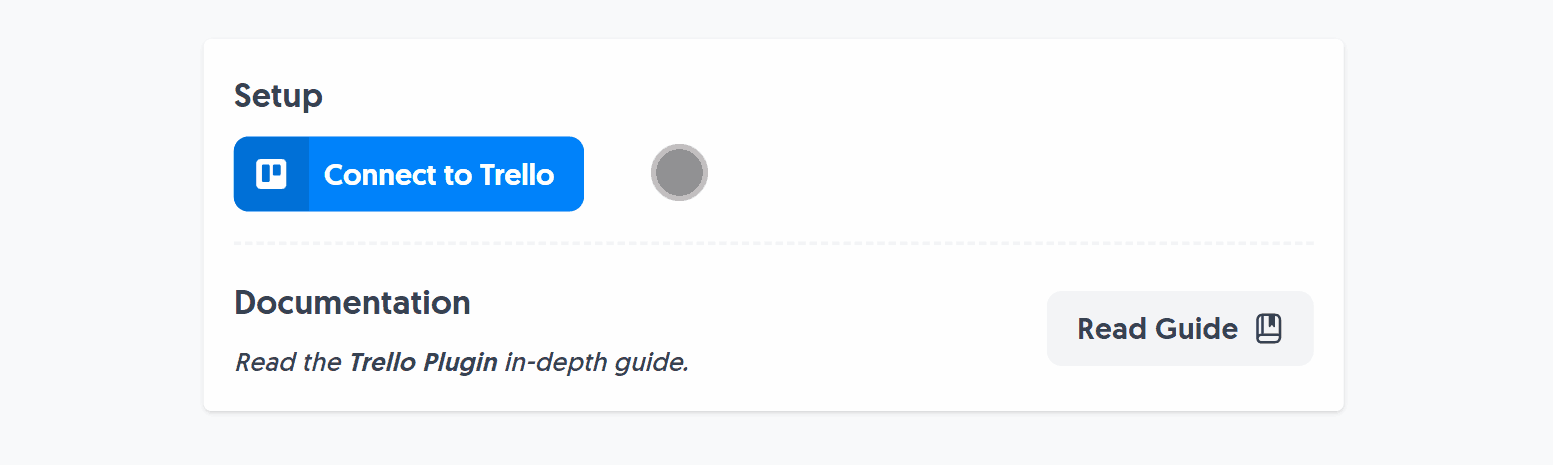
This opens an authorization window where you can select an account or sign in. Click “Allow” once logged in to grant the plugin permission:

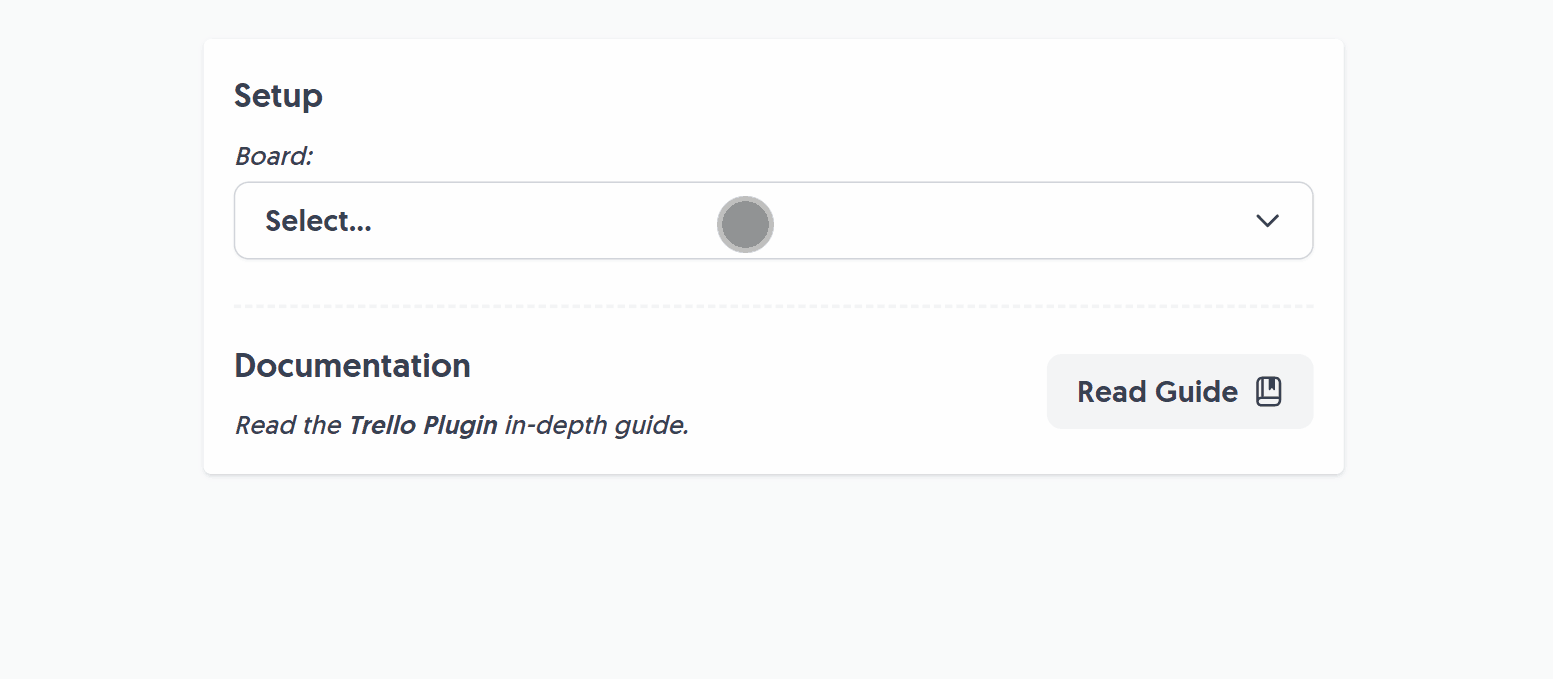
Once Trello is authorized, we’ll display all the Boards you belong to.
Select which Board and List to create cards, click “Save”, and you’re good to go:
Once setup, you’ll see a direct link to your chosen Trello Board for one-click access.
From now on, every time a user submits your form, the Trello Plugin will create a new card for you.
Customization
Card Title
By default the Trello Plugin uses the form’s name for each new card.
To create Trello cards with a Card Title based on the form response data, add TRELLO_CARD_TITLE as the custom name for a field.
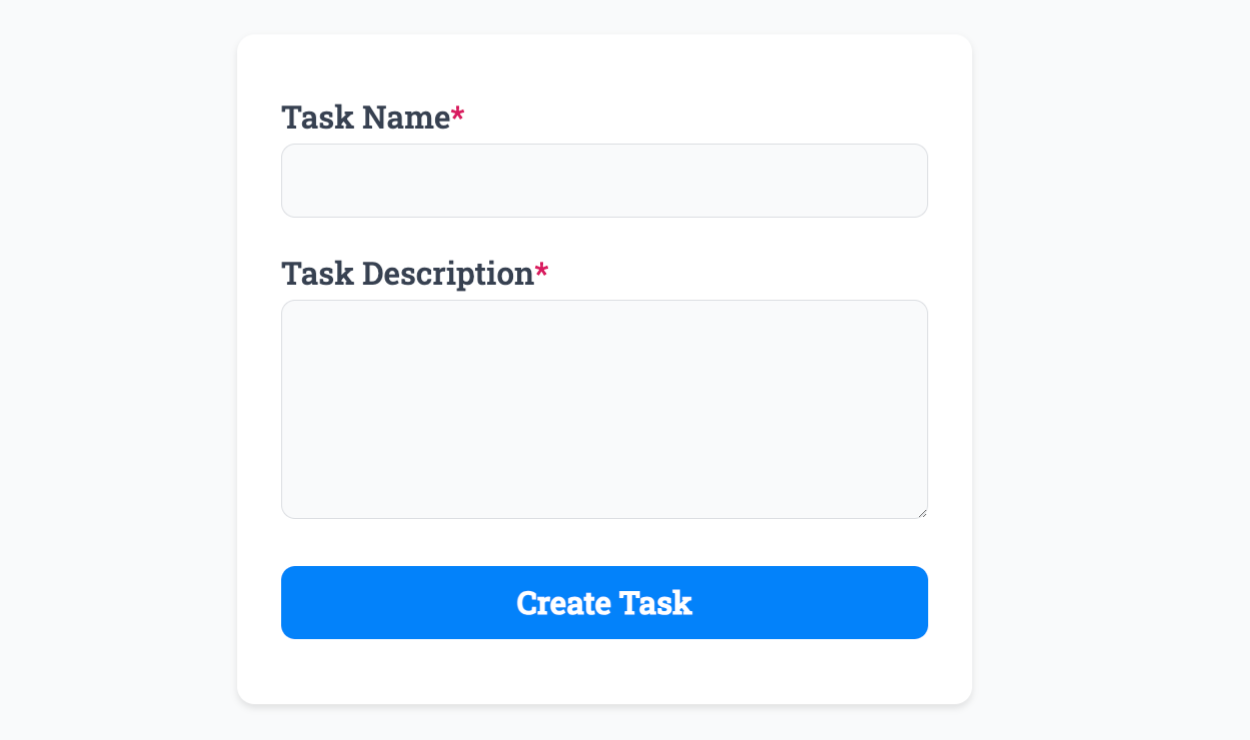
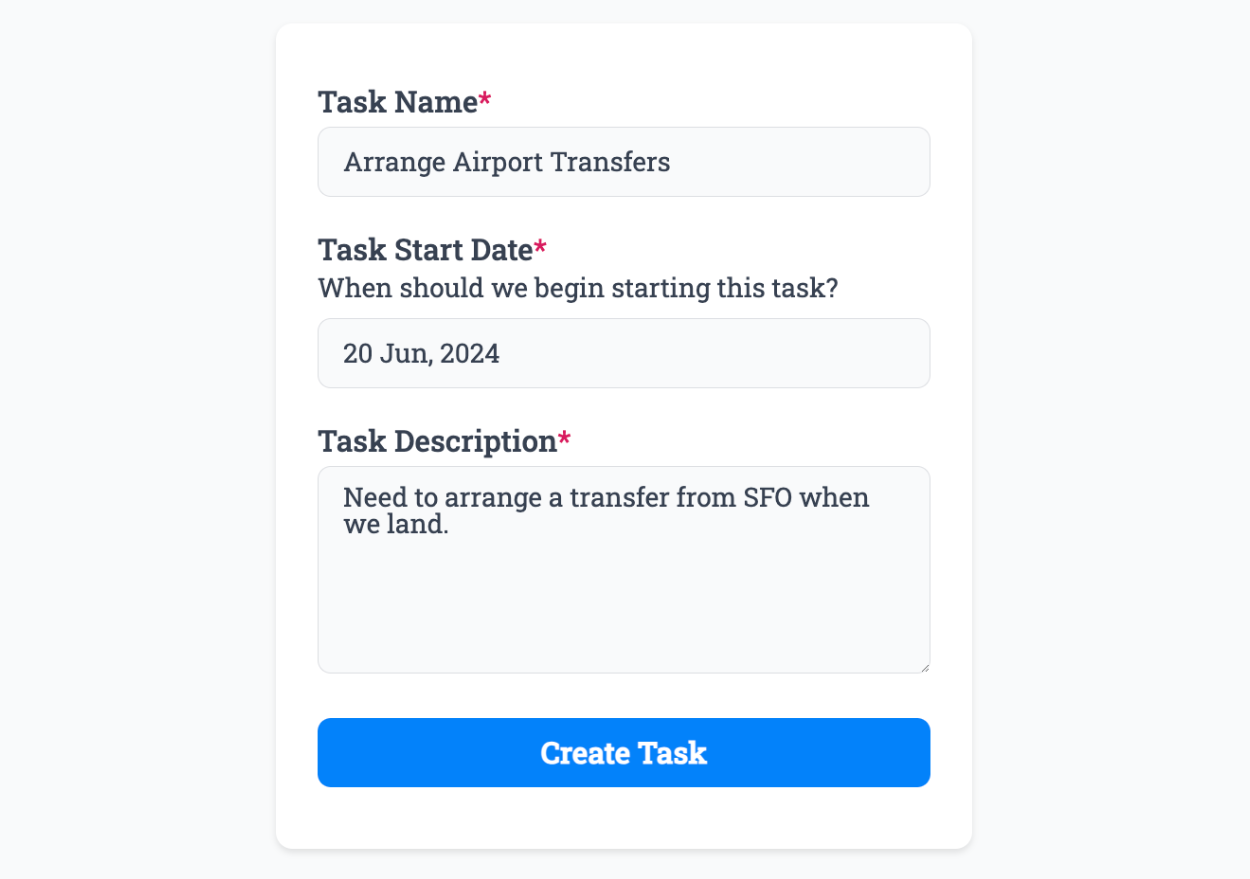
Let’s assume this form that has a Task Name, we want the value of that to be set as the Trello card title:
To do this, click “Edit” on a relevant form field, select “More Options”, and enter TRELLO_CARD_TITLE in the “Custom Name” field:

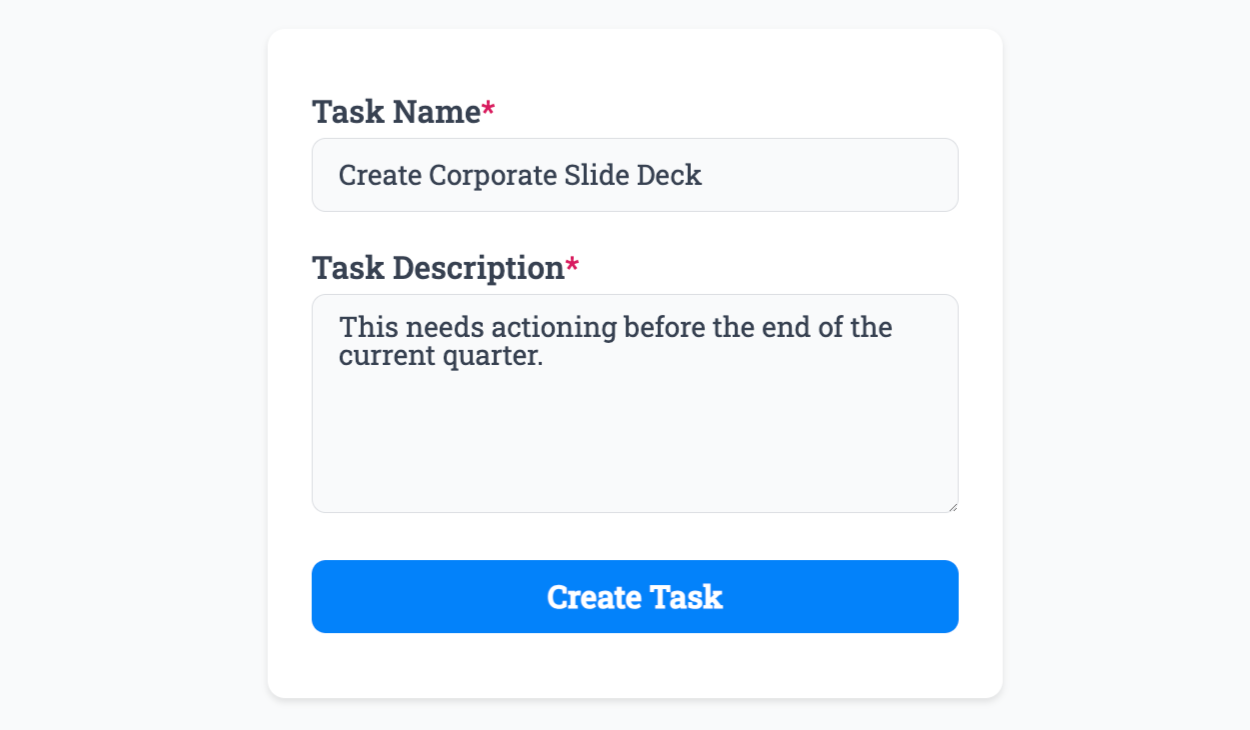
Now when we enter data into the form, it will connect that field with the Trello Plugin to tell it to create the card title from that field value:
The Trello card is then created with the title based off the entered value when the form is submitted:
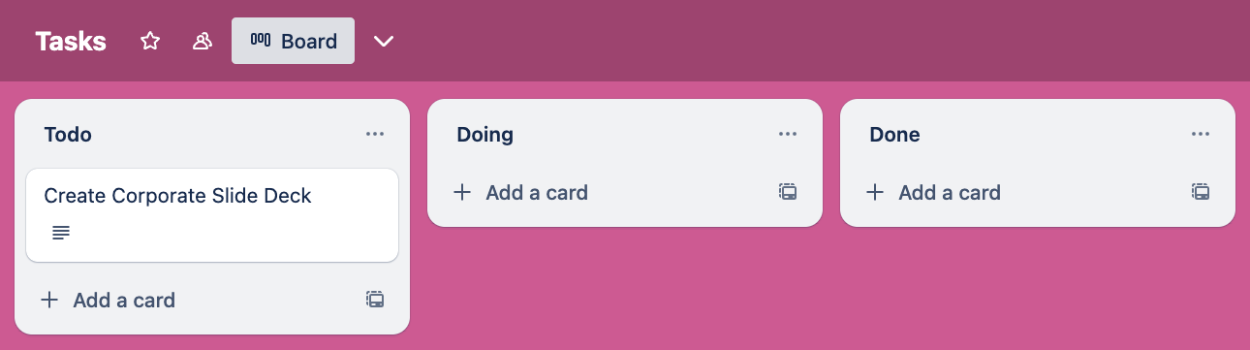
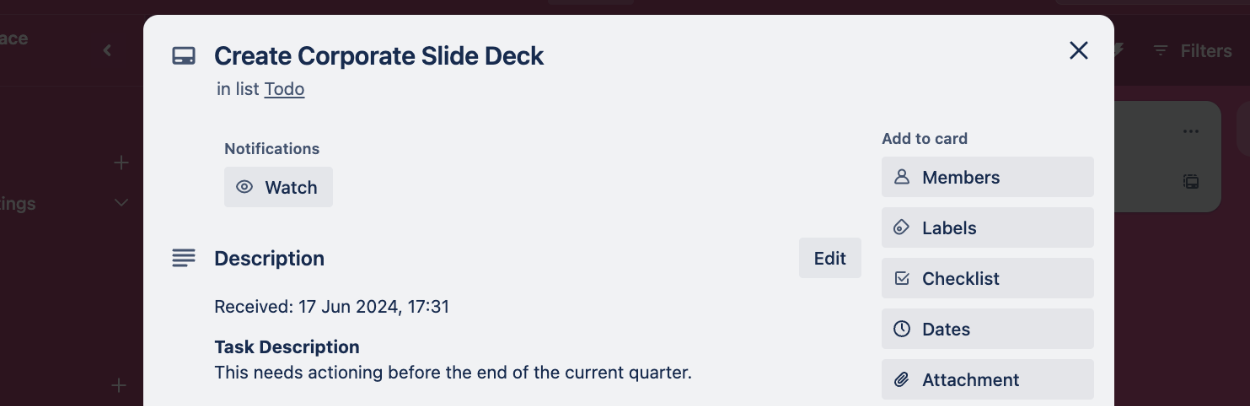
When clicking the Trello card, all other response data is included in the main description:
Card Start Date
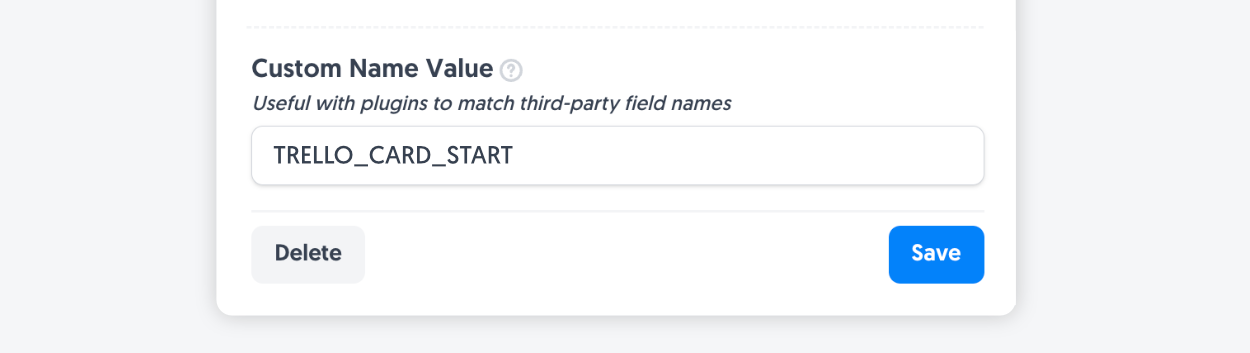
Now let’s assume we want to add a Start Date to our Trello card, first create a field with a Date Field and add TRELLO_CARD_START as the Custom Name inside the “More Options” toggle:
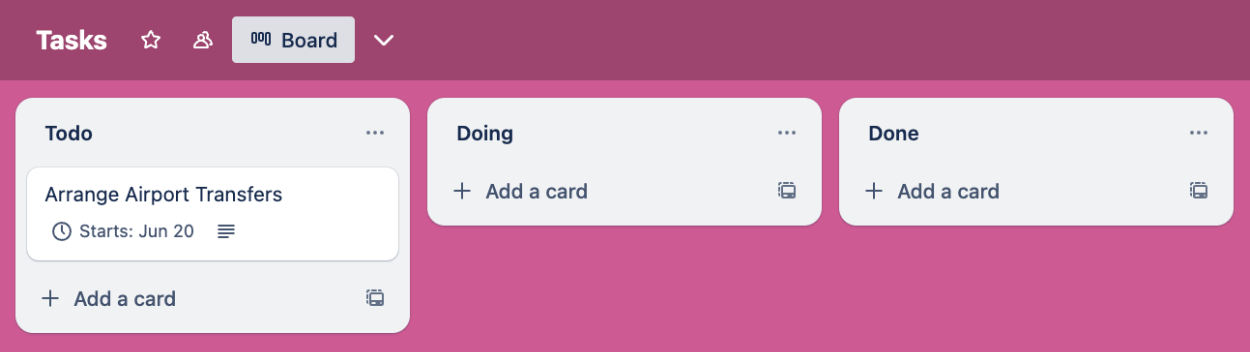
This tells the Trello Plugin to use this field value as the Start Date. We can then test our form by selecting a date value:
When submitted, you’ll see the Starts: note added to the Trello card.
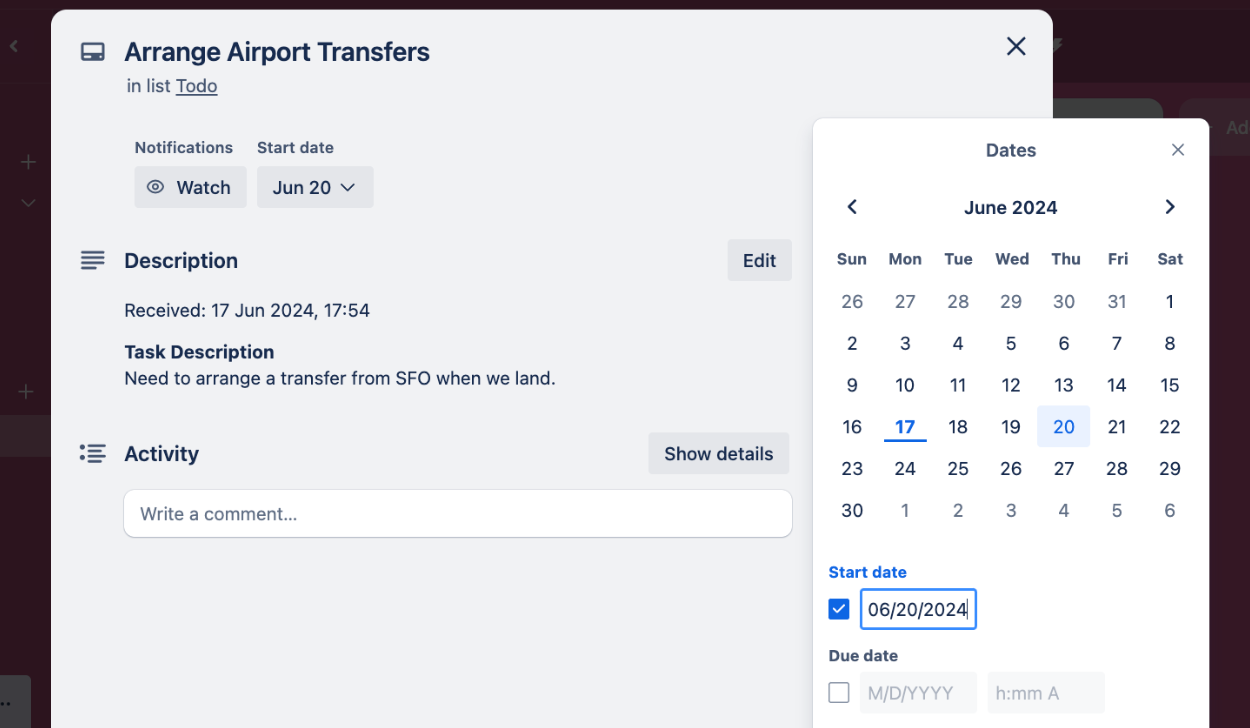
When clicking the Trello card, it will reveal the Start Date in the Dates sidebar option, which can be adjusted if required:
Card Due Date
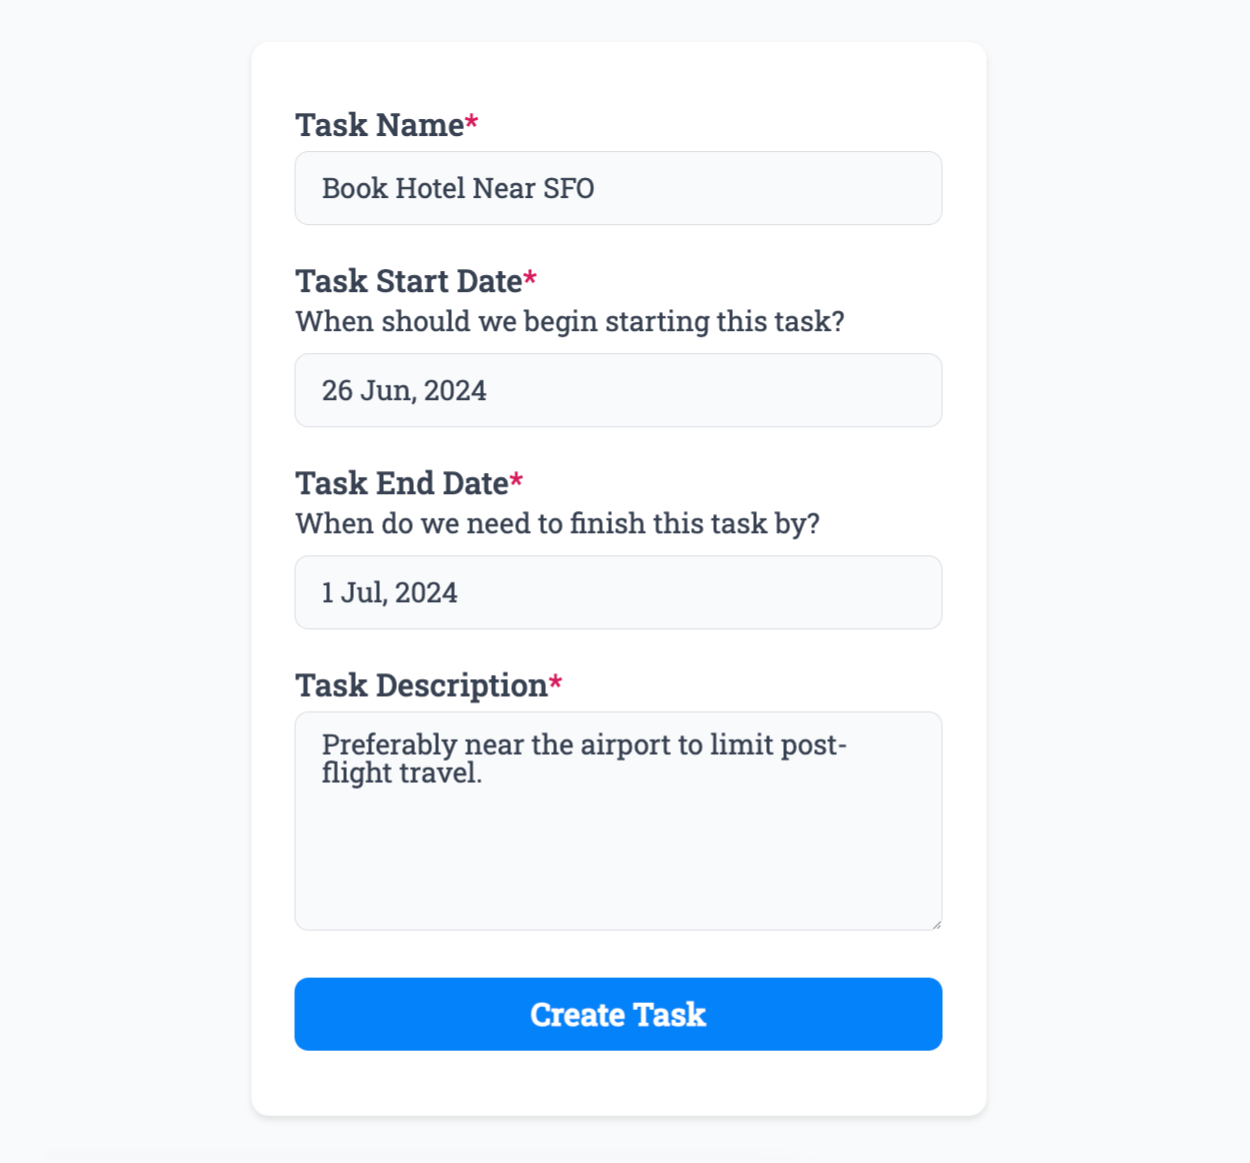
Let’s now add a Due Date to a Trello card using the Trello Plugin. Add another Date Field and add TRELLO_CARD_DUE as the Custom Name inside the “More Options” toggle:

This tells the Trello Plugin to use this field value as the Due Date. We can then test our form by selecting a date value:
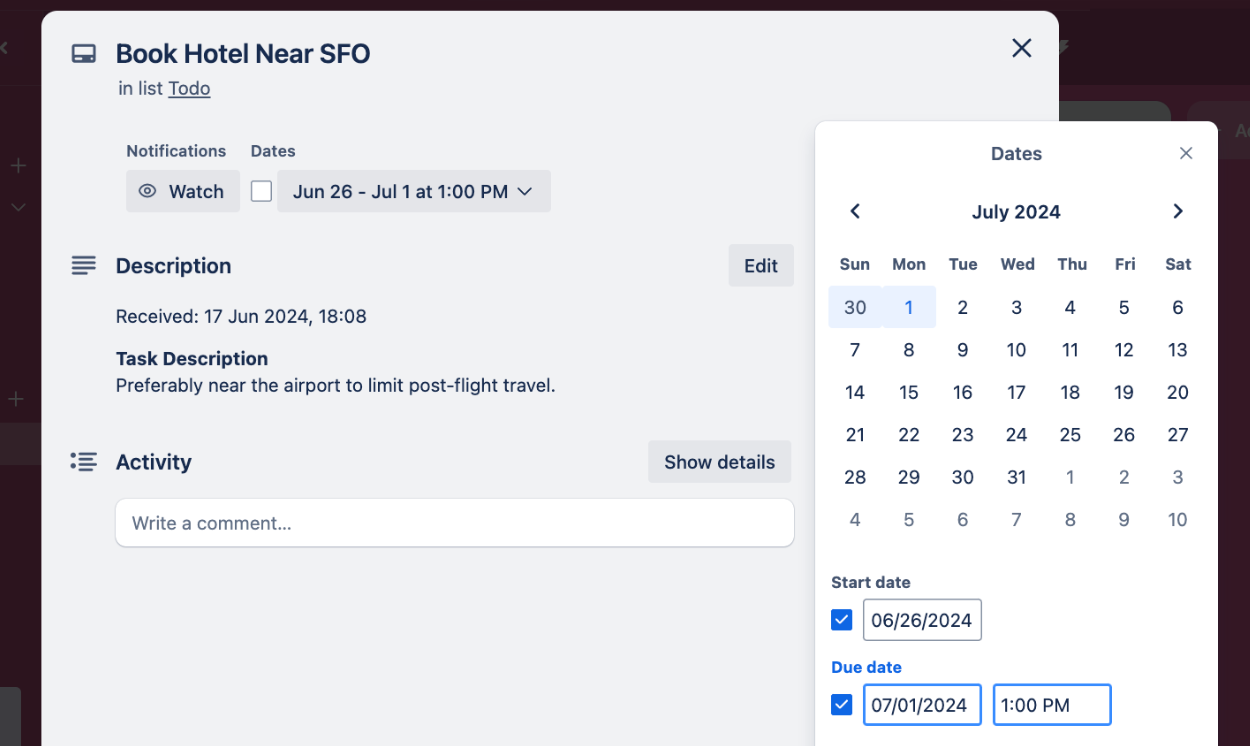
You’ll then see the newly created Trello card after submitting the form, with the Start and Due dates:

When clicking the Trello card, it will reveal the Due Date in the Dates sidebar option, which can be adjusted if required:
That’s it! You can contact us for help anytime.
Create incredible forms to run your business.
Join companies of all sizes using Form Falcon to manage their business, generate more sales and power custom workflows.
Try It FreeFree 30-day trial, no credit card required.